[Note: This article was originally published in Autumn, 2017, and has been updated to reflect changes over the past 12 months. This is the 5th of what will be 8ish articles on how to Zwift; the list of articles, in order, is at the bottom of this article.]
For many of you, half of the first 4 installments in this series were blah, blah, blah. You have no interest in group rides or virtual racing. You’re just interested in Zwift’s workout mode. So let’s get to it.
Zwift is solid as a workout tool, with power-based training using predefined workouts and plans, custom workouts, or group workouts.

What’s this “eff tee pee” stuff everybody’s talking about?
If you are completely new to power-based workouts, Zwift offers close to 700 predefined workouts. You’ll need to input your FTP; and select your workout. We haven’t mentioned FTP (Functional Threshold Power) yet. For workouts to really be effective and appropriate for you, you have to have at least some idea of what your FTP is, so let’s figure this out.
The best way is with an FTP test, so that might be your first official Zwift workout! If you’ve been riding Zwift already, and have put in some solid longer efforts, Zwift will recognize the efforts and estimate your FTP. Alternatively, if you already know your FTP, you can enter it manually.

Fire up Zwift like normal, pair your sensors, and go to the Start screen. For the Ride Type, click the Select Workout button, and you will see a screen similar to this:

The workouts are listed and grouped on the left side. At the top of the list, you’ll see options like FTP Tests and workouts grouped by duration. A little further down, you’ll see different training plans available. You can expand any of these categories to see the workouts within them.
There’s a lot of information here. In my opinion, selecting the plan you are going to be riding for the next few weeks – what is what you’ll be asked to do – comes quick in the menu process. I’d like to have a better picture of the plan before I jump in. A quick Google search for “Zwift workouts” will reveal an unofficial Zwift website that includes a much more detailed view of the workouts and plans so you can make an informed decision.
Once you’ve selected your workout, you are returned to the Start screen. Select your course, and select Ride. We are now ready to start our workout, but we’ve neglected one thing; we need to set our FTP. One minor gripe I have about Zwift is that I can’t get to my profile information, settings, or user customization from the Start screen. You have to start a ride, and then pause it right away to change any of these.

To set your FTP (or confirm it), pause Zwift, and select the edit icon next to your name. This will bring up the User Profile screen. You can enter or confirm your FTP and other information here.

Select Save to return to the Pause screen, make any other desired changes in Settings or User Customization (you’re wearing your Slowtwitch kit, right?) and select Back to return to the ride. Now we’re ready to work out!

This looks a little different…
The Zwift HUD adapts for workout mode, and is more focused on your workout information than the course information. On the left side of the screen you’ll see a list of the intervals of the workout, which are color-coded based on the workout zone for that interval. You will also see some stars next to each interval - in workout mode, you will earn experience points (XP) based on how well you hit your targets rather than the distance traveled.
At the top center of the screen, the display is changed to provide more cues on your current power target and output, along with messages to indicate what you need to do to hit your targets. Zwift will provide targets for power and cadence, it may occasionally tell you to increase or decrease your power or cadence.
We have not talked much about smart trainers, but this is where a smart trainer makes this a bit easier. If you are using zPower, you will have to do some shifting to hit your desired numbers. With a supported smart trainer, the resistance will increase and decrease according to the workout, and you can just focus on hitting the cadence numbers.
If you are using a smart trainer, you will also notice that the workout target power takes precedence over the course itself - if you are on a hilly course, you won’t feel the hills like you would in regular riding mode. If your workout has you holding 200 watts for 5 minutes, Zwift will tell your smart trainer to hold 200 watts, regardless of the grade of the road. Your speed will be adjusted accordingly.
You will also see a few more changes on screen. Messages can be displayed in the middle of the screen. You will see your target and actual power at the bottom of the screen. You will also notice a thing floating in front of your avatar. You may have noticed other riders with these when riding in Zwift, and this is an indicator to everyone else that you are doing a workout.

After your workout is done, you will see your ride report. If you choose to continue riding, you will be placed back into the normal “Just Ride” mode.

What if Coach Told Me I Need to Do my 2 x 20 Workout?
If you’re more advanced in your knowledge of power-based training, or are working with a coach who prescribes your workouts, Zwift offers a custom workout creator. Please note that you have to use a PC or Mac to create workouts. You can access your custom workouts from an iOS device once they are created, though there is a bit of a process.
Creating a workout is straightforward: Navigate to the “Select Your Workout” screen like you would for a standard workout on your PC or Mac. You will see a link at the bottom of the panel that says “...or create your own.” Alternatively, you can scroll all the way to the bottom of the workout list, and you’ll see the “Create a new Workout” button.

You will now see the New Workout screen. Zwift provides some visual cues to get you started, and the drag-and-drop interface makes it easy to create and adjust your workout. You can name your workout, add a description, add new blocks to the workout, and tailor each block as needed. If you click on block of your workout, you can reshape that block by changing the starting and ending target power and/or target cadence. You can also change the number of times an interval is repeated and add messages that will be displayed during your workout.

Save your workout, and you will now see it in the list of available workouts. You can edit, delete, or copy your custom workouts. If you want to share your workout with others, or use a workout that has been shared with you, you can use the actual system file. On a PC, this will be found in your documents ? Zwift ? Workouts folder. Each workout is stored as a .zwo file.
If your coach has Zwift, they can create the .zwo files for you, you can drop them in the Workouts folder, and you’ll be able to select them for your next ride. Like any ride in Zwift, at the end of your workout, you have the option to upload your performance to TrainingPeaks, MapMyRide, Strava and others, so you can show your coach what you accomplished.

A Brief Look at Group Workouts
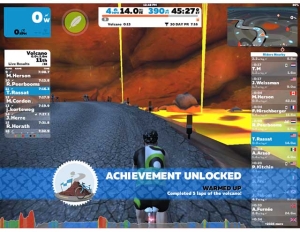
If you like a group experience, Zwift offers group workouts as events. You can go to Zwift’s Events page to find upcoming group workouts. Like race or group ride events, you just choose to join your group workout at the Start screen. If you get there early, you’ll be warming up on a virtual trainer like in the image above.
Once the workout starts, it’s very similar to a group ride, with one difference: “rubber banding.” While a group ride requires you to keep the specified pace or get dropped, a group workout is a bit more forgiving. Riders of all capabilities can ride together in a group workout, and as long as you are trying to hit your intervals and pedal, you will stay with the group.

I found the group workout to be quite a bit more fun than a group ride - since we stayed together better, there was a bit more camaraderie. We were texting messages back and forth, and at the end, it was raining Ride Ons - everybody was giving each other the thumbs up. It was fun.
But it wasn’t just fun. Our publisher is in the middle of a series on the Most Important Elements for success (as defined by podium placings) in triathlon and, without giving too much away, and hoping not to seem overly cryptic, the denouement of this series will speak to the importance of this Zwift feature.
Slowtwitch Group Workouts
Groups Workouts on Zwift equals Structured Training on Zwift, if you engage in a Structured Training event (as opposed to simply using Zwift solo, on your own). Slowtwitch has, as of this writing, 4 weekly "events" on Zwift, and 2 of these 4 are Group Workouts. They are Slowtwitch Structured Training (Tuesdays, 7pm Eastern); and Festina Lente (Thursdays, 5:30am Eastern). We're about to add some more weekly events, including more Structured Training Events (Group Workouts).

The Sky’s the Limit
Power-based workouts take Zwift from being entertainment to being a serious workout tool. For those who want to jump in and get some good workouts in, Zwift has close to 700 different workouts amongst a dozen different plans that can get you off to a strong start. For those who are inclined, custom workouts mean the sky’s the limit. Group workouts add another dimension of fun. We’ll be looking some of the other indoor training software soon and see how Zwift stands amongst its peers.
Here's the whole series:
1. Welcome to Watopia: Install Zwift using virtual power, the most cost-effective option.
2. Zwift, The Deeper Dive: One more layer below the surface.
3. It's Game On With Zwift: Zwift is a game, but also a virtual community.
4. Zwift: Let's Dance! The social aspect; Zwift is a Massive Multiplayer Game.
5. Zwift: A Potent Tool for Training: Zwift’s workout mode.
6. On Zwift Every Day is Race Day: Zwift's racing culture and community.