As was the case after September 11th, it’s hard to write anything here without acknowledging the backdrop of world events. But here we are. And life goes on. Life is going on indoors, for many or most of us, so I thought it not wholly inappropriate to write about this product.
It’s Wahoo’s Kickr Bike. Yes, I’ve already written about this. Last September I wrote about its existence. Now I’m writing about it having had it in my workshop for a few weeks. I know a lot more about it now than I did then, and since I’m writing about it today my time to give it back is approaching, and this won’t be easy.

The bike came to me assembled, so I can’t speak to how it’s packed and shipped if one were to buy it online (assuming that is or becomes possible). The electronics were separate, and what I can say is that it’s easy and intuitive. You’ll notice 3 radio ports for the shifters, and 2 jacks. It doesn’t matter where you plug them in, they’ll function. Before we hike our legs over the top tube let’s talk about set up.
You configure this bike using a Wahoo app, and you’ll see on my iPhone screen that I have a pair of Wahoo apps. One is for the ELEMNT family of head units, and it’s not that one. It’s the black Wahoo icon. This is what configures Wahoo’s smart trainers.

The Kickr comes with a 110v (in the U.S.) power cord and adapter. Plug it in. Boot up this app and you’re given the screen below on the left. If you don’t see an actual Kickr unit like in the image of my iPhone below, turn the cranks a little, just with your hand, to wake up the bike.
When you click on the blue rectangle denoting the bike, you get the center screen. Here you can rename the bike and then let’s just say you’re going to connect to a third party app, such as Zwift (and what I describe below is also the case with Rouvy, Virtugo, Tacx videos, et al, and there's a compatibility chart for this).
Bypass the rest of this screen (just scroll down) and below Workout Profiles you’ll reach the screen I show on the far right below, whichs is Bike Profiles. Click Configure.

At this point you’re given a granular set of shifting options. Both screenshots below are from the same page in the app; you just scroll down to see all the options. On the left is the style of braking and shifting. Let’s leave this for a moment.
As you scroll down you’ll find your front options, notably 1x versus 2x. if you choose 2x you choose your rings and your number of cogs. Then you choose the particular cassette. Don’t get overly enamored with your own pedaling prowess. When you’ve already ascended 3000 vertical feet of Alp d’Zwift, you have 500 more feet to go, and you’re riding up 13 and 14 percent grades, you’ll wish you’d chosen a different gear range if you select poorly now.

Then we get to fit, and Wahoo is trying to play well with others here. As you see, once you’ve gotten through the part described above you’ll be told how to translate your fit coordinates to the Kickr Bike. You’ll see a screen that gives you Most, Somewhat, and Least accurate options and, honestly, I’d bypass all of that.
If you want to take a crack at translating from your Retül report to the fit bike, using the Wahoo tool, knock yourself out.

However, in my opinion, you’re best off simply measuring on your existing bike saddle height, saddle setback, and then the height and forward protrusion of whatever your contact points are. Contact points in this case will be your armrests (if you’re putting some aerobars on this bike) or Web X, or hood trough, or whatever it is you call the point on the hoods where horizontal turns vertical. Measure the “stack” and “reach” of those points on your bike and keep at it on the Kickr Bike until you nail it.
This bike is very adjustable. The only tricky thing about it is the seat tube or the proxy for it. It telescopes, there’s a handle on the backside of it, you turn the handle from vertical to horizontal, there’s a push knob, and that knob allows you to raise or lower the seat tube. If you find your can’t get your handlebars high enough, you need to raise the seat tube. If you can’t get the bars low enough, lower the seat tube. Then, for micro adjustments, there’s a handlebar “quill” and a seat post that adjust with quick releases.

Another set of quick releases let you move the handlebars further out by lengthening the “top tube” from the midpoint forward, and then you can move the saddle fore and after by lengthening the top tube from the midpoint rearward. There’s a pair of handles (in the image above), and when you turn those handles perpendicular to the top tube you can then slide the handlebars and the seat mast in and out. Then you lock the handles back down.
I have not calculated how short or tall you might be before this bike would not fit you. Wahoo says it'll work for riders from 5'0" to 6'4", but I think you might be able to make it work if you're a bit over 6'4", depending on your specific fit coordinates. I don’t get the sense Wahoo sabotaged themselves by disqualifying a large swathe of the audience.

Let’s revisit the “style of shifting” I mentioned above. If you look at the shifter paddles, there is a way to shift like you would a Shimano lever, with 2 discrete paddles, 1 for upshift, 1 for downshift. SRAM uses 1 paddle only. You can configure these to work either way. Likewise front derailleur performance.
I have mine configured SRAM, so, pushing either of the 2 left hand shifter paddles places me in an easier gear, and in the harder gear when I click a right hand paddle. When I click left and right at the same time, I shift the front derailleur.

You can choose the style of shifting you want regardless of the gear options. For example, what I have in my default configuration is very much a SRAM AXS set up: 12sp, 10-33 cassette, but I could rig this to shift as if I had Shimano shifter action on it.
The crank length is adjustable, as you see in the image above. One thing that’s quite nice about bikes like this one is that you get to simulate what your next bike, or bike fit, might feel and ride like. In fact, let’s talk about how this bike rides.

If you look at the shift levers, there’s a pair of buttons on the top. These are for incline/decline. There are similar buttons on the other lever but they are not operative. There are some other buttons on the levers not operative. I assume they’re there in case Wahoo thinks up something else, and turns them on via a firmware update.
That said, if you’re letting a 3rd party app like Zwift control the bike, you won’t use those buttons. Let’s talk about this.

This panel, to the right hand side of the top tube, just behind the head tube, is the brains of the operation. You’ll notice a blue light, and that light is either illuminated next to a lock or an unlock icon. There’s a grey button on the right of this box, and pushing that button toggles between them.
Lock is the setting you want if you want to control the incline yourself. Unlock is the choice when you want a 3rd party app to control the Kickr Bike for you.

When I ride this bike I’m Zwifting almost 100 percent of the time. Therefore, I want the unlock icon showing. In this case, as the road pitches up or down the bike pitches up or down. The normal display is gearing, and what you see above is the front ring (1 or 2, and 1 is the small ring), and then you see the rear cog (1 thru 12, and 1 is the inside cog). In this schema, 1 is always the low gear, easiest to pedal. 1 and 1 means that’s it, hope you chose a low enough gear for what Zwift is giving you. if you see 2 and 12 (on a 12sp set up) then this is what you’ll use for pedaling down a descent.
If you push those incline buttons on the top of the lever – which you’ll only do if you want to override what Zwift is serving you – then you’ll briefly see the percent grade, up or down, that you’ve chosen (image below), and then the display will automatically revert back to gearing.

The bike serves you a satisfying little clunk when you shift gears. Enough to tell you you’ve shifted, but not distracting. Not having to worry about mis-shifts, choosing the gearing you need, not needing to worry about whether your wheel axles (thru or QR) matches what’s on the smart trainer, how to put an 12sp cassette on a trainer that doesn’t have an XDR cassette driver, is really nice.
But let’s talk about one thing in Zwift that could confound you, and I’ve heard about this but I haven’t experienced it. You have a number of places you can configure stuff in Zwift. There’s your account, where you type in your gender, height, weight and (most importantly) your payment info. And then there’s in The Game, and when you’re in The Game, there’s yet again a couple of options.

You can go in and change your height and weight if you click where you see the red arrow pointing. But the green arrow gives you some options in how The Game itself responds. Sounds and appearance, stuff like that. One option is how much real, live, actual, "trainer difficulty" you want The Game to serve your trainer. In other words, if you’re 170 pounds, and you’re riding up a 16 percent grade, and you’re in a 38x25 gear, do you want The Game to serve that difficulty to your trainer? Fully? You can calibrate that. You can lessen that if you want, via that slider below.

If you do, then The Game will cut you a little slack on the steep grades. It won’t let you cheat. You still have to pedal the power to get the performance. I bring this up because I’ve heard that if you don’t have that slider pushed to 100 percent realism, that might affect whether the Zwift will drive the incline in the bike. I haven’t found that this slider affects this. I find that the Kickr Bike I’m riding faithfully obeys the grade that Zwift serves it.
What do I not like about the Kickr Bike? There are some things. First, I’m very much into having a home stationary bike on which I can experiment. I'm spoiled. I’ve used my fit bikes, built for bike fitting, as stationary bikes for years. I can change whatever I want and see how that works for me. That’s nice. I can do that with the Kickr Bike. However, this bike has a standard seat post, with a pair of Allen screws that adjust the tilt. You’ve used these. Loosen the rear facing Allen screw, tighten the forward one, the saddle is tilted down in front. Purely Custom’s fit bike uses the same design, except instead of Allen screws there are large thumb screws you can hand tighten. These might be less useful on the road, but they’re very used on a stationary bike. The Kickr should move to this.

Second, this bike has the same lack of road feel when you’re out of the saddle as when you’re on any stationary bike. This is especially felt when you’re out of the saddle on an ascent. This isn’t a slam on this bike in particular. It’s just that Wahoo gives you something really cool: a bike that ascends as Zwift’s route ascends. What that unmasks is the unfortunately lack of road feel when you’re standing on the bike while you’re on that ascent. This is an argument in favor of, say, the Saris MP1 platform. But, the platform doesn’t allow the bike to pitch up, only to ride level. And, while I have a trainer on an MP1 platform right next to the Kickr Bike in my studio no, I can’t put the one on the other, per both Saris and Wahoo.
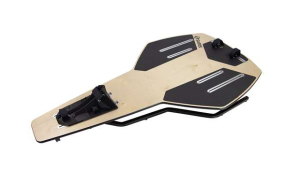
One thing, as a point of order, you’ll see a device in my pictures of the Kickr Bike (such as the image just above), it’s what the saddle is attached to, it’s called a SwitchIt, and it allows me to change saddles in 10 seconds. It’s not part of the Kickr Bike.
As for specs, 2200 watts, 20 percent incline, 15 percent decline (I haven’t ridden down that kind of decline yet; that might scare the poop out of me were this bike to point nose down like that); it’s 93 pounds total, and it rolls around on back wheels like a wheelbarrow.
This is a great product. Well thought out. Well executed. It sells for $3,500, a very fair price for what you get. If I’d have been asked, not knowing the price, and knowing what goes into bikes like this, I’d have guessed more like $4,500. If you want the functionality of this bike – the smart trainer, and the incline via a Kickr Climb – you can get that for less than half the $3,500 price. I see that bundle for around $1,600. But, you don’t get the virtual gears, which I see as a key feature; you don’t get the adjustability.
While the price for the Kickr Bike is more than fair, it's not pocket change, so from time to time I remind you of The Pro's Closet, or however it is you want to divest yourself of your "training furniture." If you were to buy a Kickr Bike at your local bike shop, first let TPC know what you've got gathering dust. They'll give you vouchers. Haul your stuff down there, your LBS will take it from you, you don't have to pack or ship it. Give your TPC vouchers to your LBS. This makes the Kickr Bike $3,500 minus your voucher total. I mention this because of the ever-growing gap between what we can afford, and what we are charged.
The Kickr Bike has been conspicuously unavailable since its intro last autumn, but is now finally available in the U.S. It will arrive soon in the UK and Germany. Here’s where you can see and read more about the Kickr Bike.