We’re continuing our coverage of all-things-road-tubeless, bringing you any and all information necessary to understand and implement it, should you choose to do so (also head over to our reader forum for a very active supplemental discussion).
Last week we covered some of the technology that cross-pollinates between tubeless and tubed (standard clincher) tires, and this week we’ll talk sealants. We’ve investigated sealant in the past with fairly broad strokes, but want to focus today on some of the practical nuts and bolts that apply specifically to road tubeless – not tubed or tubular tires. What are the best brands? How often should you add or replace the sealant, and how do you do so? Can you mix different types of sealant, or add anything to it? There’s a lot to talk about, so let’s get to it.

The Basics
In case it isn’t obvious, you must use tire sealant with road tubeless tires – and the sealant must be tubeless-specific. Tubeless sealants are latex-based, compared to tube-type sealants that are typically glycol-based. The downside to latex sealant is that it dries out over time, requiring replenishment (compared to glycol sealants that can often last for the life of your inner tube). Note, however, that this is a necessary evil, as the drying-out process is part of what makes it work for the application.

You’ll notice in the photo above that the sealant looks like glue – and that’s exactly what you need to seal up the imperfect tire bead against the rim. Sealant shores up micro gaps in these surfaces, while allowing the tire bead and casing to be lighter in weight. For comparison, there is a mostly-defunct mountain bike tubeless standard called UST, which doesn’t require the use of sealant for an air-tight fit, due to a heavy tire bead, heavy sidewalls, and very strict tolerances for both tire and rim. (All the extra weight led to its abandonment, despite its function). There is a new road UST, which does require sealant.
So – how much sealant should you use, and how often must it be replenished? That depend on many factors, such as sealant formula, personal risk tolerance, and even the ambient humidity in your area. Most tubeless sealant manufacturers suggest a range of 30-60ml (1-2 ounces) per wheel for average sized road tires (say, 23-32mm). If you’re like me, you err towards the higher end of this range, because you don’t like flat tires or adding sealant more frequently than you have to. Sealant replenishment times are typically in the neighborhood of 2-12 months, with low humidity necessitating more frequent intervals. If in doubt, check your sealant levels at least every six months. Oh, and don’t forget to SHAKE the sealant bottle – a LOT – immediately before adding it to your tire.

You should also plan to completely remove your road tubeless tires on an annual basis, to clean out any large dried chunks of sealant, lovingly called “Stanimals” (named after the tubeless pioneer, Stan’s NoTubes). These not only add weight, but they can also cause wheel balance problems if one side of the tire becomes much heavier than the other.
Sealant Shelf Life
There is an often-overlooked issue with latex-based sealants, and that’s shelf life. Even if your sealant bottle is brand new and sealed, it won’t last forever. It will eventually separate into its component parts, unable to be mixed again. I’m no chemist, but this seems to be universal and irreversible, regardless of brand. If you don’t believe me, check out my bottle of Bontrager TLR sealant, that sat in a brand-new, sealed bottle in my garage for a couple years:

I’ve inquired with several manufacturers, and most suggest an approximate shelf life of one year for tubeless sealants. The take-home is that you should buy small quantities, or on an as-needed basis.
What About Mixing Sealant Brands?
In general, you should not mix different sealant brands, even when they’re both latex based. Different manufacturers use different additives, which don’t always play nice together and can cause coagulation or a degradation in performance. That means that if you run out of Sealant A and only have Sealant B on hand, you must remove the tire and clean it before proceeding. I’ve done this, and had success with Simple Green’s bicycle formula and a clean rag for the job. Some sealant manufacturers recommend a more thorough approach, such as using soap, water, and a stiff brush to scrub the inside of the tire.
What About Sealant Additives?
If you’re old enough to remember the early days of tubeless for mountain bikes, you’ll recall the lore of sealant additives such as glitter. The idea was to add extra chunks to the mix, hoping to clog holes and slow leaks. True mad scientists would use two or three different sizes of glitter particles (and a rainbow of different colors for style points), but I don’t think anyone knows if it actually helped. In fact, some resourceful enthusiasts made their own homebrew sealant using latex mold builder or body paint, along with antifreeze, ammonia, and other easily-accessible ingredients. It saves a few bucks, but I’ll pass on the extra work.
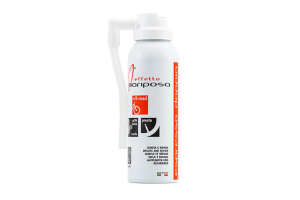
These days, there are a few legitimate additives, such as Vitamina CL from Effetto Mariposa. It claims to increase the maximum repairable puncture size, and the only question I have is why it isn’t included in the base formula of their Caffelatex sealant.
How To Add Sealant

You can add sealant to your tubeless tires in a few different ways. The first and most simple way is to pour it right in the tire after you install the first bead and before installing the second (see photo above).

Of course, that method doesn’t work so well after you’ve already been riding the tires for a while – and you actually want to keep those beads fully sealed in place if they’re already holding well. In that case, you can use a sealant injector. Several brands make them, and they allow you to perfectly measure and inject a specific amount through a removable-core tubeless valve. Yes, you do want removable cores in your valves, and most are made this way in 2019.

If you don’t want to mess around with buying injectors or special tools, several brands sell pre-measured bottles, typically measuring 60ml (2 ounces) or so. If you prefer to go light on your sealant levels, this is enough to cover two road tubeless tires. Most of these small bottles have a tip that’s sized perfectly for a valve stem with the core removed, or they include some sort of adapter tube to facilitate injection.
Finally, there is a new system called milKit, which is a clever system that allows you to measure, inject, and even remove sealant all through the valve stem.
Sealant Brands
There are probably a hundred sealant brands by now, more than we know of and certainly more than you want to read about. Rather than try to list them all, we’ll cover the top brands that have captured our attention or have features that are particularly relevant.

Stan’s NoTubes remains a steady force in tubeless, and they have refined their sealant formula over time. They also make special formulas for the likes of Schwalbe, with their Doc Blue Professional sealant. Stan’s own sealant does contain a trace amount of ammonia, which has caused controversy about alloy rim compatibility over the years. They claim that any trace amount will evaporate after being injected into the tire, and that tubeless rim tape protects any scratched areas that might otherwise oxidize. I’ve never had a problem with Stan’s, though it’s been quite a while since I’ve used it.

Orange Seal seems to be steadily growing in popularity, having burst on to the MTB scene several years ago. They did well in our sealant test, and have since branched out into several new formulas for specific applications.

Caffelatex from Effetto Mariposa has been around for some time now, and is one of the first ammonia-free formulas, and the only one we’re aware of with a high foaming action to promote coating of the inner tire surface. Their Vitamina CL additive claims to add extra puncture-stopping power, putting them on our short list of favorites.
No matter what sealant you choose, always shake it up before installing it in to your tire, and don’t stockpile it as most sealants have a shelf life of 1 year even if never opened. Also be sure to keep spare valve cores handy, because virtually any type of sealant will slowly clog them over time.