Can the Quintana Roo Service Course Road Bike be the New Starting Point for Newer Triathletes?
When I was looking at choosing a bike as a “new beginner option,” one ride stuck out. Last year in Kona, a friend of mine rode up to the top of Mauna Kea. He had the Quintana Roo SR and slapped some aero bars on it. At home it was his daily commuter bike. He lived about 20 miles from his office, and biking to and from work most days he would get in a lot of extra miles. He also traveled a ton for work, and he loved traveling with a road bike instead of a TT.
Watching him unpack the bike and throw on the aero bars reminded me of just how universal the right road bike can be for athletes.
With all the new beginners in the sport I wanted to take a look back at my roots in triathlon in 2001. What was my journey like? What helped me stay interested and engaged? Also, more importantly, how did I afford all of this stuff? Now, I know this build is not a good example of affordable stuff, but the bike itself is, so don’t kill me just yet.
I did my first triathlon on a road bike (a Felt). I did my first IRONMAN on a road bike (an Aegis). After being in the sport for a couple of years, I finally decided to purchase a tri bike — a used Cannondale that a friend of mine was selling. It wasn’t until a couple of years into the sport — when I was really hooked —that I became a multiple bike owner.
The industry is finally starting to come back to its roots with affordable bikes for the people who want (and need) them. For a while, this was totally out of control. Even now some of the price tags are still, in my opinion, insane. But, like I have said before, if a company has a client that wants to buy it, you can’t knock ’em for selling it. But, I can, and I will knock the company for not having any other options for the rest of the world.
While building up a new bike frame is always fun, it’s also a chore. It’s a lot more complicated than just ordering a bike that is 95 percent ready to go. Once they are set up, however, you can finally get to the point of the mission: Ride. And ride I have.
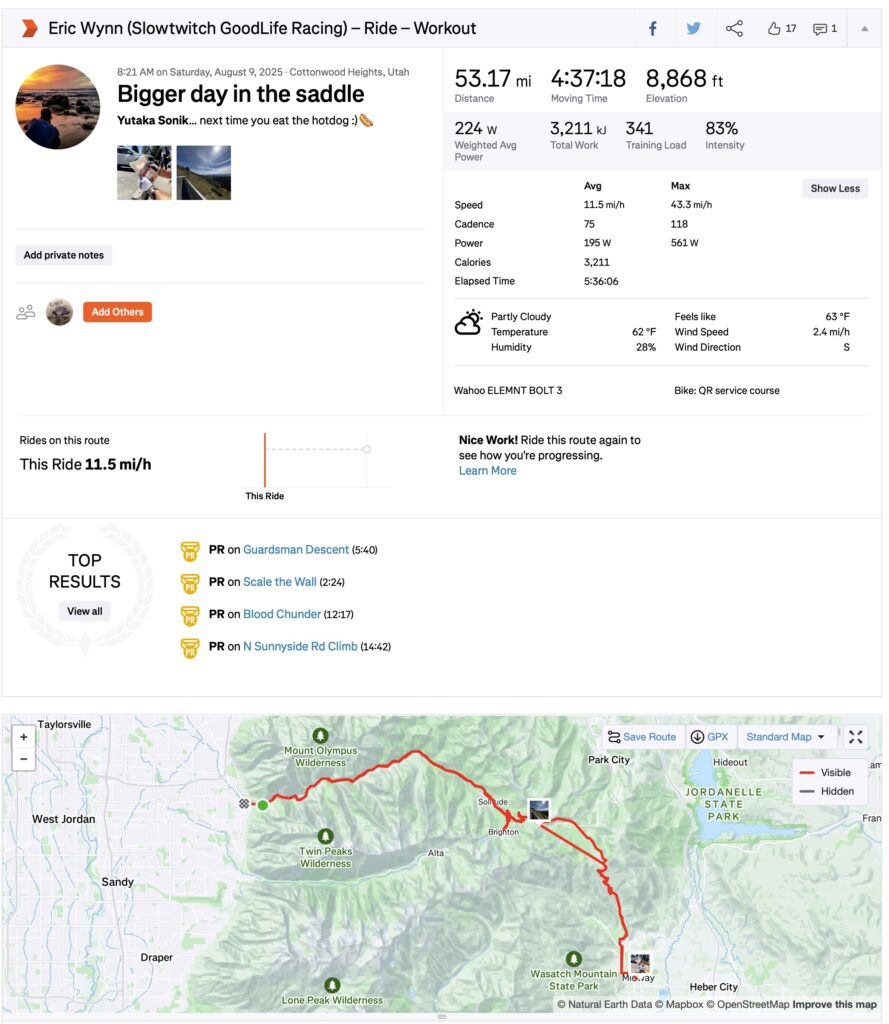
According to Strava, since the end of June I have put eight rides on this bike for a total of 196.55 miles and 16,014 feet of climbing. Now, I know that’s not a massive amount of miles, but considering I’m currently testing four other bikes and pretty busy in life, it’s a sold amount of time on one of these frames over the time period (and I think it’s a fair shake at the first thoughts of a review). I have also tested out three head units and three different sets of wheels on this bike. So, a good amount of time has been spent on this ride. I have ridden in Florida on nothing but flat roads (so I have traveled with this frame) and in Salt Lake City on some of the biggest climbs near my house.
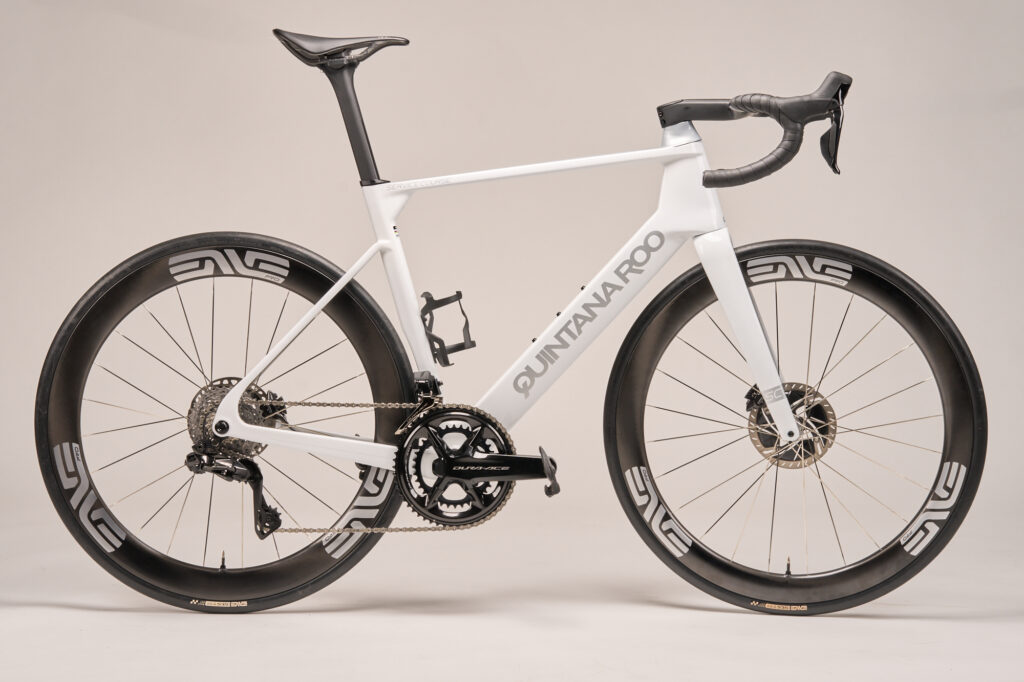
In thinking of a stating point “new bike” review, I chose the Quintana Roo Service Course. The SR series is what QR considers its ultimate all-rounder. They have two options: the SRSIX and the SRFIVE. The difference is that the SRSIX is a lighter carbon, which means it costs more and is a little bit lighter.
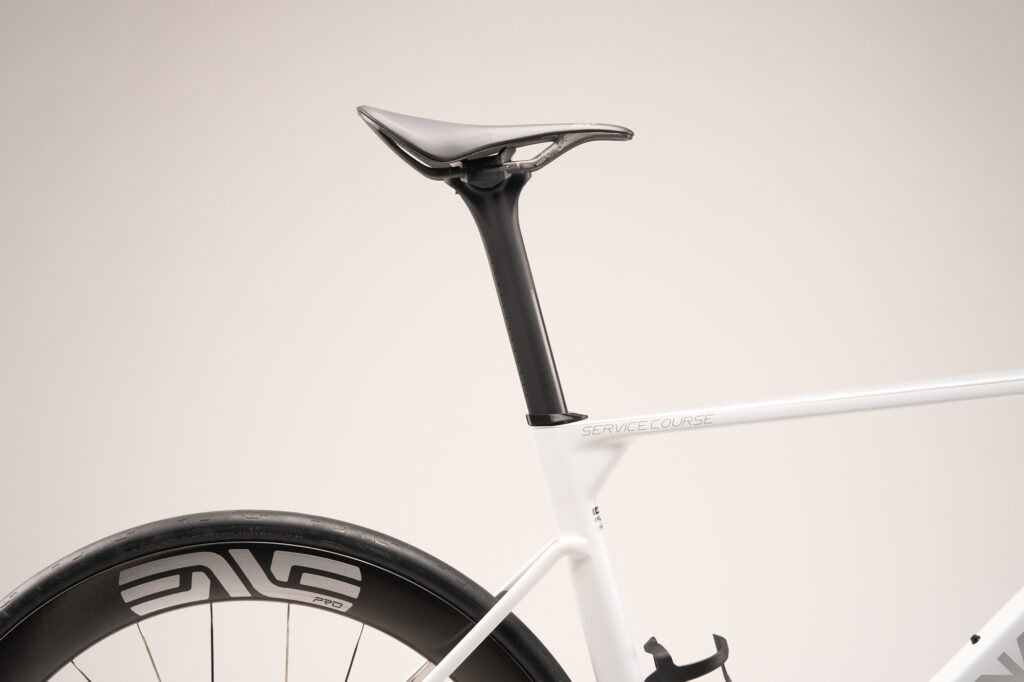
According to QR, the Service Course bike is inspired by their TT bikes. It has a much more forward moving design, and the slight geometry differences — combined with the aero fork and head tube — makes this bike want to go forward fast.
Because the geometry for both SR series frames is the same, the choice was between the SR and the SC models. So, let’s dive into some of the numbers around my choice.
Geometry
| Metric | V-PRi (L) | Road SR (All rounder) (L) | Road Service Course (Aero) (L) |
|---|---|---|---|
| Seat Tube | 58.5 cm | 51.0 cm | 52.0 cm |
| Top Tube Length | 55.0 cm | 57.0 cm | 57.3 cm |
| Head Tube Length | 12.6 cm | 17.0 cm | 17.1 cm |
| Head Tube Angle | 72° | 72° | 73° |
| Seat Tube Angle | 77–83° | 73.5° | 73.5° |
| Chainstay Length | 39.5 cm | 41.5 cm | 41.1 cm |
| Wheelbase | 103.1 cm | 101.9 cm | 101.2 cm |
| Standover Height | 83.3 cm | 79.2 cm | 80.9 cm |
| Front Center | 64.8 cm | 61.5 cm | 61.1 cm |
| BB Drop | 7.35 cm | 7.2 cm | 7.0 cm |
| Stack | 53.5 cm | 58.0 cm | 58.5 cm |
| Reach | 44.3 cm | 40.0 cm | 40.0 cm |
| Virtual Stack | 56 cm | — | — |
| Virtual Reach | 43.5 cm | — | — |
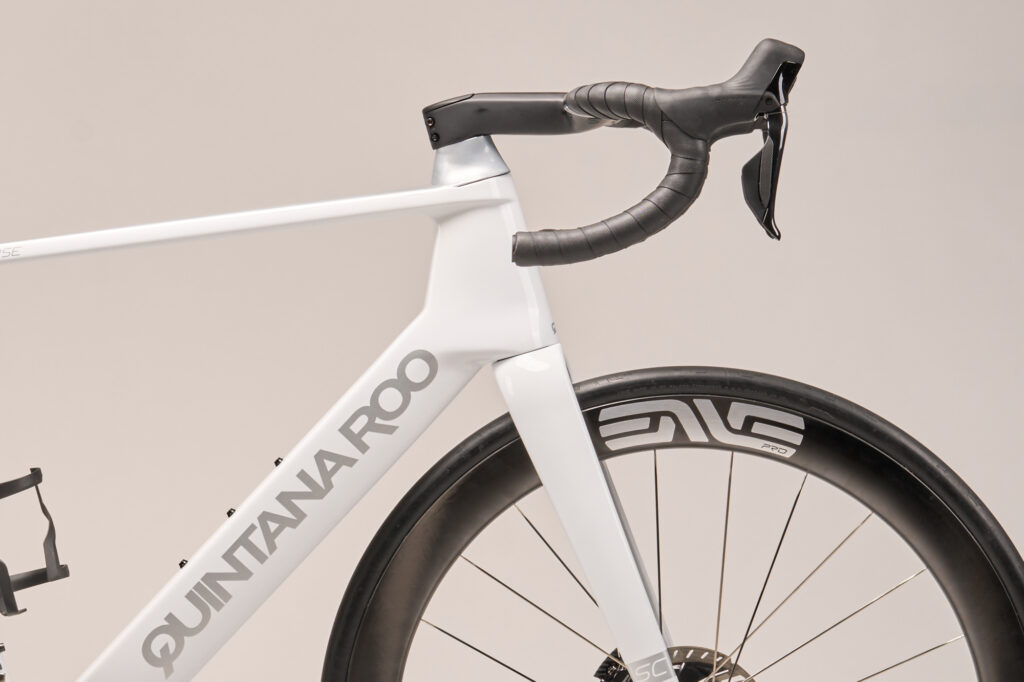
These photos will give you an idea on what Im talking about.
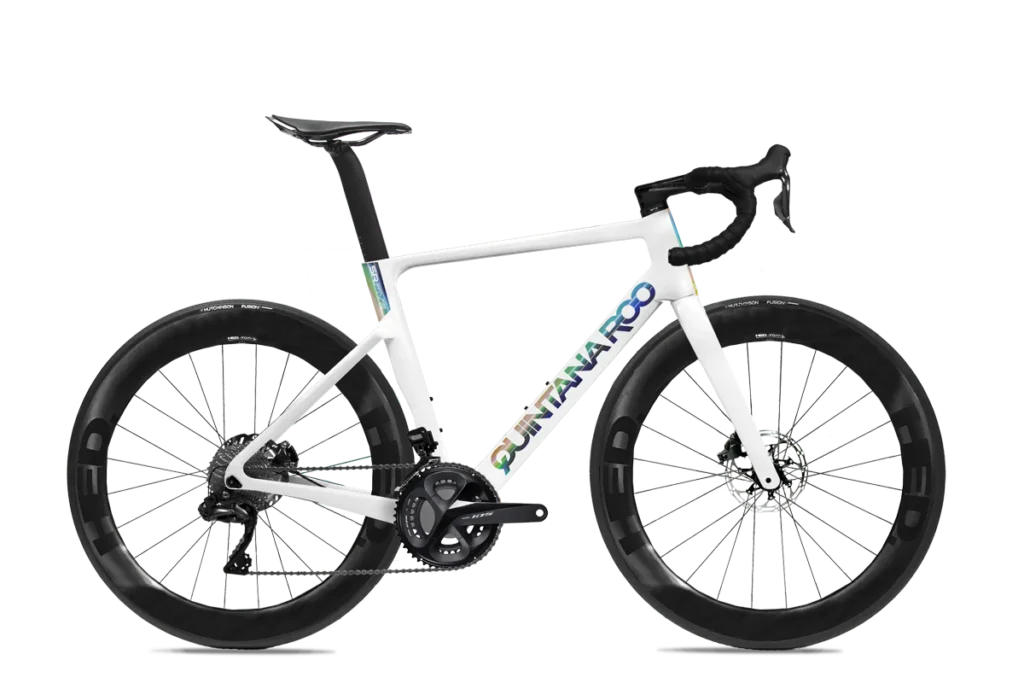
PR SERIES
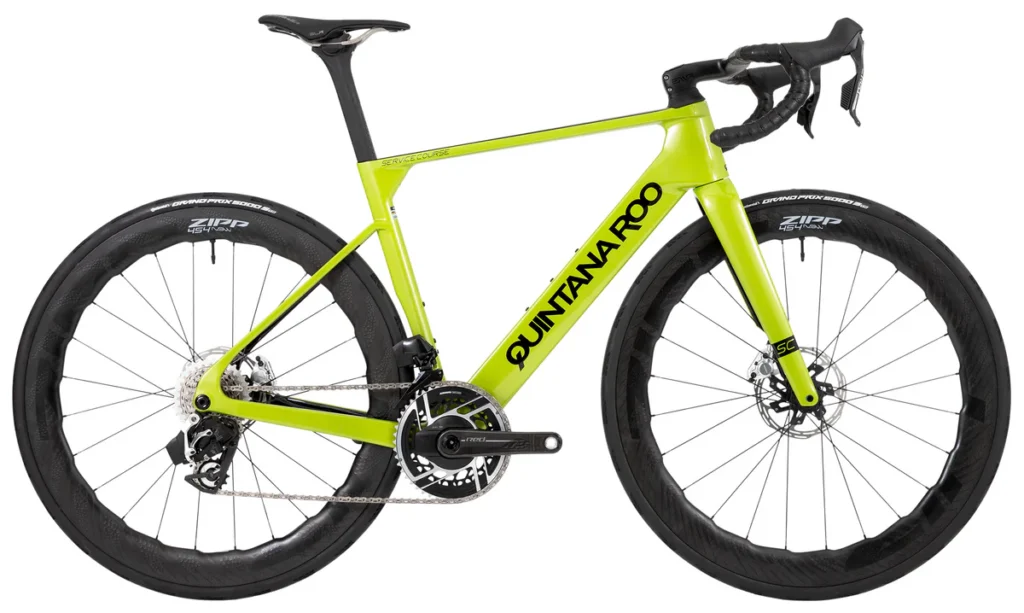
Service Course
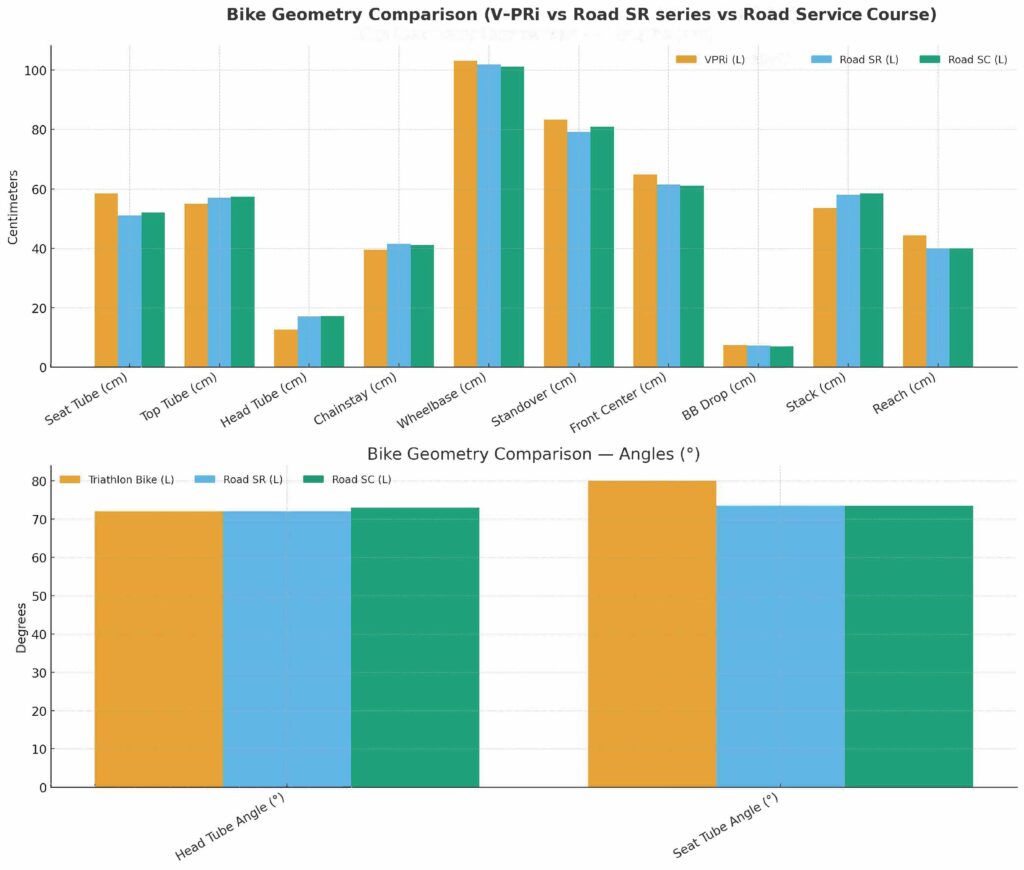
These charts will also hopefully help you visualize the data that we are working with.
Choices
Understanding that, for the most part, I’m dealing with almost the same set of measurements for the road bikes, the reason I chose the Service Course was based on the aerodynamics of the front end. If I’m going to have a decrease in wheel base (compared to the TT bike), I want to have the best aerodynamics that I can get (not just for CDA but for stability as well), so the increased fork and head tube flare is a good thing. I also have more adjustments in my tool box with the front end head tube. (The way that they measure these includes an aero spacer.) So, 17.1 mm isn’t 100 percent accurate if you don’t need the aero cap that isn’t required for a couple of TT base bars I’m looking at.
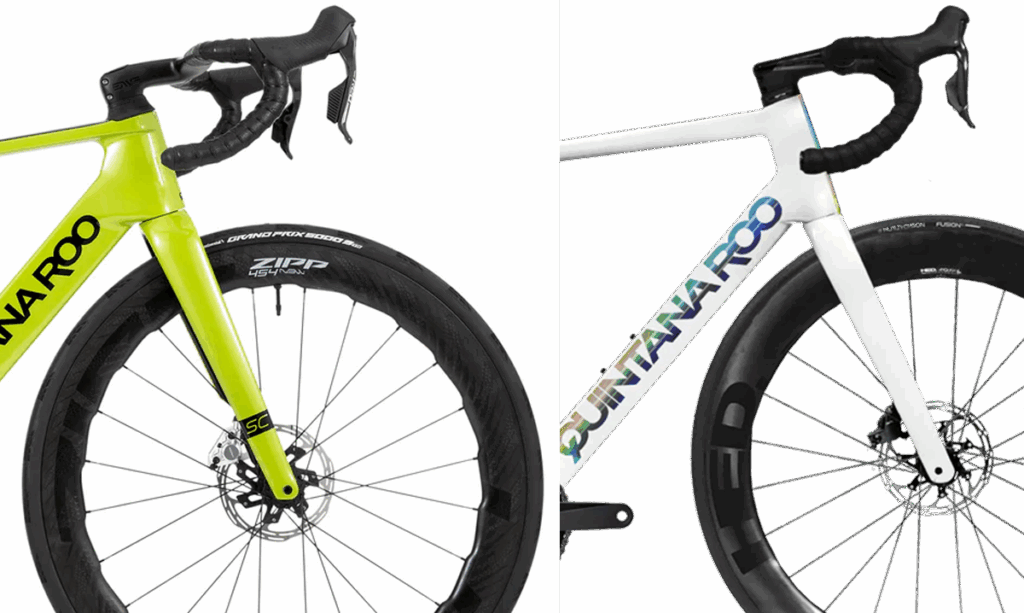
Service Course on the left (Yellow)
Remember, the point of this is to help people understand that when making a big purchase, they can buy something that they can move into. In other words, as you progress in the sport, you have a great baseline piece of equipment that, with little upgrades here and there, can progress with you.
The Build I Started With
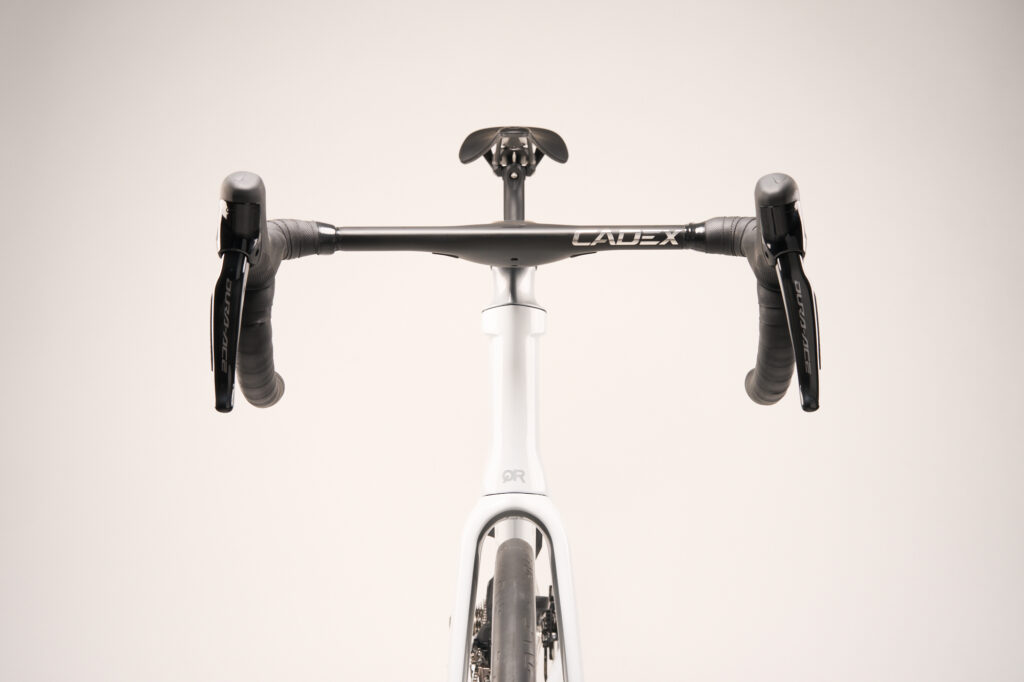
I know, I know, a top-of-line groupset, a $699 handle bar and a super expensive saddle isn’t what the average beginner would buy, but when starting out, I wanted to get as close as possible to an aero setup as I could. I still needed to make that work while doing a lot of product testing on this bike that had nothing to do with a TT position. So, I slammed the seat a little forward and added the CADEX Aero Integrated Handlebar, which I ordered long (420 mm width, 130 mm length) just for this purpose. The QR was one of the bikes I could get this bar on, and the -10 degree, 130 mm length stem isn’t anything I would normally ride in the mountains (which is where most of my rides are), so for this build and test, it was nearly perfect.

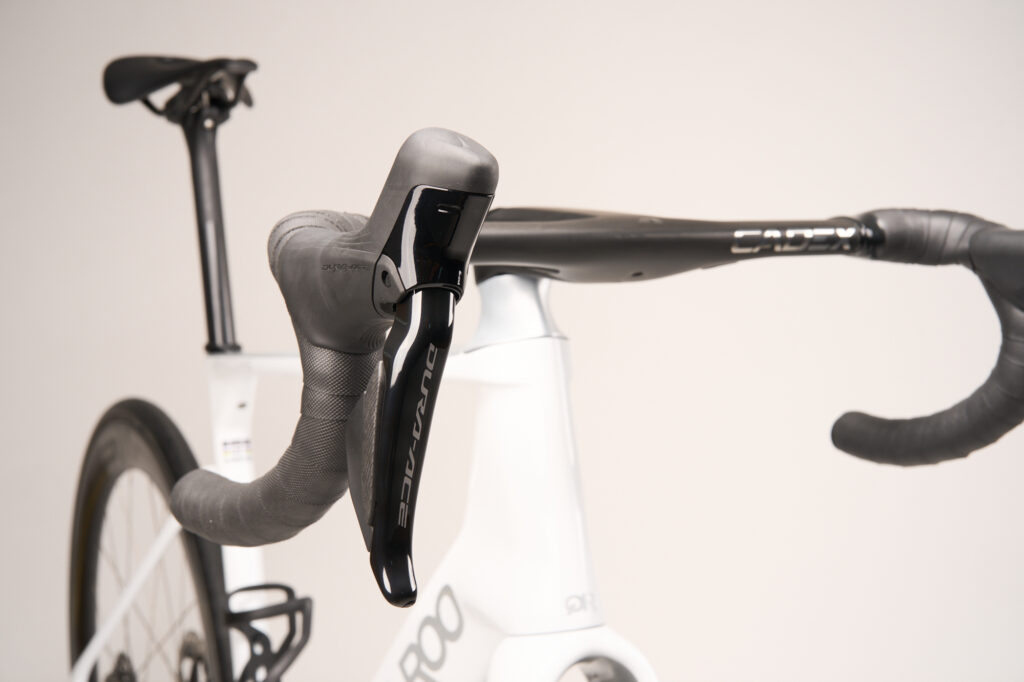
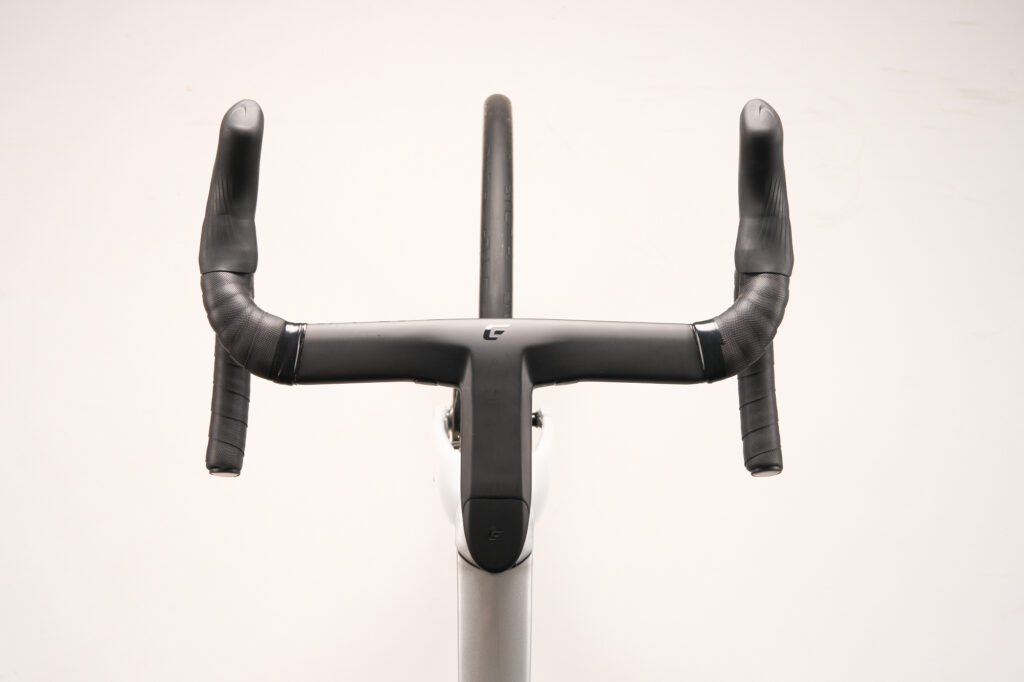
What this handlebar setup gave me was the reach I needed to be forward. Now that I have a better understanding of the bike, I can start to build out my aero bar set up options.
So far, I’m pretty sure I made the right choice of frame and frame size, but that will become 100 percent clear during Phase 2 of this build.
The bike itself is great. It’s super comfortable and fast. It is what it claims to be — an aero bike. Its thicker and stiffer bottom bracket, aero front fork and down tube wants you to go fast in a straight line.
I can easily see why this setup works well for triathletes while also being a great option for sprinters on the UCI cycling scene. This is not the bike you want to buy if you live in a mountain town and mostly ride hills (like me). The Service Course is meant to go fast — and we will make it go fast.
You can get this bike for just under $3,400. You can even get into the PR series for under $3,000. So, if we want to talk about something that someone can use for a couple of years, and add on as needed, I think this is a great option.
What’s Next?
It’s time to change the saddle so I can get a little more forward and start doing some fun stuff with the front end. I’m going to show you everything from the most basic set ups, to the stupid and silly. And we’ll also explore how we can make this look like a pro’s bike that is ready to win some big races.


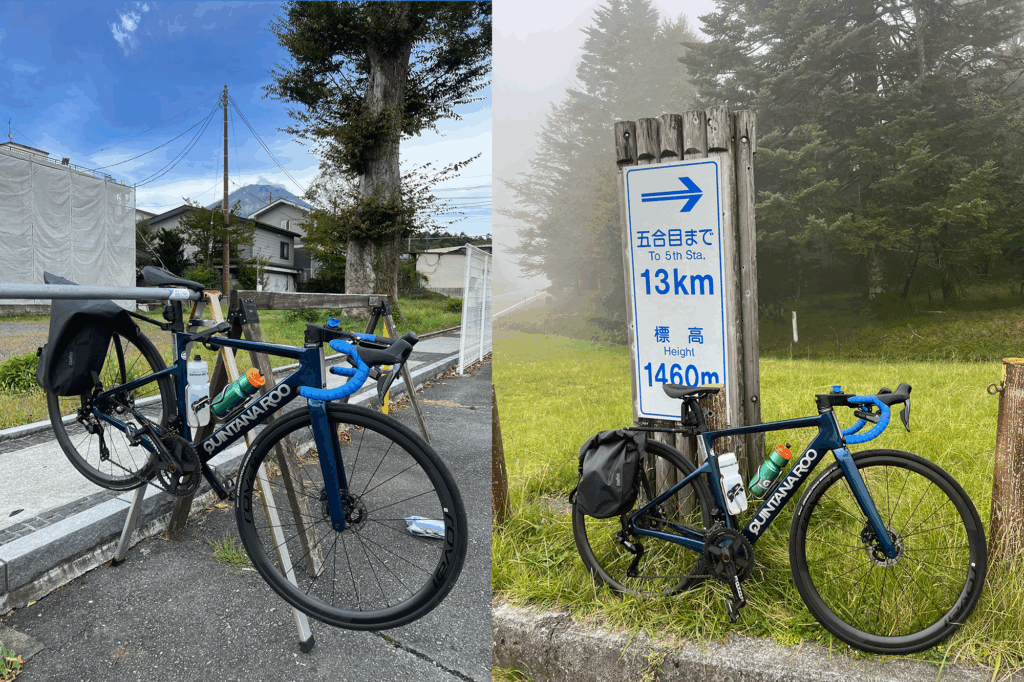
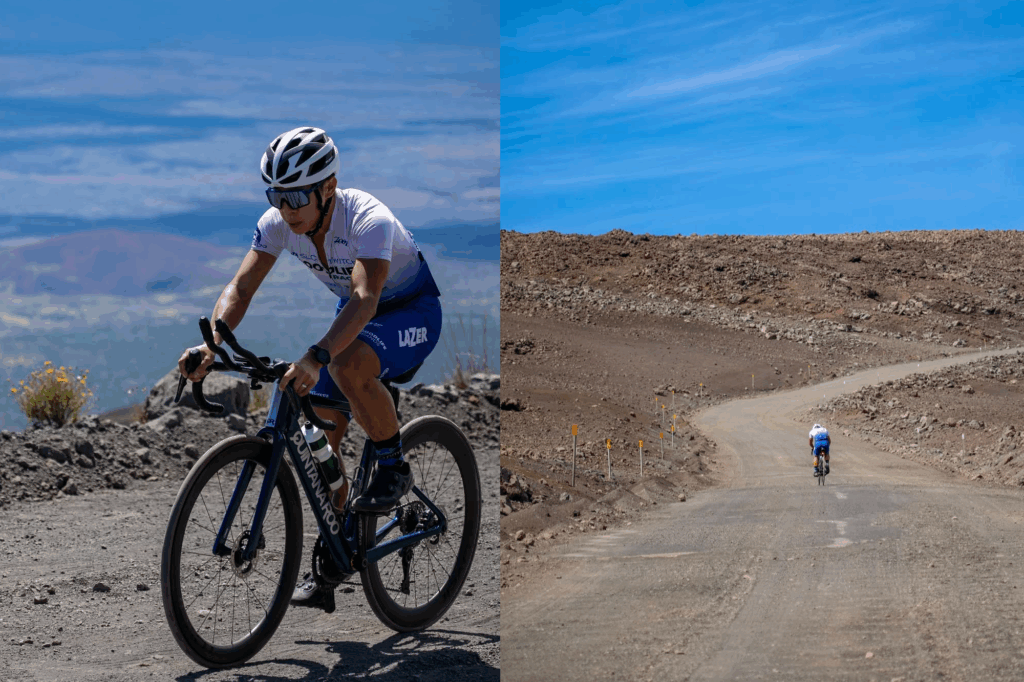
Love that my QR has taken me up to the (paved) summit of Mount Fuji and top of Mauna Kea, all within the same month! The Service Course looks great on you…now it’s time for me to get one to match!
Slap an ISM PN 3.0 to get more forward
If you’re going to just review a ROAD bike, just review the road bike. Otherwise your review makes little sense.
You start out talking about a great ‘starter’ bike for beginners, and talk about how a friend used a road bike+aerobars to great effect. All good here, I agree.
Then you talk about your testing bike, which is nothing what a beginner would ride - it’s a $3000 bike WITHOUT race wheels, and then you slap on a $699 handle bar, and ENVE race wheels on it, with a DURA-ACE groupset. At that spec, it’s good enough for a pro rider.
AND - you can’t easily add aerobars to your setup because your $699 custom aerodynamic handlebar just completed negated any chance of adding any standard aerobar since those typically require round-tubed ‘normal’ handlebars to clamp on. They won’t clamp onto the flattened aero integrated handlebars. So you’ll have to reinstall or buy another old-school handlebar just to use aerobars. Definitely NOT beginner-friendly.
A true entry level tri-friendly setup would be any <$1800 standard road bike (many choices like Scott Speedster <$1300, ALL of which conveniently come with round handlebars), and add clip on aerobars, and if you really want to upgrade to full tri racing speed, add race wheels that are <$1000. And it’ll beat your non-aerobar roadbike.
I actually am convinced that a road bike + clip on aeros is all you need as an amateur triathlete, even a top one. My $600 true entry-level road bike with $25 Aliexpress aerobars + $350 88mm Superteam wheels (rim brake) was just as fast in racing as my $6k Quintana Roo TT bike with HED Vanquish wheels, which is kinda crazy.
You didnt actually read the article did you… at least read the article…
Uh, yeah, I did, and even pointed out exactly what I thought were the problems with it.
Which is funning cause I pointed those out myself as well I’ll see if I can do a better job with that.
Don’t get me wrong - the review of the bike as a road bike is fine.
The emphasis on it being a ‘starter bike’ as well as a ‘triathlon-friendly bike that you can slap aerobars on’ seems really forced to me, given that it’s essentially a pro-level pricey setup, and you don’t give any recommendations on how to slap aerobars on it - which is arguably THE most important thing to make it a TT bike. After your intro, I was expecting to see some cool way to attach aerobars to that sexy handlebar you installed, but to my chagrin, nope! (You actually did the opposite - if I had bought this bike as a beginner on your article recommendation and got the same setup, I’d be pissed that it wouldn’t take an aerobar!)
I’d recommend you just review it as a capable road bike. Nothing wrong with that. But it’s not a great review if you’re aiming to show it as a great starter bike and/or TT-friendly aerobar bike.
happy to send you some aerobars slapped on to my QR! I have the Enve SES Aero handlebar (my fave!) and the Enve SES aero clip ons. Also used a Profile Design tri stem to get the appropriate drop and reach too!
Ha - I know it can be done - but it is NOT beginner-friendly, contrary to the OP’s title post!
I think the review was pretty thorough and maybe the addition of the upgrades suggests that it’s an even better bike, as it can grow with you through out the triathlon journey/experience.
You (the person commenting it would be pro level with the additional upgraded components) are obviously not the targeted audience for the review based on your stated experiences with triathlon. Has that pre-taper funk hit you. What’s the old saying - if you don’t have something nice to say maybe don’t say it. Just click and move on…or better yet-go train
No, I think I’ve been pretty fair in my commentary.
$3k base bike before addition of an aero bar, and race wheels, and Dura-Ace groupset? NOT a beginner bike. Yes, it’s gonna be a great bike, no doubt, but I wouldn’t call that beginner. That’s significantly better and pricier than my road bike and I’m def not a beginner. Contrary to the ‘starter bike’ in the post, this would literally be an ‘end’ bike for most riders, meaning no further upgrades needed!
And the most important thing arguably for a entry level triathlon bike are aerobars. Which he made an entire point of pointing out his friend’s bike with aerobars right at the start - but then his bike has no aerobars and no easy way to put them on (will have to remove the whole basebar and possibly stem.)
As I said, retitle the article just “QR SR Road bike Review”, and I’m all good with it. But the moment you led with in ‘starting point bike’ and ‘newer triathlete’, it’s no longer consistent.
But yes, it’s a perfectly good road bike review!
JFC dude… it’s not the final result…. I have said in the review……
I appreciate that you’re doing this. I’ve also noticed over years on slowtwitch that “no good deed goes unpunished.” Someone will always be looking for an opportunity to jump all over you. I’m someone who lives in a very hilly area, but still likes to feel comfortable and fast, both on the climbs and down in the aerobars. I like seeing perspectives like yours. I’m actually in the market for a new bike, and I want a good climber that is somewhat aero and will accept clip-on bars. Your article provided just the kind of insights that I’m looking for.
It’s why we do it :)I would check out the PR series then. Good luck on the new purchase make sure you share pics of what you end up with.
I have owned a SR Six for two and a half years, I really like it, and I got the frameset at a fantastic sale price. Now, I wish it had a 73 deg head angle (and I could dream for a downtube storage compartment haha), but it does check the t47 box and had a great geometry. I am using round bars so I can use clip ons, and I want 36cm bars and a 110 stem which is hard to get in a one piece that I’d prefer but settled for what I have. I can take one bike to do the draft legal duathlon, and then put the clip ons on for the standard distance. I have made two trips that way. It’s a lot more stack than my tri bike but good enough.
Then get something else with a slacker seat tube angle. Unless you have a really good core and slight upper body.
And round bars of course