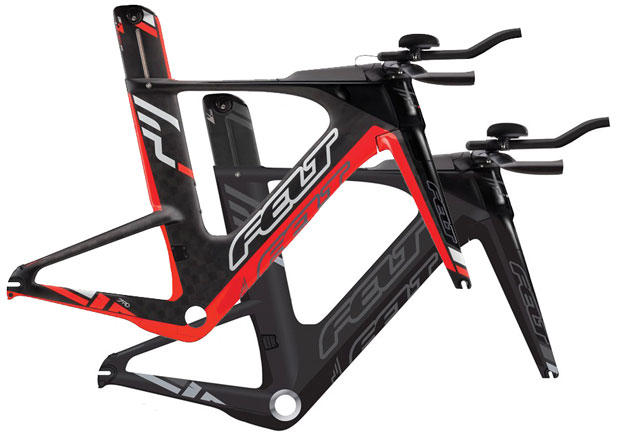
Two frames pop out of the same mold. One is twice as expensive as the other. What we’re talking about is the difference between, say, a Trek Madone with 700 Series OCLV versus 600 Series OCLV. Or, a Felt FRD bike versus a Felt version with the same silhouette, popping out of the same mold, but that is not FRD. In fact, these are what are pictured just below. What are the differences between these IA framesets, one of which costs $4,500 and the other $7,000? What justifies the big price variance? Is it all just marketing?
There are three basic differences between these frames: the materials used; the lay-up schedule; and the use (or not) of internal molds and, to that latter point, the kind of internal molding process used.
First, let's talk about types of carbon. Treks claims of its 700 Series OCLV the use of "the lightest, strongest carbon available" and "the ultimate combination of superior modulus and superior strength."
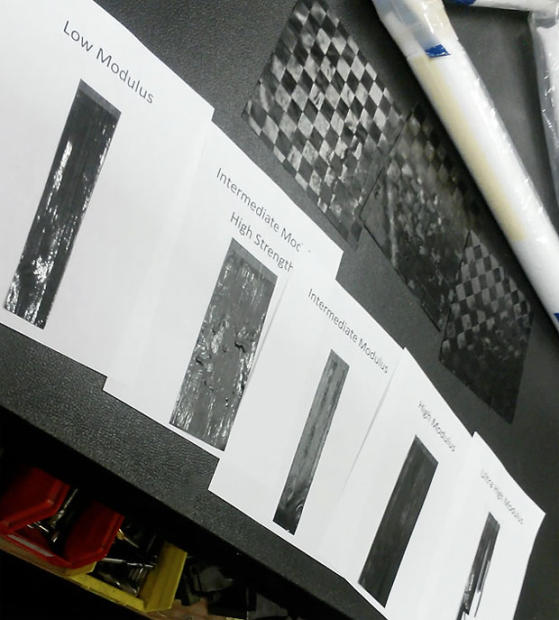
Those are mutually exclusive claims, if you apply them strictly. What Trek means, I think, is that it uses very expensive, very high modulus carbon in its 700 Series OCLV. But you wouldn't want to use that carbon throughout the frame because it's very brittle. If you cut sections of several different types of carbon fiber, before it's been impregnated with resin (see below), and bend each, some are very ductile and bend easily while others break. High modulus carbon breaks. This is the carbon you want if the goal is a light, stiff frame.
But if you build the frame entirely out of this carbon it's going to be brittle. It won't fail the way you want it to fail. If a track and field fan has ever seen a pole vault pole fail, that's the kind of failure you don't want if you're a bike maker.
It's not just that. If you want a frame that is vertically compliant but torsionally or laterally stiff, this is the kind of thing it was hard to make prior to the carbon fiber era. Now it's possible. It depends where you put the high and low modulus carbon. (Notice above swatches of carbon woven into a basket-type pattern that allows fibers to be oriented perpendicular to each other; you could ask the "basket weaver" to place high modulus in one axis and low modulus in the other, if you so-chose.)
The placement of this carbon is what you might call the lay-up, and it might seem incongruous that I built a factory (in a prior life) that made both wetsuits and bicycles, but the processes and even the tools are pretty similar for both.
What we used to call a lay-up in the wetsuit business was a stack of neoprene sheets, maybe 4 feet wide by 12 feet long. We placed pattern pieces on top of the stack, and drew the outline of these pattern pieces with white chalk. Our cutting machine acted like a very sharp SawzAll, the blade vertical and sharp like a razor, and we cut these pattern pieces out of this stack of rubber. These went to gluing tables, where we glued the edges of the pattern pieces together and then to those who blindstitched the seams on the inside of the suit. Turn your wetsuit inside out you'll see this kind of seam.
It's very much like that with the carbon bikes you ride. Just as we juxtaposed and interposed different kinds and thicknesses of rubber, and the jersey adhered to the inside of the rubber, to get the performance we wanted while an athlete swam in our suits, frame makers are concerned with carbon fiber type, how many layers, the orientation of the fiber, at every point in the frame.
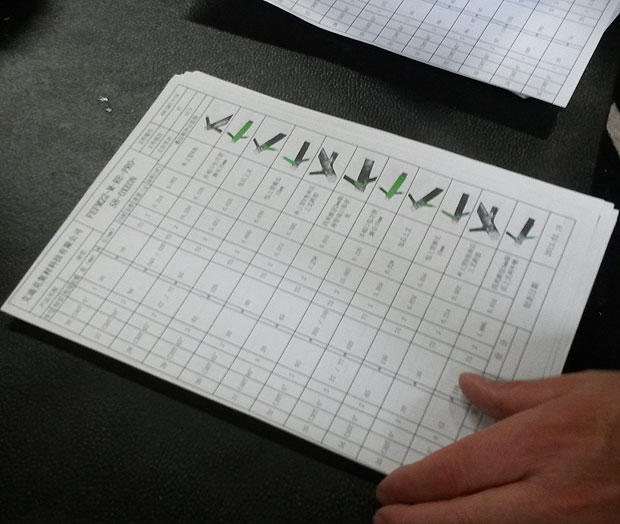
A bike frame's lay-up schedule is printed out (pictured below), often with pictures showing where on the frame this pattern piece sits. Each step is specific to a particular pattern piece, which might be quite small. It would not surprise me if the same cutting machine we used for wetsuits is used for cutting carbon fiber out of a sheet (though these can also be cut by CNC machines, the patterns programmed in, and instead of blades the cut might be done by water jet or other process).
One page of a lay-up schedule might have 10 or 12 steps (thanks to Felt Bicycles for letting me take some pics of processes that you'll rarely see a bike company divulge). A lay-up schedule on a cheaper bike might be 4 pages, that is, 50 steps or fewer. I looked at lay-up schedule for a Felt FRD frame – just the front triangle – and the lay-up schedule was 17 pages long. This is the difference between a lasagna that has cheaper and fewer ingredients, and very few steps, versus a recipe that requires many, many steps, and a lot of labor. This is one reason why that FRD frame above costs so much more than its very similar cousin.
How much labor are we talking about? A 17-page lay-up schedule would require 8 hours of work, just laying the carbon up around an internal mold for placement inside a stainless steel clamshell mold. I think customers assume a high degree of automation in today's production bike industry, and we marvel that carbon manufacture moved from Taiwan to mainland China, and is now threatened in China, because of labor costs. How much can labor costs possibly be in a bike frame? Here you see one example of how much labor goes into a frame. You might be lucky to get two frames a day, maybe only a single frame, out of one mold if your lay-up schedule is this detailed.
Or it might not be like that. It can just as easily take 90 minutes to lay up a frame. Just like in a wetsuit, if it's not an intricate pattern, if you don't mind your wetsuit fitting like a potato sack, if the rubber is not premium, if the precision and workmanship not first rate, two wetsuits that appear nearly identical can be far from identical in their performance. Bike or wetsuit, it's like that, and that's even with a pair of frames (or wetsuits) that pop out of the same mold or flow from the same pattern.
I mentioned an internal mold. Older carbon frames did not have these. There was simply a bladder, it was inflated, this inflated bladder squeezed the carbon against the clamshell mold during a heating process. The resin pre-impregnated into the carbon suffused and permeated the carbon and then out popped the frame. Nowadays the better frames have an internal mold as well as an external mold. You'd know if your frame was built this way only if you took a SawzAll or band saw to it, cut it apart, to see whether the inside surfaces were as clean as the outside.
Internal molds cut down on the overall weight of the frame and they cut down on the resin content. A frame might be 45 percent resin or 28 percent, and resin beyond what you need to activate the carbon fiber is just added weight.
When the frame is done, and pops out of the mold, someone now has to fish that internal mold out of the frame. Actually, not mold, but molds. There might be 6 or 8 internal molds in that frame, made out of a kind of blown foam specific to the task. It might take a worker in one of these factories an hour to fish out all those molds.
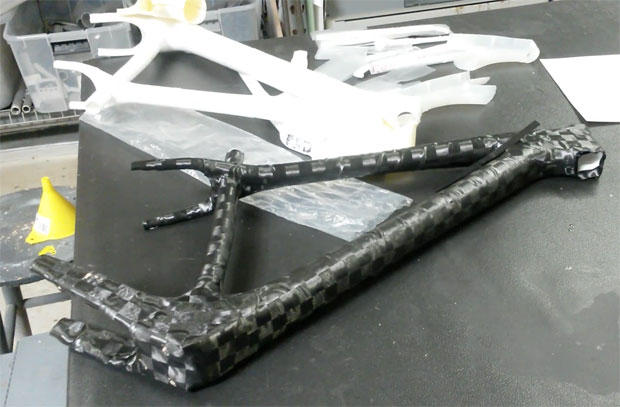
Above is an image of a carbon lay-up around an internal mold with another internal mold just above it. Again, thanks to Felt (understand this was sent over from Asia as a demo, and has started to unwrap itself a bit).
How do these lay-ups and mold shapes end up as they do? It starts with industrial design, just like when the car you're driving was designed. Or, like a building shape, which starts with an architect's rendering. It has to look sexy, and that's the industrial designer's job. Then it goes to engineering, and you do as much as you can on computers. The aerodynamic engineers plop the industrial sketch into a CFD (computational fluid dynamics) program to work out the probable best performing shape. The structural engineers plop that into an FEA (finite element analysis) program to figure out how to make this design structurally sound.
Somewhere in this process somebody makes sure the thing fits well, the sizes are scaled properly, and that its geometry will yield a nice-riding bike.
You have still to test it in the wind tunnel to see if what you thought you'd get using CFD is what you really get (and you still have to subject it to fatigue and impact testing to make sure it's sound). For wind tunnel testing, easiest is to "print" your frame out of a 3D printer, take it to the wind tunnel and see. Still, after you're sure it's what you want you still don't know if it's going to perform per ride quality. If you expect a certain behavior out of the frame and you're not getting it, you change the lay-up.
A lot of cyclists wonder why frames that look so similar on the outside vary so much in cost. Above is part of the story. Yes, marketing as well as other sales, general and administrative costs must be added into the cost of the product. But the gross profit margins of bike companies are not that high, and the greater volumes of the large bike brands command factory pricing that largely offsets the "value" offered by cheaper brands. Indeed, I suspect the large companies could compete very well with off- or no-brand frame sellers by simply offering their lower-echelon frames as bare framesets.
As with two bottles of wine, and two bags of coffee beans, the outside of a pair of bike frames might look the same. The outside is what you see, but the beauty is on the inside.
To provide the best experiences, we and our partners use technologies like cookies to store and/or access device information. Consenting to these technologies will allow us and our partners to process personal data such as browsing behavior or unique IDs on this site and show (non-) personalized ads. Not consenting or withdrawing consent, may adversely affect certain features and functions.
Click below to consent to the above or make granular choices. Your choices will be applied to this site only. You can change your settings at any time, including withdrawing your consent, by using the toggles on the Cookie Policy, or by clicking on the manage consent button at the bottom of the screen.
Functional
Always active
The technical storage or access is strictly necessary for the legitimate purpose of enabling the use of a specific service explicitly requested by the subscriber or user, or for the sole purpose of carrying out the transmission of a communication over an electronic communications network.
Preferences
The technical storage or access is necessary for the legitimate purpose of storing preferences that are not requested by the subscriber or user.
Statistics
The technical storage or access that is used exclusively for statistical purposes.The technical storage or access that is used exclusively for anonymous statistical purposes. Without a subpoena, voluntary compliance on the part of your Internet Service Provider, or additional records from a third party, information stored or retrieved for this purpose alone cannot usually be used to identify you.
Marketing
The technical storage or access is required to create user profiles to send advertising, or to track the user on a website or across several websites for similar marketing purposes.
To provide the best experiences, we use technologies like cookies to store and/or access device information. Consenting to these technologies will allow us to process data such as browsing behavior or unique IDs on this site. Not consenting or withdrawing consent, may adversely affect certain features and functions.
Functional
Always active
The technical storage or access is strictly necessary for the legitimate purpose of enabling the use of a specific service explicitly requested by the subscriber or user, or for the sole purpose of carrying out the transmission of a communication over an electronic communications network.
Preferences
The technical storage or access is necessary for the legitimate purpose of storing preferences that are not requested by the subscriber or user.
Statistics
The technical storage or access that is used exclusively for statistical purposes.The technical storage or access that is used exclusively for anonymous statistical purposes. Without a subpoena, voluntary compliance on the part of your Internet Service Provider, or additional records from a third party, information stored or retrieved for this purpose alone cannot usually be used to identify you.
Marketing
The technical storage or access is required to create user profiles to send advertising, or to track the user on a website or across several websites for similar marketing purposes.


Start the discussion at forum.slowtwitch.com