Disc Brake Primer – Part 2
This is Part 2 of our primer on disc brakes for road and triathlon bikes. You can find Part 1 HERE.
So far, we've covered some of the basics about disc brakes – the different types (hydraulic and mechanical), basic pros and cons, and some of the baseline implications for beginners (i.e. you can't use your old race wheels, your service schedule will almost certainly increase, and you must improve your overall cleanliness around the bike and brakes).
In Part 2, we'll look at other changes you can expect to make when switching to a disc-equipped road or triathlon bike. What tools do you need to buy? How does bike storage and travel change? What happens when you swap wheels out?
Let's get to it.
Essential Tools
These are some basic tools you'll need in order to do some of your own disc brake service. It should go without saying that brakes are a critical part of the bike, and if you're not comfortable or qualified to fix them, a mechanic can help.
Rotor Truing Tool
Perhaps the most essential tool for road disc brakes is this:
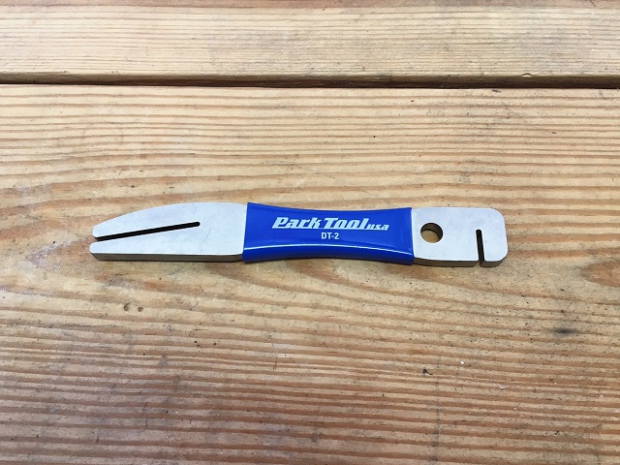
The rotor truing tool. In short, you use it to help make your rotors straight(er). When you buy new brake rotors, it's like winning the lottery to find one that is perfectly straight. Occasionally you hit the jackpot, but don't count on it.
Bicycle disc brakes put light weight at a huge premium, so rotors are thin and relatively fragile. Also, pad clearance (the amount of open air between the rotor and pads) is very slim. If the rotors aren't straight, you'll get the tell-tale sound of 'ting-ting-ting' as you ride.
Also, it is possible to make your rotor worse by bending it too much using one of these tools. It is a situation where you want to make 5 small adjustments instead of one large one – meaning that it is going to take some time to do it right. I prefer to work in a well-lit, dead-quiet area, so I can clearly see and hear pad contact.
Spray Cleaner
As mentioned in Part 1 of this article, you must step up your cleanliness game significantly with disc brakes. Rotors and pads do not like grease, oil, or contaminants of any kind. Don't touch them with your bare hands. I always wear nitrile mechanic's gloves (and change them out if I get grease on them).
The standard for brake cleaner is 90% isopropyl alcohol. I put it in a spray bottle like this for convenience:
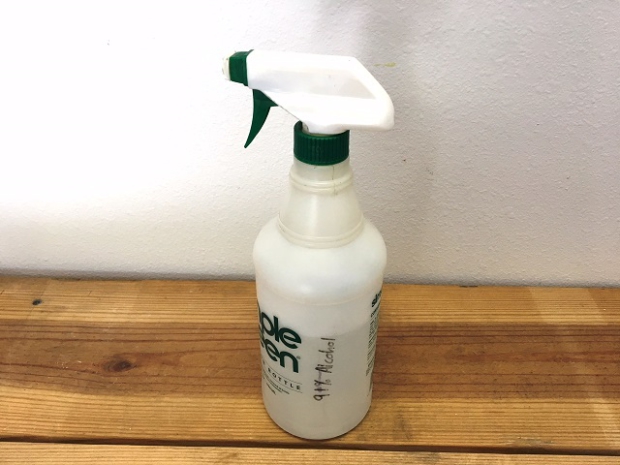
You can also use an automotive brake parts cleaner if you like, but it is more expensive and probably more toxic.
If your brakes get noisy and squealy, the easiest potential quick fix is to clean off the rotors with a CLEAN rag and alcohol. This will sometimes do the job. If, however, the contaminants have gotten into the brake pads, you will also have to remove and clean them, and possibly replace them.
On that note, you also need to do a process of "bedding in" the brake pads every time you clean the rotors off. This starts the process of getting pad material to transfer over to the rotor, which helps with smooth, quiet, more consistent braking. The basic procedure is to do about 10 strong repeated stops from about 20 miles per hour. Sprint workout, anyone?
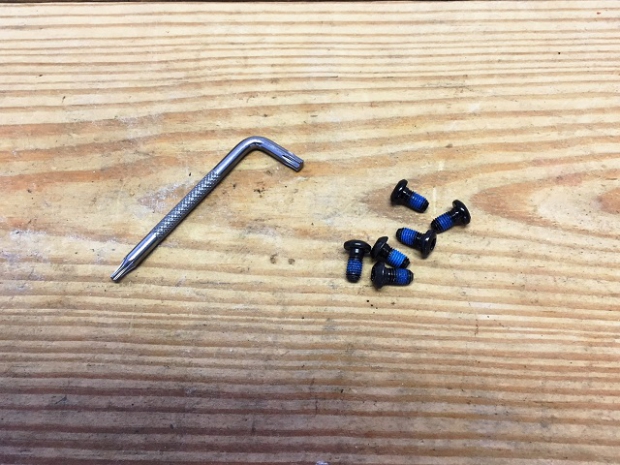
Rotor Removal Tool(s)
In order to remove your rotors (i.e. for travel, replacement, or transferring to a different wheel), you'll need some tools. Luckily, you may already have them.
There are two main systems for attaching a rotor to a wheel. The first uses six small Torx T25 bolts. All you need is a T25 Torx wrench (and most manufacturers recommend that you use a torque wrench for this, meaning you'll need a T25 Torx bit with 1/4" driver).
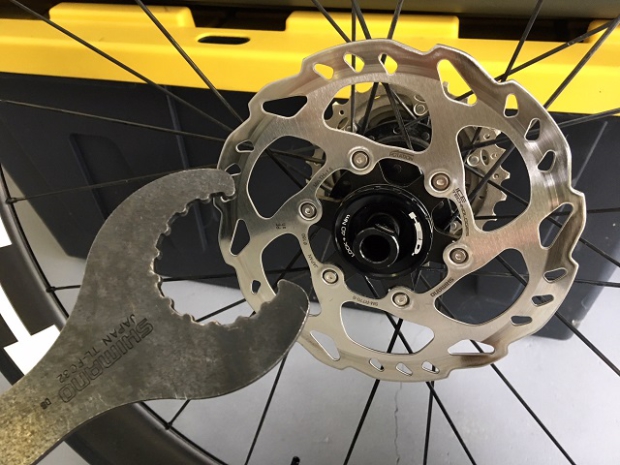
The other attachment system is Shimano Center Lock. This uses a splined pattern and lockring, and is a lot faster to install than the 6-bolt. Note, however, that there are two different styles of lockrings for this. First, the standard style, which uses a Shimano cassette lockring tool for installation:
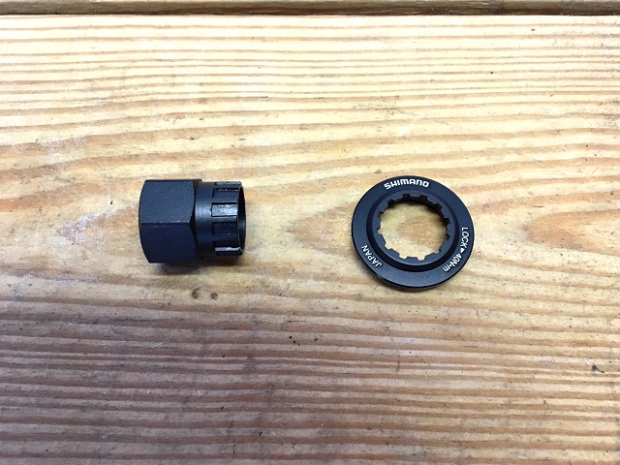
The second style of Centerlock is specific to wheels with 12 and 15mm thru axles, and requires a Shimano bottom bracket tool:
Most aftermarket hubs or rotors include the first style (for quick release axles). If your wheels have thru axles, you will need to purchase separate lockrings.
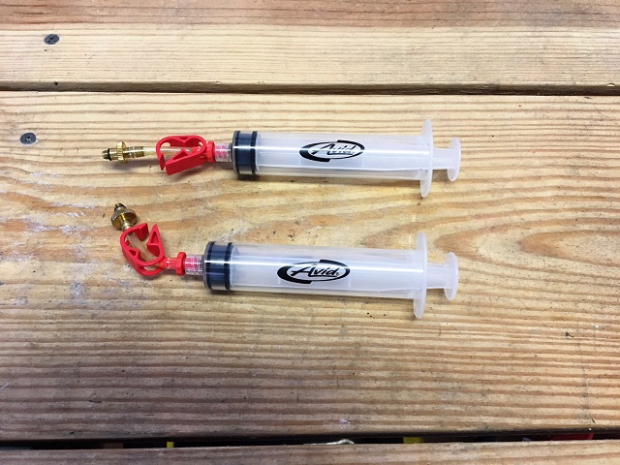
Bleed Kit and Fluid
If you own a hydraulic disc brake setup, there is a good chance that you'll have to bleed the brakes at some point. In layman's terms, this means you'll either have to remove air bubbles that have got into the system, or completely replace the fluid.
In order to do this, you'll need a bleed kit. These are manufacturer-specific, so double check that you buy the right one (i.e. a SRAM bleed kit will not work with a Shimano brake system). Typically bleed kits also include a handful of spare parts – O-rings, hardware, etc. DO NOT throw these items away.
Bleed kits will often include brake fluid for your system. Again, these are manufacturer-specific. As mentioned in Part 1 of this article, SRAM systems use automotive DOT 5.1 fluid, which must be periodically replaced due to its hygroscopic (water-absorbing) nature. Mineral-oil systems such as Shimano and Magura last much longer and don't need replacement "just because".
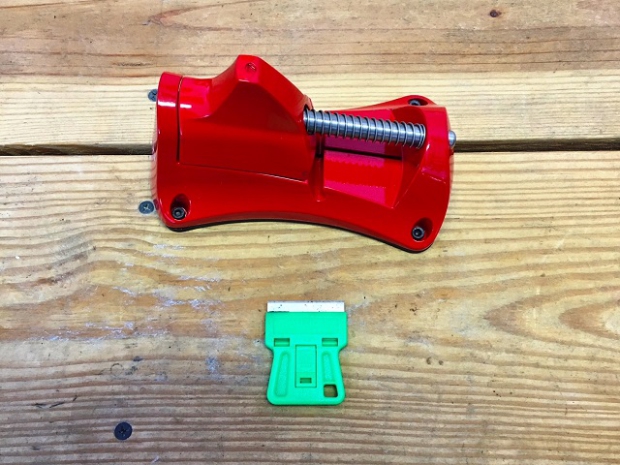
Housing Cutter
To cut hydraulic housing to length, you cannot use a cable cutter meant for mechanical shift/brake housing. The ends of hydraulic lines need to be perfectly flat. The cheap method of doing this is a flat razor and a steady hand. Manufacturers also have their own fancier cutting tools, all the way up to my shop-grade Avid cutting tool (pictured below).
Wheel Swapping
When it comes time to swap wheels, your procedure will change compared to rim brakes. First and foremost, you will almost certainly have to readjust your brakes. This is hit-and-miss with rim brakes, but normally when they’re set up properly, adjustments only take a few seconds (i.e. re-center the caliper with your hand, and maybe change pad spacing via the barrel adjuster).
To sum it up, with the way tolerances stack up between hubs, forks, frames, and rotors, the left-right location of the rotor changes slightly from wheel to wheel.
Road disc systems often have 0.5mm or less of pad clearance on each side, so even a tiny bit of change in rotor location can cause pad rub. Even using ONE bike with ONE wheel and ONE brake, I've witnessed the pad rotor location change simply by loosening and re-tightening the quick release skewer (and wheel manufacturers have confirmed to me that this is a known issue, affected by dropout specs, paint application, skewer tightness, etc. The rotor just doesn’t always want to locate in the same spot when you tighten and loosen the skewer – even with the bike on the ground and the wheel pressed firmly into the dropouts). Generally speaking, this is less of an issue with thru axles, though they bring their own issues, such as requiring special adapters for use with roof racks, repair stands, and indoor trainers.
Even with two identical pairs of wheels and rotors in one frame (featuring thru axles), I have had to readjust the caliper position when swapping wheels. It gets easier as you do it more often, but it can be inconvenient. Consider this a heads-up. Last-minute wheel changes before your race are now a thing of the past (do I want that 90mm front rim, or is it so windy that I should go with the shallower 60mm?). I highly recommend deciding the day before and checking to make sure your brakes are 100% locked and loaded.
Travel and Storage
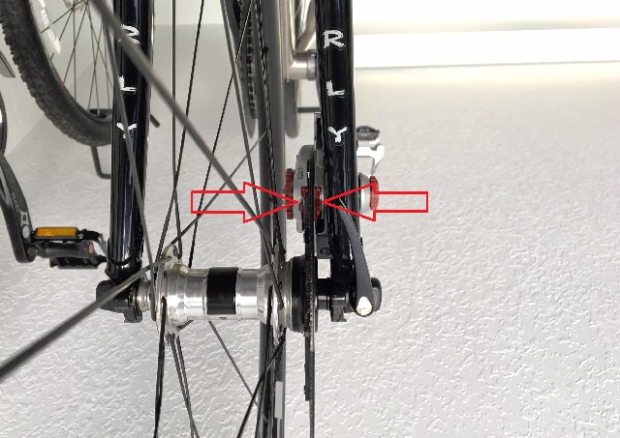
The main thing to be aware of for bicycle storage is that you shouldn't hang a bike equipped with hydraulic disc brakes upside down (note that my two bikes pictured here have mechanical discs, which are fine to hang upside down).
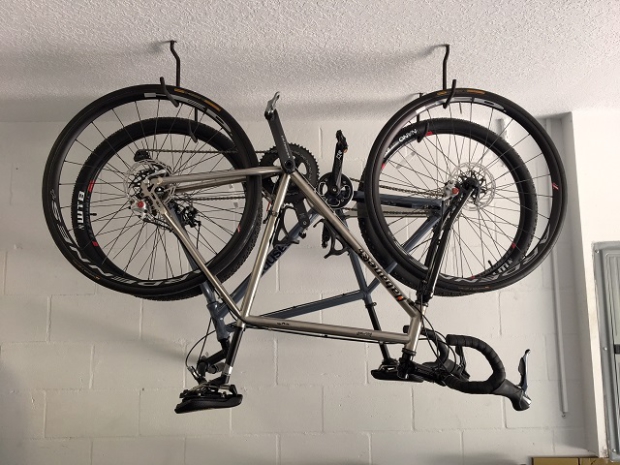
Someone will disagree with me here and comment how they hang their bike upside down without issue. However, there's no way around the fact that it's riskier than leaving the bike right-side-up.
This is because any air bubbles in your brake lines will travel to the highest point. Normally that's the reservoir in your brake levers, which have a little bit of extra space to allow for temperature change. If there's a little air up there, no big deal. If, however, the bike is upside down, the highest point is now the caliper. If the air bubbles travel here, that can lead to spongy or dangerous brakes. You can make your own decision, but I recommend leaving the bike rubber-side-down.
Note that there are some closed hydraulic systems, such as the Magura RT8 hydraulic rim brake. These do not feature a reservoir, and are 100% fluid-filled (if they’re set up properly). These are fine to hang upside down.
For airline travel, you need to get yourself some of these:
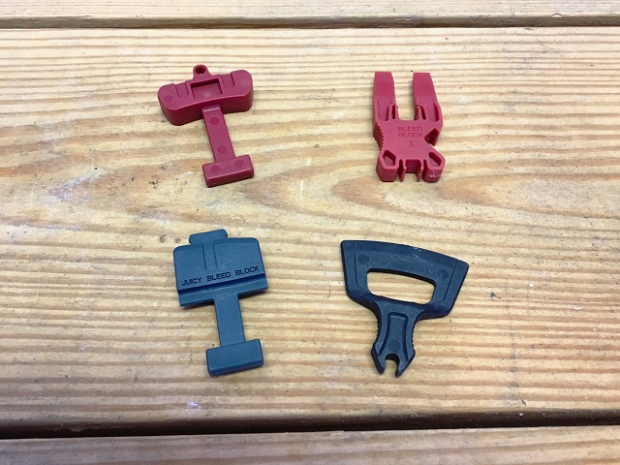
These are bleed blocks / pad spreaders. If you took my advice and bought a bleed kit, it should have included a couple of these (they're a tool that's normally used in the bleed procedure for hydraulic brakes). When you put your bike in a travel case, you should always have a bleed block in each caliper to ensure that the pads stay put. If there is no bleed block and the brake lever gets squeezed, it will advance the brake pads, reducing the already-super-tight clearance between the rotor and pads. With a bleed block in place, this won't happen. Oh, and make sure that the bleed blocks are clean and grease-free so you don’t contaminate your brake pads and cause squealy brakes upon arrival at your destination.
Mechanical disc brakes don't require bleed blocks, since the pads don't auto-advance when you pull the brake lever. That also means that you will need to manually adjust the pads to become closer to your rotor as the pads wear out. Tools for this depend on your brake system, but they're usually common ones such as T25 Torx or 2-5mm allen wrenches.
Be sure to remove the rotors from your wheels any time you’re flying with a bike box. If you leave the rotors on, there is a good chance they will get bent during travel (and you won’t find this out until you reassemble your bike and take it for a spin).
Wrap Up
Hopefully that clears up a few of the basics about what you can expect with a disc brake system. The debates rage on as to whether they're actually "harder" to live with than rim brakes. (I think this depends entirely on the brake system you're using, but about 8 times out of 10, discs require more work). The debate continues on whether the improved performance of discs is worth the effort, or even if there is a clear performance improvement at all. Those are topics for another day, and/or someone smarter than me.
At the end of the day, regardless of your braking system, proper care is necessary to ensure safe and reliable function. Even if you primarily rely on a mechanic to do your work, I encourage you to become familiar with your brakes – you never know when some roadside wrenching will be necessary to get you or a friend back home.


Start the discussion at forum.slowtwitch.com