

Canyon Speedmax CF 7.0 Makeover
Clark Kent could transform into Superman in seconds; sometimes in a phone booth or behind a hedge. We brought the Canyon Speedmax CF 7.0 into the TTS Fit Studio for its own super transformation.
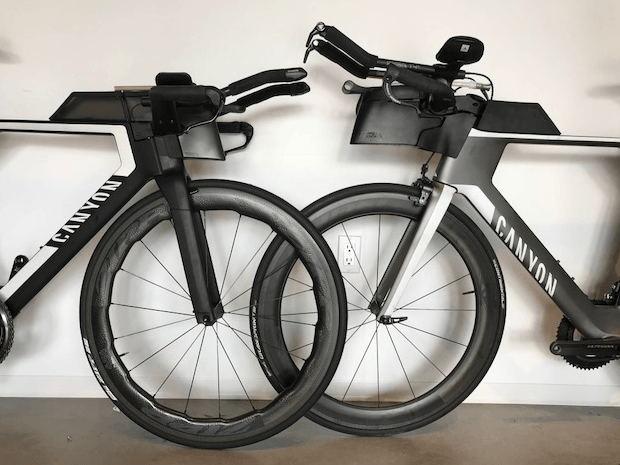
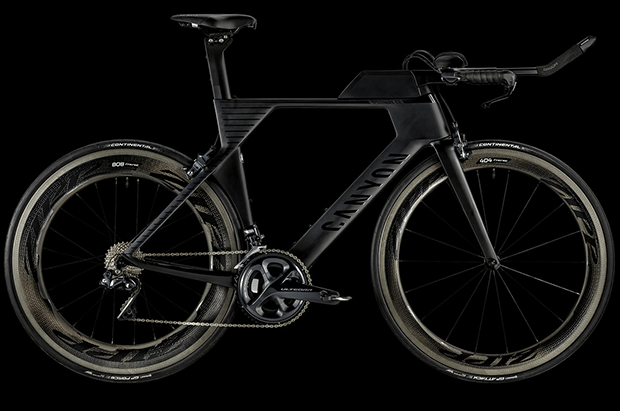
Below are two photos of the same Canyon Speedmax CF. The One just below is the CF after some modifications which I’ll describe. The next image down is the “before” picture. This bike, for you who aren’t familiar with it, is the “mortal” version of the Speedmax SLX, the superbike that has been under the last four male Kona Champions.

The picture below is the Speedmax CF that can be found on Canyon’s site. Of course, it's not exactly what you can buy today, and fast on the heels of what you're reading here are overviews of Canyons you can buy for the 2020 season. But what if you're like me and you already have this Canyon?
We aren't going to orphan you. Your current Canyon still has a lot of utility in front of it. At least I hope so, because the bike I'm writing about is my race bike for this upcoming year.
The image above is the same bike, just after I added a few things. Even this bike has been modified since the picture was taken and I’ll tell you what I added.
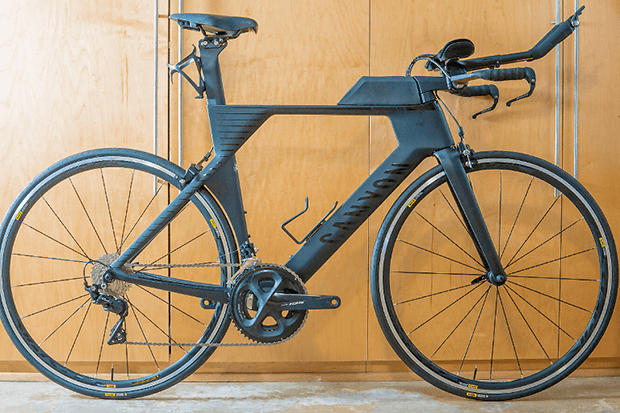
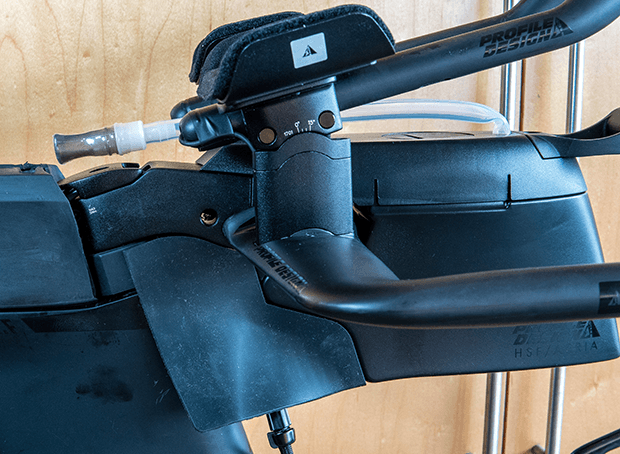
The front end is where the biggest changes were made to my bike, and I changed 2 things: 1) I added electronic shifting; 2) I changed the handlebar/stem.
I didn’t go whole hog on electronic shifting. I just changed the bar-end shifters. Yes, I could’ve also placed shifters on the pursuits, and maybe I will. I don’t now have the capacity to do that, because I added a 3-port junction box. Had I added a 5-port version I’d have ports ready to accept those shifters. But look, this was an entry level bike and the reason I have this bike is because it was so affordable. I’m updating this bike as the budget allows, and I saved about $50 by keeping to the 3-port junction.

What I took off this bike were mechanical bar-end shifters and Shimano 105 mechanical front and rear derailleurs. What I added were parts of an Ultegra Di2 groupkit: bar-end shifters, 3-port junction box, an internal battery, front derailleur, rear derailleur, a junction b, and 4 E-tubes to connect those pieces. Retail on that smattering of Shimano Di2 goodies could be had for about $800 and I hunted around, was patient, and in the end spent about $600.
The image above is “before” I went to work on this bike. Below is “after” and as you can see, one reason this cleans up nice is it’s easier to hide electronic cables. It’s also much easier to work on this – or any – tri bike with internal cables if you can get rid of mechanical shifting.
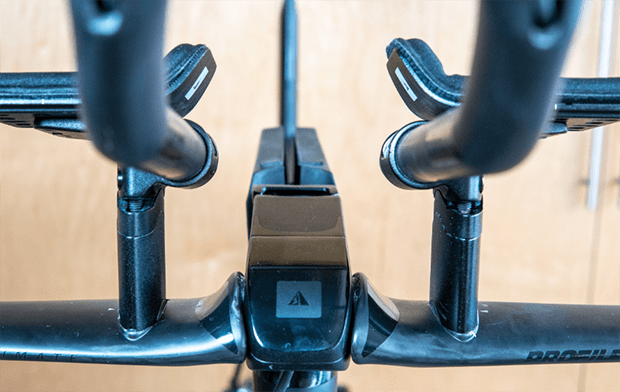
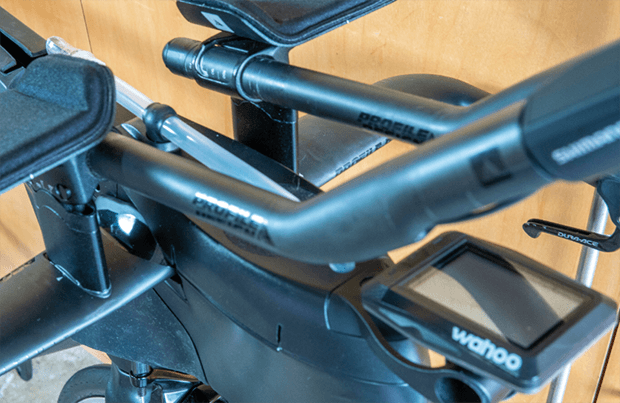
The bar and stem changes meant removing Canyon’s own V21 stem and H30 bar and replacing it with a Profile Design Aeria Ultimate combo. The Aeria Ultimate stem has space inside large enough to house the junction box. Both front and rear brake cables are routed internally through the bar and stem without seeing the light of day.
The E-tubes from the shifters exit the back of the aerobar extensions, and, after a dab of electrical tape, tuck neatly into a channel in the back of the risers before disappearing into the bar as well. Profile-Design’s Aeria Ultimate Stem is $159 and Aeria Ultimate cockpit is $1,100. (This was the big financial gulp. But, last I checked PD has a sale going on the Aeria Ultimate stem, so, you can clean up your Speedmax a bit just with the stem purchase if you’re upgrading it to electronic.)
The wheels that come stock on this bike are 30mm deep and aluminum – just about as special as Clark’s chunky, black glasses. We pulled those off and put on a set of Profile Design carbon clinchers. The front wheel is Profile’s 58/Twenty Four. At just shy of 60mm deep and with only 20 bladed spokes this wheel is plenty slippery without getting tossed about in cross winds. The Rear wheel is 20mm deeper as the Profile Design 78/Twenty Four name suggests.
Now, speaking of things-on-sale, I originally photographed this bike without PD’s 24 wheels. Then I reshot the bike with these wheels – they were a late add – because PD is having a sale on these wheels and I got a pair. They’re rim brake wheels. But that’s what I need for this bike. And as you can see, I don’t think you could hope for a better cosmetic match.
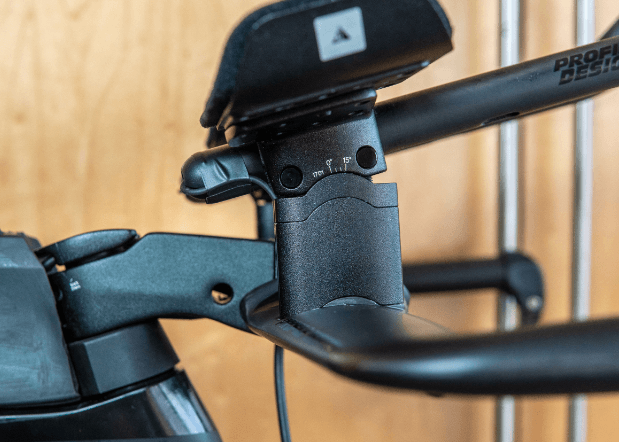
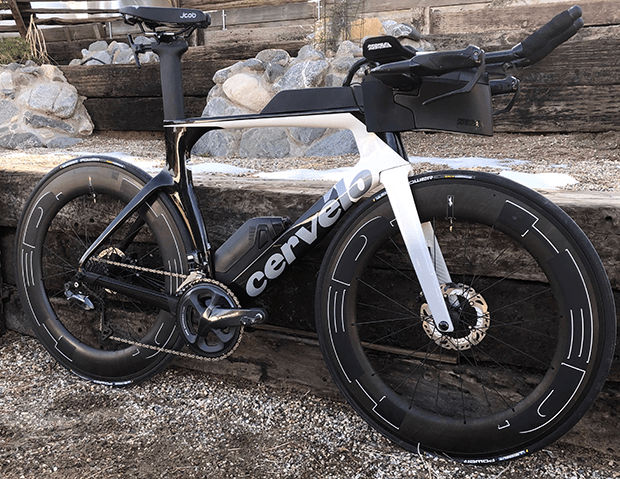
Perhaps the final touch of Clark’s “super” transformation is the cape. Here it’s the Profile Design Aeria Hydration system that is paired to this front end. On the underside of the Aeria stem are two, small threaded holes. After screwing in an unassuming mount, the hydration system simply snaps into the place making this bike nearly faster than a speeding bullet. Just note that if you're going to go this route, get the faceplate that goes on PD's stem. (The Cervelo P-Series makeover, referenced just below, has a description of this.)
I made 2 more changes to this bike, that are not reflected in the complete bike photo above. First, I added PD’s hydration system and this is the same system we showed on the Cervelo P-Series makeover a couple of weeks ago. I love this hydration system, because it makes a mortal bike look (and function) like a superbike.
I’m not the first person to put this hydration system on this bike. Others (Jay Prasuhn in particular) made this look good almost exactly 2 years ago, on our Reader Forum, there’s a whole thread about this, both this stem and this hydration system, and above is the image from Jay from that thread. But there’s a problem with this. It doesn’t really work well with a side pull front brake. There’s a malleable part of this system that curves around whatever sits behind it – a kind of rubber cowling – and the cable entry forces that cowling outboard.
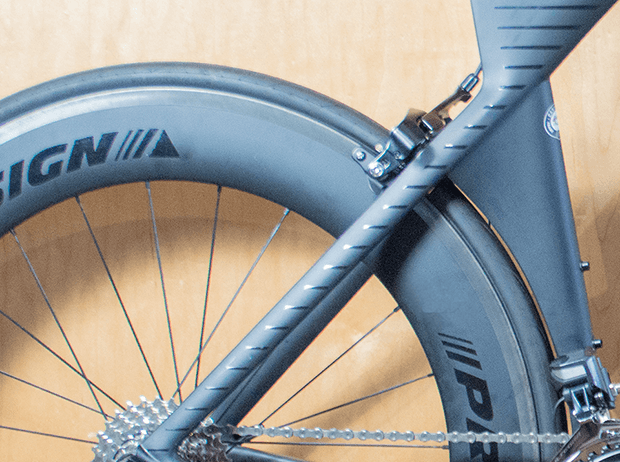
The hydration system isn’t a good match for that side pull brake, which you can’t really see in Jay's pic because the cable’s entry is on the other side of the bike. But you can see it in the pic above. It’s best on a bike with disc brakes, or on a bike with a center pull brake. As it happens, the PD Aeria Ultimate stem and a TriRig brake and this hydration system make a terrific match.
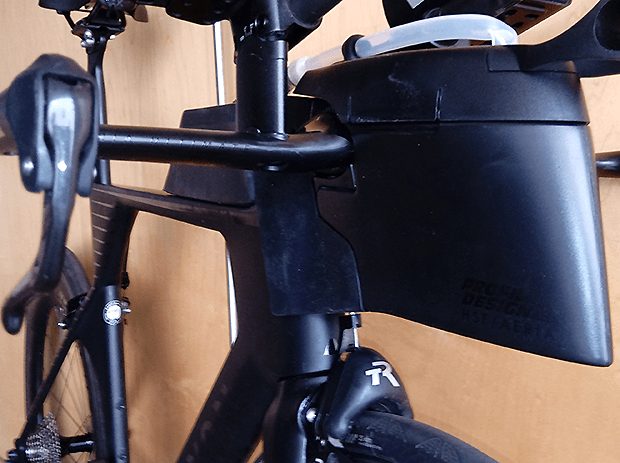
The image above is just an iPhone quickie to show you that yes, the TriRig brake did solve the problem, and finishes this upgrade off nicely.
The next time I write about this bike – which I hope will be soon – I’ll snap some pics of the complete bike with all the upgrades, plus whatever I can afford to add to this bike between now and then.

Start the discussion at forum.slowtwitch.com