Speed Concept brake tips
It’s Tech Time again at Slowtwitch HQ. Today’s subject is a good one, so strap on your geek goggles and get ready for a ride. Many of you have heard that modern triathlon bikes feature brakes that are aerodynamically superior, but also challenging to live with at times. There are a lot of different proprietary designs, with a lot of different proprietary parts. While many of our readers take their bikes to a local shop for service, it never hurts to take a gander at how your bike works.
One of the most popular tri bikes that I see around is the Trek Speed Concept. It’s a very fast frame by all accounts, and there are a whole mess of them being used at races today. In my experience, they also feature one of the most labor-intensive rear brakes around. It’s a very aerodynamic brake, to be sure, but you have to know what you’re doing in order to set it up right. Our article today will cover my favorite tips and tricks on how to get it working smooth-like-butter. Even if you don’t own a Trek, many of our tips will apply to ALL types of rear TT brakes.
We will cover the first generation Speed Concept. Why? Because that’s the bike I happened to have in my garage to work on. I’m told that the second generation has an updated brake that is easier to work with, but I don’t have any experience with it just yet. Why aren’t we covering the 9-series integrated front brake, too? Because the bike I’m working on is a 7-series with a standard front brake. The rear brake is the common denominator; it’s on all of these bikes. Also – if you ask me – anyone that is skilled enough to handle this rear brake will have no trouble managing the 9-series integrated front brake, too.
For those interested, we did a similar article on the Trek Madone, located HERE (apparently all of my friends own Treks; I have no particular bias for or against them).
Wrench Time
To get started, you’re going to need a work stand. You either want something that clamps on to an aero seatpost, or a fork-and-bottom-bracket ‘Euro-Style’ stand, such as this:

I prefer this type of stand because it’s A) very stable, and B) allows me to flip the bike over quickly. Flip the bike over? Yes – you will be doing this during the brake service procedure. You need a large work area, and some sort of bench, table, or chair to rest the saddle on when you flip the bike over. I do this in my garage, and use my bench vice as the saddle recipient.
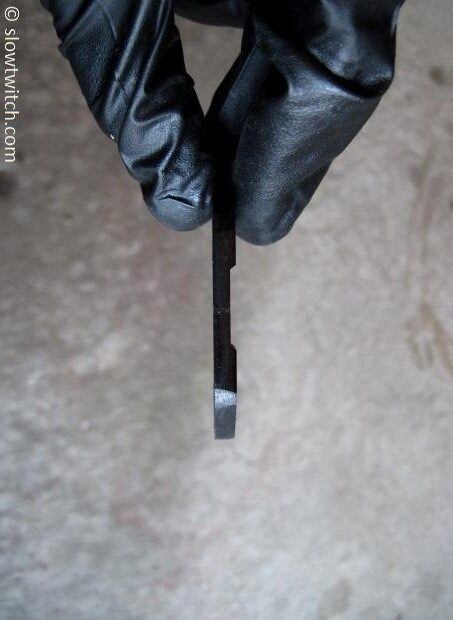
The Speed Concept has an aero brake cover. I line this up so the two larger points on my Park work stand touch the cover.
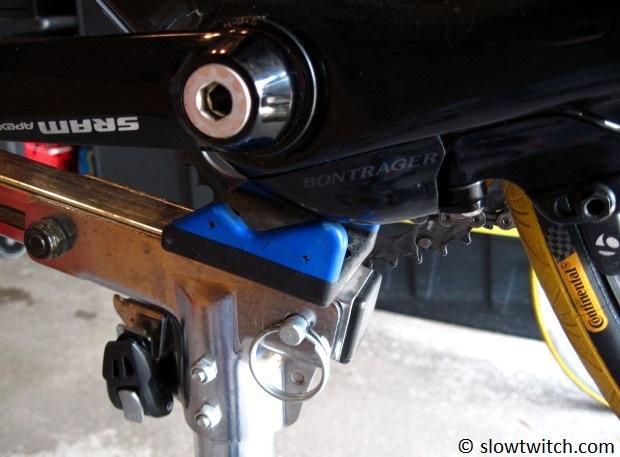
With most brakes that mount down near the bottom bracket, it is ten times easier to perform your service with the crankset off the bike. If you’re only doing a very minor adjustment, it is sometimes possible to do it with the cranks on.
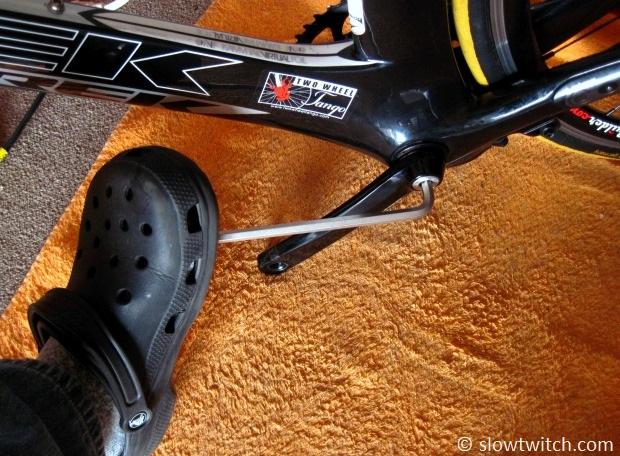
That also brings up a Quick Tip opportunity. What do you with a SRAM crankset when the main bolt has seized up? I huffed and puffed with my 8mm allen wrench, and it wasn’t going anywhere.
You need some mechanical advantage: Place the bike on the ground with the front wheel removed. Arrange the crank so the non-drive arm is touching the ground (so it won’t move). Insert an 8mm wrench, step on it with your Crocs, hear a loud ‘pop’ as the bolt loosens, and go on your merry way. It’s rudimentary… and effective.
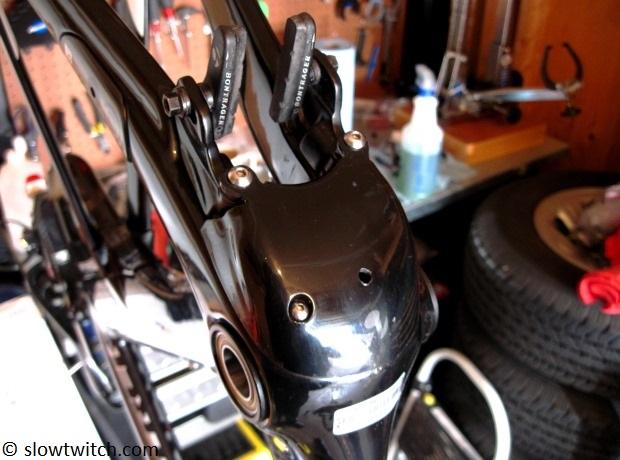
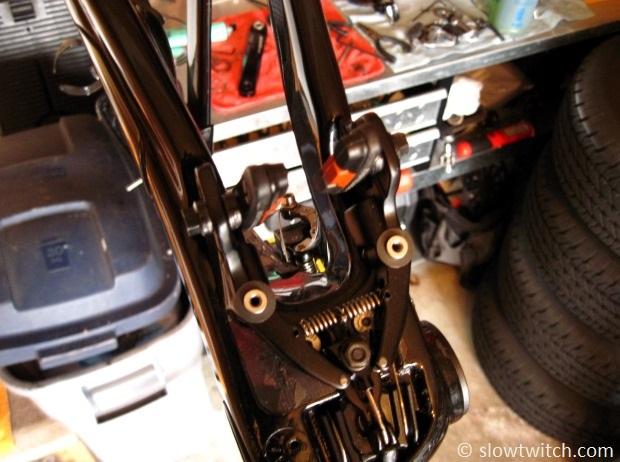
With the crank out of the bike, the next step is to put it back in the stand and flip it over. As you can see in the photo below, there are three bolts that you must remove – two 3mm hex bolts, and one 2.5mm hex bolt. Unthread them and remove the cover.
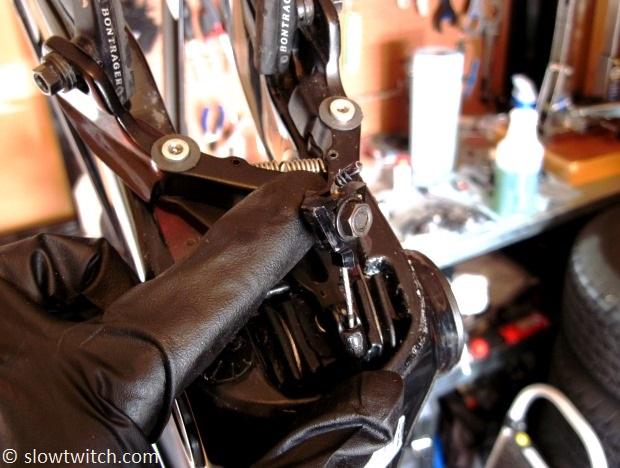
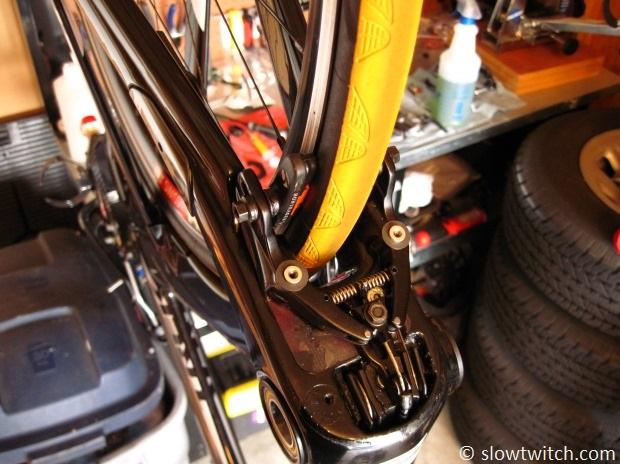
With the cover removed, here’s what it looks like (below). Notice that it is a center pull brake – the little triangle shaped piece in the middle pushes the two brake arms to move the pads closer to the rim. You can’t see them very well in this photo, but the two centering bolts are underneath the brake arms (you access them by removing the brake).
Also notice the black strut that runs between the two brake posts – this is where your two 3mm bolts threaded in.
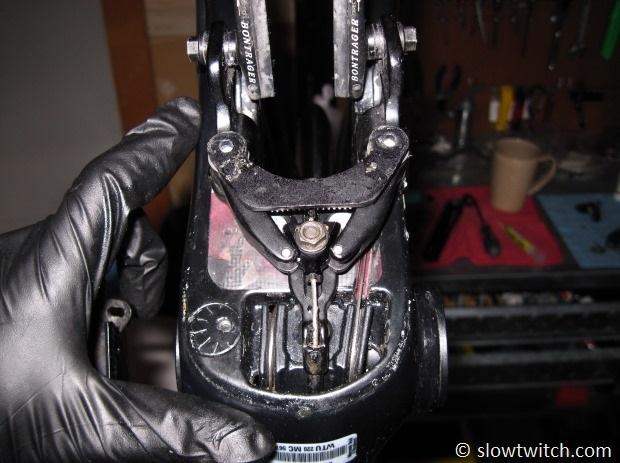
That black strut comes off easily – without the 3mm bolts, it just lays in to place. Note that it is directional – there is a cutout on one side. This cutout faces up towards the brake; the flat side faces down towards the road.
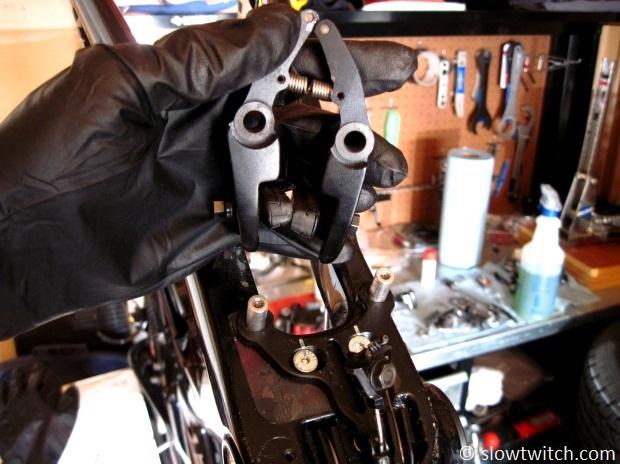
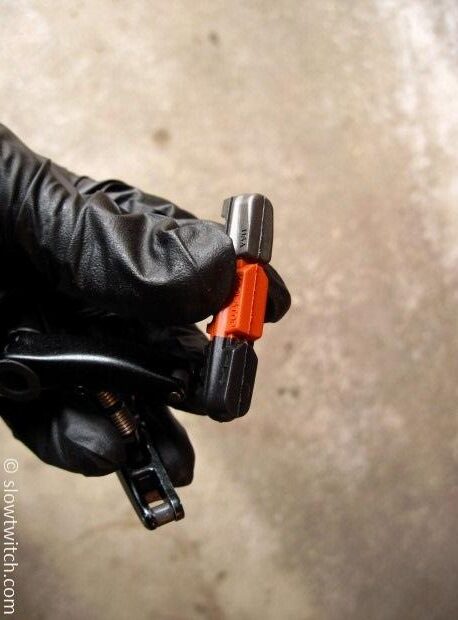
With the strut off, the next thing I do is push the pads together with my hand and pop the center pull piece out of its place.
You can now remove the rest of the brake (it slides right off).
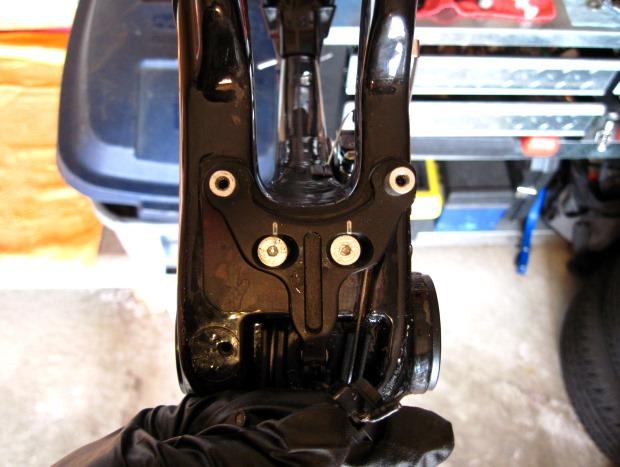
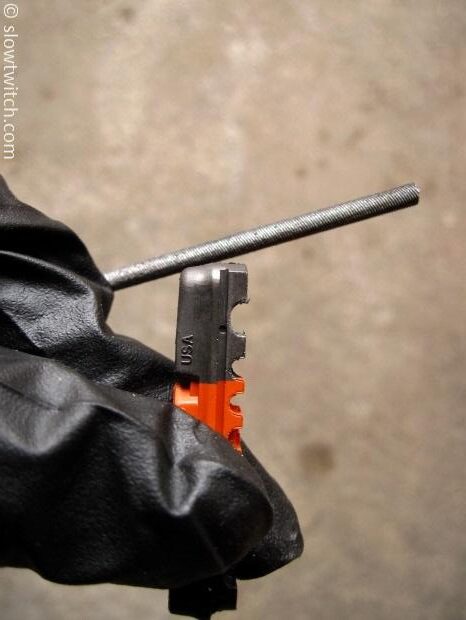
Now you’re essentially at ground zero for the brake. If you need to adjust the centering, now is the time. In the photo below, you can see the two 3mm bolts that adjust this. On my particular bike today, these bolts were almost seized into place. I was able to carefully remove them, but the bolt heads nearly stripped out. For that reason, I recommend that all Speed Concept owners buy a spare bolt kit. Along with a spare derailleur hanger and seatpost binder assembly, they can save the day in an emergency, so you’re not left bike-less as you wait for parts.
For today, our bike doesn’t need new shift cables. If it did, I would remove the two 3mm bolts (above), remove the brake post plate, and dive in to those. Yes, you must always remove the entire rear brake to access the shift cables on this bike. Even if the cables are in good shape, I always take this opportunity to apply some lube to them (assuming the bike doesn’t have a sealed cable system installed).
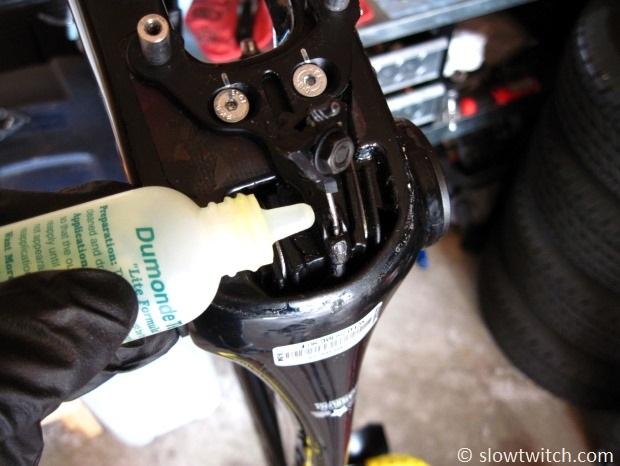
Dumonde Tech is my favorite chain lube, and it actually works well as a cable lube, too. I normally use the standard dark green on chains, and the yellow ‘Lite’ formula on cables. Since the bike is upside down, all you have to do is drip a little bit on each of the three cables and let gravity do the work to get it up in to the housing.
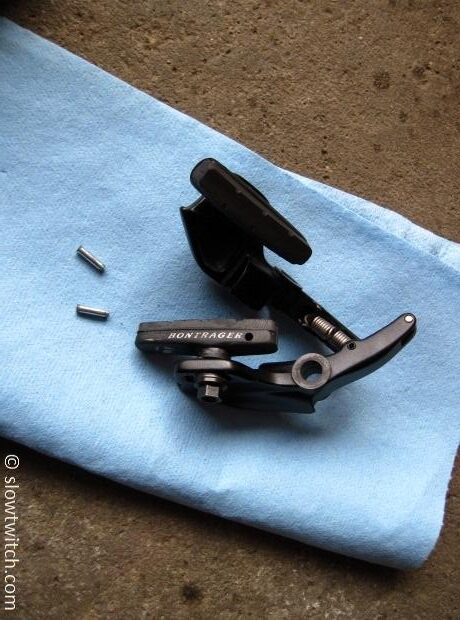
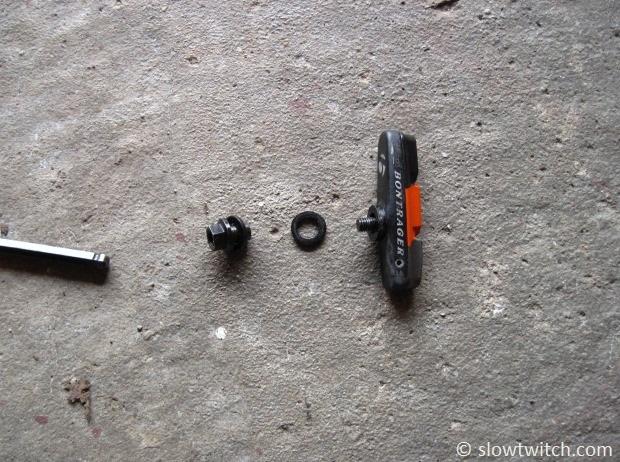
While our bike doesn’t need new cables, it is getting a brake pad upgrade and a shot of lubricant. In order to remove the pads, you must take one 1.5mm hex bolt per side. Not all tool kits include a 1.5, so make sure you have one before taking everything apart (many kits only go as small as 2mm).
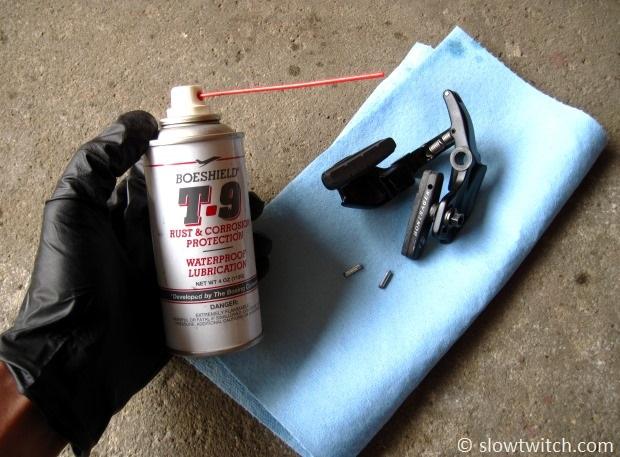
Normally with any low-mounted rear brake, I spray it down with lube any time I remove the brake pads and crank. Given its location, the brake is a recipient of a mixture of road grime, chain lube, sweat, sports drink, and other unmentionables. Compared to the standard rear brake location, the low-style always needs service more often. Spray lube protects the metal from corrosion and also lubricates all of the moving parts, improving brake function and feel.
My favorite lube for this job is Boeshield T9. It’s similar in purpose to WD-40, but works better and lasts longer, in my experience. I normally remove the pads before spraying the brake down – the last thing you want is a brake pad that’s contaminated with lubricant (lube reduces friction… which is not exactly what you want with a brake pad).
On this particular bike, however, the brake pads were absolutely locked into place. I put the edge of the pad on the edge of my workbench and put my full body weight on the brake several times; it wasn’t coming loose. The solution? Hose down the whole brake – including the pads – and let it sit for ten minutes.
Because we’re replacing the pads anyway, I wasn’t concerned with soaking them in T9.
I pushed, pulled, and finally manage to get the pads out of their holders. The culprit? It was a delicious mix of… well… I don’t want to know what that stuff was:
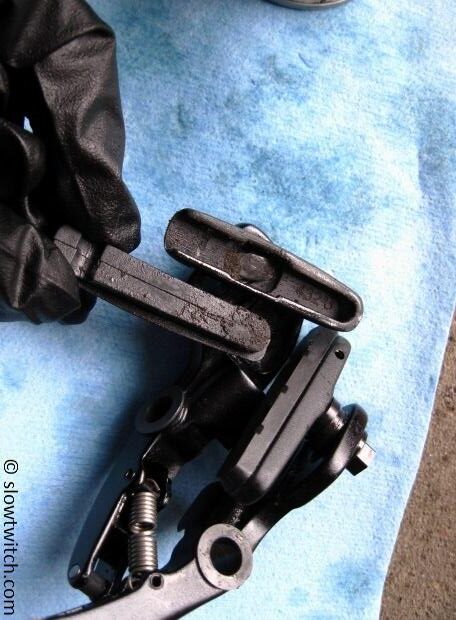
While the pads were out, I sprayed out the inside of the pad holders with T9 and wiped them out very well. Wear gloves for this stuff.
Our new pads are my go-to for aluminum rims: Kool Stop Triple Compound. They offer a little bit more bite than the black-only dry compound, while aren’t as grabby as the dual compound or super-tacky salmon compound. When in doubt, I use these. If the brake caliper or lever aren’t very robust, I’ll go with the dual or salmon to supercharge it. In my experience, all of these compounds pick up less metal off of the rim compared to other brands.
Note that I’m using the newer ‘Dura 2’ brake pad shape from Kool Stop – the contact surface is narrower than the original shape, which works better with narrow braking surfaces on modern wheels. With a difficult-to-adjust brake, a narrower pad is easier to deal with.
Here’s your other secret tip on brake pads: With calipers that have the long 1.5mm pad retaining bolts, file out a little bit of the slot on the back of the pad (these are different than the standard 2mm bolts on most modern road calipers). Original SRAM road calipers were notorious for needing this treatment. To make a long story short, the clearance between the bolt and pad is very tight; it is sometimes impossible to reinstall the bolt. I use a small round file to hog out the back of the pad, making bolt installation much easier.
Now we begin the process of adjusting the brake for the wheel. Begin by installing the brake arms back into place.
This is where the tedious part starts. Note: I leave the bike upside down for all of this. The process is:
1. Install the rear wheel. Be absolutely certain it is square in the dropouts before tightening the skewer. If it’s askew, you will set up the brake for a crooked wheel… so the brake adjustment is incorrect when the wheel is straight.
2. Check brake pad placement and clearance. Since the strut and 3mm cover bolts are not installed, you need to be double sure that the brake is pushed all the way on to its posts.
3. Adjust pad placement as necessary to match the braking surface on the rim.
4. To adjust caliper adjustment left-to-right: Remove the rear wheel, remove the rear brake, adjust the brake mount via the 3mm bolts, reinstall the brake, and reinstall the wheel. Repeat as necessary.
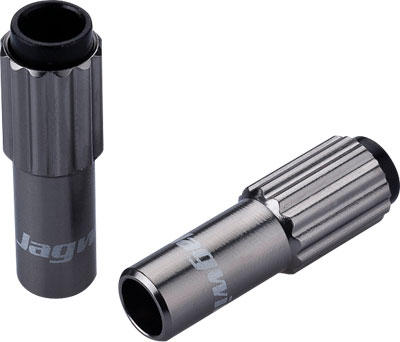
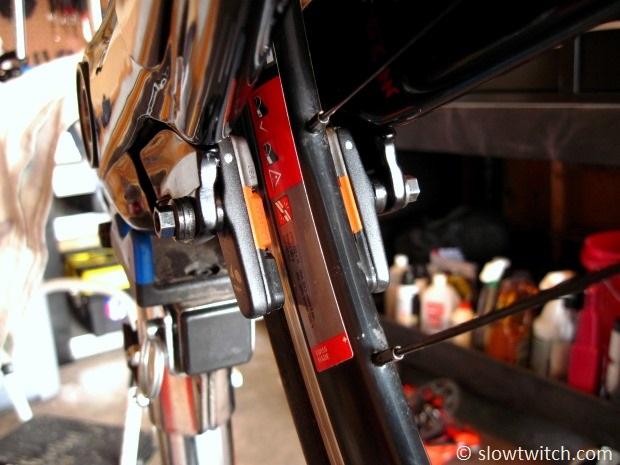
5. To adjust the brake width, you must either have a barrel adjuster pre-installed into the housing (see photo below), or use an open-ended wrench to adjust the cable. If the latter, you must install a brand new cable about 80% of the time. Due to the tight clearance to the tire, the cable end must be cut super short, leaving you no adjustment range unless you use a new cable.
If you’re really good, you could probably dial the brake adjustment in so that a barrel adjuster would allow you to run two different rim widths between training and racing wheels. You would have to get it absolutely dead-on perfect. Even if you’re running the same width, you must also be sure that the rims are centered identically, or else you must remove/adjust the brake to accommodate for it when you swap wheels.
For large adjustments of pad width, you can swap washers around on the caliper. Each brake arm has two washers of about 1mm in width. My new pads were substantially thicker than the old worn pads, so I had to move 1mm worth of washers on either side of the brake.
With the brake centering (step 4 above), the difficulty is that you must remove the brake to adjust it, but you can’t check your work until you’ve reinstalled the brake and wheel. I like my pad contact to be perfect on both sides of the rim; if I really can’t get it dialed via the brake adjustment, I’ll use a Dremel tool on one of the pads to remove a little bit of material to center my brake.
What about removing the rear wheel quickly? Is there a quick-release to open the brake – to clear the tire? Unfortunately, no. This is where the housing barrel adjuster can come in handy. This also gives a nod to using a rim width that is similar to your tire width. When these two match up, you can often remove the wheel from the bike without opening up the brake. On this bike/rim/tire combination, I can just barely get the wheel out without opening the brake.
After you’ve dialed in the pad placement, pad width, and pad centering to your satisfaction, reinstall the strut, brake cover, and bolts. I also wipe the pads down with 91% isopropyl alcohol, to remove any grease or lube that gets on them from the repeated installation and removal of the brake. If you removed the crank, put ‘er back on so you can get to riding.
If you did everything right, the brake should feel… like a brake. T9 spray lube goes a long way towards smoothing out the moving parts and protecting them against all of the grime they will inevitably receive.
How often should you do this procedure? Assuming you have training and racing wheels that are the same width and braking surface material (and are dished the same), you shouldn’t need to ever really adjust the brake, save a few turns of a barrel adjuster as the pads wear down. Cable replacement should happen every year or so. Apply some spray lube when the brake starts to feel sticky – call it every four to six months – and your Speed Concept should live a long and happy life.


Start the discussion at forum.slowtwitch.com