Speed Concept 9.9 preferred build
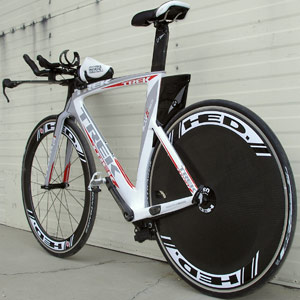
I spent a good part of 3 days building a Speed Concept 9.9 last week, and a good part of the next 3 days riding it. Let me tell you about both experiences.
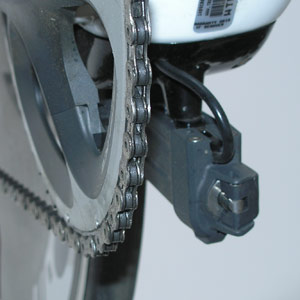
I should say in advance that I expect a lot out of Trek, and I thought I'd make this exercise as difficult on this company as possible. I therefore chose to install on the bike a Shimano Di2 groupkit with its wiring routed internally. This is not as simple as you might think. Most bikes—even superbikes—are not quite ready for a straightforward internal Di2 install.
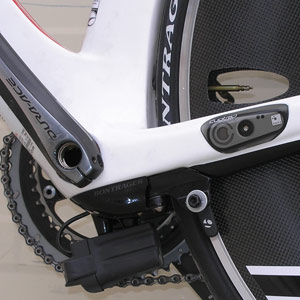
This prompted Shimano—from whom I obtained a Di2 TT/tri kit—to send me wiring and harnesses for internal routing; and Trek to send me a couple of items (like a rear brake caliper housing with bosses for the battery mount) specific to this groupkit.
I chose two sets of wheels for this bike, both by HED: the training wheels are a set of HED Belgium rims built around a Shimano Dura Ace 7900 hubset. The racing wheels are HED Jet 6 front and Jet disc rear. It's important that all four of these wheels represent a sort of matched set, because many of today's superbikes get ornery when you attempt to vary the width of the braking surface. HED has championed a wider rim in recent years, with the Ardennes and Belgium rims and corresponding aero wheel shapes. Both the training and racing wheels have identical rim widths, so, when I switch from one to the other I don't have to adjust brake caliper widths.
This wheelset matches very nicely with the Bontrager Race XXX Lite tires I mounted on all four wheels, such 22mm width a good match for HED's rim profiles. Because these tires on the rims make a U-shaped profile rather than the typical bulb-shape, the vertical sidewalls add structure to the tire, and I can and did ride with 95psi in the training tires and 110psi in the race wheels, while racing.
This wheel choice was a go/no-go proposition, and I'd be sitting with some very nice—and dormant—wheelsets if the HEDs didn't fit. I wanted to make sure the Speed Concept would accept this rim profile—this rim width—without complaint. Happily, it did, no muss no fuss, and without any nonsense like shaving down the brake pads. (I do understand, however, that the Stingers are not such an easy match, though I don't know why—you'll want to inquire before you mate Stingers to a Speed Concept.)
The Build
Before I get started, if you think the bike I'm describing here might be something to which you aspire, there are two ways to make this dog hunt. In each case, if you want electronic shifting on your Speed Concept, you must go through Trek's Project One process, through a dealer. While no Trek website shows the ability to buy the frame, fork, integrated Bontrager aerobar, and stem, alone, and part and piece everything else out yourself, you can do this, and street price on what Trek sent me—frameset and aerobar—should be about $4500.
Second—again through the Project One website—you can build your custom Di2 bike. The advantage to this is that the Project One factory builds the bike, routes the electronics and the cables, and your shop doesn't have to do any of this. This is good, because I suggest you not invest in a Trek Speed Concept outfitted with Di2 built by a guy whose popping his cherry on your steed. This, unless you're happy to get heart surgery from a doctor who's making his first solo run on your ticker.
Fortunately, the Project One folks know the tricks, so, best to let them build your bike for you.
But maybe you're like me and are a do-it-yourselfer. I understand. Still, unless you have every tool in your garage that any good bike shop has; unless you are a pretty darned good bike mechanic in your own right; unless you possess additional man skills above and beyond your bike mechanic abilities; do not order a 9.9 and attempt to install Di2 on it. Neither this frame—electronic or cabled—nor Di2, is like anything else you've built.
Unless, that is, you've been building bikes for a very, very long time. This, because a Speed Concept seems very space-aged in certain ways, and—like a lot of the new superbikes—retro in other ways.
For example, you don't want to install the crank on your Speed Concept until you've routed all your wiring and cables, because you'll want access to the frame's bottom bracket area for this. Still, the BB is one example of a retro techno "feel". There is no bottom bracket, per se, and this is typical of Trek's high end road bikes. There are a pair of bearings you must press into the frame with a headset press, with an axle shield in between.
No big problem, except, make sure you grease the heck out of the outsides of these bearings, and the faces on the frame into which these bearings press. Otherwise, woe unto you if you decide to change your crank somewhere down the road. You're going to play heck popping those bearings back out and, when you do, you'd better have a new set to replace them with.
In my mind's eye I imagined how it is I'd get these bearings out. Too bad—I thought—there isn't a mini version of an old style headset cup extractor tool. (That would be perfect!) I ambled over the Park Tool's website, and typed in, "bottom bracket bearing extractor" and, lo, look what I found 😉 I'm going to immediately order myself one of these. As a bonus, by the way, you get the bushings needed for your headset press appropriate for pressing the bearings into the frame.
Note that you need a set of bearings that match the cranks you intend to use. I'm frankly not up on all the permutations you might need, just realize that the bearing you use must be the size Trek requires for press installation into a BB90 shell (37mm bearing OD) and the ID required for the axle diameter of the crank you intend to ride (SRAM, Shimano, FSA, Campy, whatever).
But first (!) you have to route all your wiring. My 9.9 came as a bare frame, with the fork installed, and the stem (such as it is) gauged to match my fit coordinates, and the Bontrager aerobar that mates specifically with this bike frame. The frame, and the Bontrager pursuit bar, came with cable housing routed. If you're hanging Di2 onto this bike, first thing to do is yank all that housing out. Which I did. Then I commenced routing Di2 wires by pushing a shift cable into one hole and hoping it emerged from another hole somewhere else on the bike. If the cable got close enough to that distal hole, an elbow-style spoke head works very nicely as a cable-grabber.
Then, one tapes, with plastic tape, the electronic cable to the shift cable and you pull your electronic cable back through. This is how you internally route cables in bikes. By the way, this is also how you route cable housing internally—you fish the cable through first, then push the housing onto the cable and then pull the cable back out the way it went in.
In fact, after I routed the electronic shifter wiring through the pursuit bar toward the brake/shift levers, I had to get shift housing out to that same spot, and that's the method used.
There are two other elements of the build that are worth noting. First, the brake calipers. They're both center-pull, they're both Trek-built for this bike only, and they're both hidden from view, on purpose, for aerodynamic reasons. They work more or less identically, except the front brake has easy-to-adjust pad centering screws, but the rear does not. The rear requires the removal of a cover plate, exposing the brake calipers, enabling you to adjust the calipers to suit, however with a bit more foofaraw than is needed to adjust the front calipers.
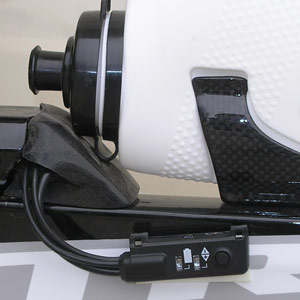
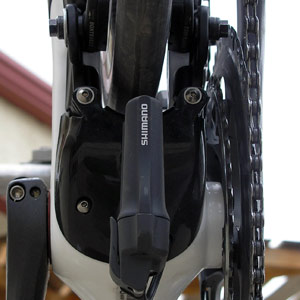
Finally, there are those Di2 wires. One wants to leave exposed the junction that provides for both derailleur adjustment capabilities and that tells you how much battery life is left. Yes, a Shimano Flight Deck computer also interfaces directly with Di2, but, the Flight Deck is not Ant+. Trek's DuoTrap is. So, if you want to use Trek's DuoTrap for, say, a cadence sensor, you have to choose an Ant+ computer head to pair with it. I chose a Garmin Edge 500 as my computer head.
This means you must leave exposed the Di2 junction, and it's made to be zip-tied to the STI brake housing. But this is a tri bike, not a road bike, and this junction is really not in the vicinity of any shift housing. So, the ticket is to adhere this junction to the frame with 2-sided tape (installation adjacent).
The Fit
The bike I built up for myself was a size-L, with a stack and reach of 541mm and 426mm respectively. Honestly, I'm in between sizes—I need the reach of an XL and the height of an L. The XL has an extra 25mm of stack, which I don't need, and an extra 20mm of reach, which I don't absolutely require but it would be nice—I like the extra reach because I'm slightly longish in the torso, and I ride pretty steep. That means I need length in a bike frame.
But, had I moved to the size-XL I'd have to use the shortest and lowest stem, no spacers, and I might just have made it work. It would have been very close and that really was cutting it too close. So I chose an L.
As noted, I ended up with the flattest, lowest stem, and one 25mm pedestal betyween the pursuit bar and the armrest. One possibility might have been to move from the low-height stem to the medium-height stem, and omit the pedestal under the armrest. But this wouldn't work, because the difference in height, one stem to another, is 35mm. The size-L is indeed the right-sized Speed Concept for me.
As an aside, let's talk about stems. The 9-series comes with 6 stem options: two lengths in low, medium and tall heights. If you were to end up on a Speed Concept with the tallest profile stem—especially if it's the long version of the stem—I'm guessing you're on a frame that's too small, and you'd be better off on a larger Speed Concept frame size. This is already a moderately narrow/tall frame geometry, and I think something's likely wrong if you're forced to use the tallest stem on this frame with its chosen geometry. Either you're an outlier; you got a bad fit; or you're on the wrong-sized bike. Best is if you're riding this bike with either the low or the medium height stem. I can't imagine many people riding this bike with the tallest stem size Trek makes for it.
Adjustability
You might think that 40mm or 50mm between stem sizes is too much—that there ought to be at least one stem in between. (Honestly, maybe instead of making the tallest stem option, Trek might've made a stem in-between the narrow and the long instead). Ordinarily, I'd be critical of only two stem lengths. However, the Bontrager bar adjusts—like certain Profile Design models, and like Blackwell (RIP), and others—by moving the extension fore and aft thru its bracket system, and moving the armrests fore and aft on the extensions. This makes the bar almost infinite in its fore/aft adjustability, obviating the absolute need for incremental stem lengths. This, as long as you're in the aero position, and, if we're only talking about fit (not handling).
There are two offsetting concerns to this. First, while the pads, and extension contact points, are extremely adjustable using this schema, the pursuit position is not. Honestly, the Bontrager pursuit bar sweeps a fair distance in front of the steering axis—too much in my opinion for optimal out-of-the-saddle riding. My hands were far enough in front of me—the steering lever sufficiently long—that the position seems unoptimized for riding while standing. This also caused me to have a kneecap-to-armrest clearance issue. I would prefer if the pursuit bar came with a second sweep—with less forward sweep—along the lines of the Zipp Vuka Bull.
Now, look, I understand this is a judgment call, and I will say that while seated and in the pursuit position cornering and descending were great. Were the pursuit contact points "closer in" I'd have had to move back a bit on the saddle to keep from being too scrunched up while cornering and descending. Still, less forward sweep is my personal preference.
The seat post is fore/aft flippable, I ride with about 79° of seat angle and I found it no problem to get my Profile Design TriStryke saddle in the right position, and I did so with the saddle sitting in the center of the rails.
The seat post hardware was very easy to use; it was easy to micro-adjust the saddle to the correct tilt.
I had no problem affixing the seat post at the right saddle height, and I haven't had one iota of slippage.
The Ride
I took to the bike immediately. My first two rides were short, with many stops just to get every scintilla—saddle height, saddle tilt, cockpit, aerobar tilt—perfect. (You can set everything up according to your pre-established fit coordinates, and I did, but, whenever you're riding with a saddle, or an aerobar, you've never ridden before, there will be a few millimeters of micro-adjustment here and there).
My third ride was a race, with a very hilly bike leg of 70 miles, and I thought this would be this bike's perfect shakedown cruise. The course was also quite windy, lots of gusty sidewinds, and I rode with a deep front and a rear disc. I asked a lot from a brand new, unfamiliar bike. But danged if it didn't handle everything perfectly. It was, and is, a real pleasure to ride.
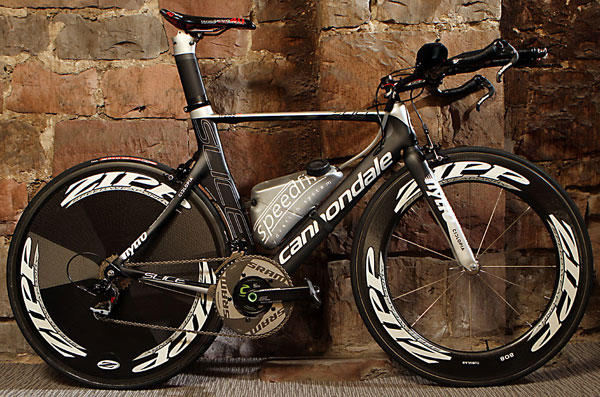
Like the other two tri bikes in my garage—a P3 and a Slice—the Speed Concept is longish in its trail (at or north of 60mm) so, it very stable without being a dog. The Speed Concept also has a low bottom bracket—8cm of drop—and it seems to me this gives the bike a bit of suspension and also a low center-of-gravity (nice for descents and turns, but, no pedaling thru corners).
My own doo-dads
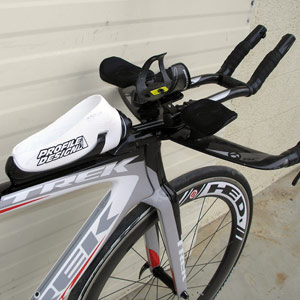
One nice thing about this bike is the water bottle bosses everywhere. I think it's great, and should be a running change on a lot of existing bike models. Especially the bosses on the top tube. I can't imagine it's an engineering problem to drill a pair of holes and epoxy in some nut-certs. I stuck a Profile Design Razor cage and bottle on the top tube and sliced off the trailing end, and put my gels and whatnot in there. Bontrager makes a front Speed Box for this area, but, the Profile bottle worked fine and so would an Arundel bottle. But not a regular round bottle. I tried it, my knees hit.
The bottle cage between the bars sits on an armrest clamp from a Blackwell clip-on bar. There are a series of threaded holes in this clamp, and one of them works nicely for the front hole of the water bottle cage. I drilled and tapped threads in line behind this hole for the rear water bottle mounting screw.
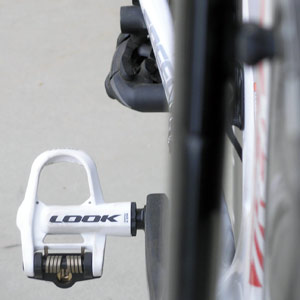
The computer mount is nifty bridge offered by 3T. Onto this, as noted, I mounted a Garmin Edge 500. I topped it off with some white Look Keo 2 Max pedals.
Fitting
I think the one difficulty in this process is figuring out what size Speed Concept to buy, with what length and height stem to use. I knew I would need the longer of the two stems, and I knew I'd need either the lowest or the middle-height stem. So, I had a 50/50 chance of nailing it.
Because a Project One process ends in a custom bike, custom paint, custom spec, you really don't want to get this wrong. The imperatives are: to know that you've got your fit coordinates nailed; and to figure out a sort of normalizer between standard bikes and the 9.9's front end.
For example…
Most bikes have headset top caps above their head tube tops, and then stem clamps that average about 4cm in height. So, the distance from the head tube top to the center of the stem clamp might be, with even just 10mm of spacers, 45mm. The center of the Bontrager aerobar sits about 20mm above what I'm calling its head tube top (see adjacent). Accordingly, I'm going to call the "flat" Speed Concept stem (the lowest height stem) more or less equal to a standard bike with a -25° pitch (a -17° pitch would be a stem parallel to the ground, so, perhaps the lowest-height Speed Concept stem equates to a slightly down-angled stem on a typical bike).
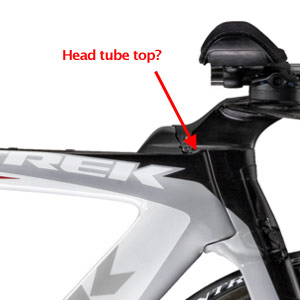
The middle-height stem, inasmuch as its 35mm taller than the lowest-height stem, might then be similar to, say, a 0° to -6° stem. The stem with the most height would be way up there, pointing to the sky.
Note, however, that the lowest profile stem isn't simply going to pitch you down, and that's that, you're stuck down there. Your pursuit bar position is stuck down there, yes, but, there are several cms worth of pedestals that can sit between the pad and the pursuit bar, and the extensions "follow" the armrests. This is good, and mimics what Giant does with its Trinity Advanced. You want your armrests and extensions to ideally move up or down in elevation together, because, as you lay your forearm flat on the armrest, you want your contact point—where you grab, and where your shifters sit—to be there to greet you, not above or below the plane of the armrests.
So, yes, start with the right sized frame. But the height of the position on this frame is a combination of both the stem height and the cumulative height of the pedestal between the pursuit bar and the aerobar.
The armrests and extensions on the 9.9 are not available—at least not as of this writing—in Bontrager's aftermarket aerobar line-up. Ideally, one day they will be, because this will aid fitters greatly in determining what sized Speed Concept works for the customer. Slap this bar onto a fit bike, normalize for the stem geometry differences between standard bike stems and Speed Concept stems, and you'll know precisely what the Speed Concept in your size will fit like.
Comfort
Bontrager's aerobars have really come up in the last year. The Race XXX Lite is a very nice set of bars. Still, the Speed Concept's aerobar pads and extensions—Bontragers products currently only available on the Speed Concept—are as good as those made by any company currently making aerobars. The extensions riff off of the Blackwell Wrist Relief, by descending in elevation before they turn upward. That's homage properly extended to a well thought out design.
Is this bike civilized?
You might find this a curious question, since this is obviously a technologically advanced bike. But it's been my observation that the more super a superbike gets the more neanderthal it is in its ability to adjust, to tune, to stop when you apply the brakes, not to mention seat posts that slip, saddles that won't adjust steep enough, saddles you can't level, geometries that make no sense.
I think bikes have certain basic functions they must perform. When they don't, they're not super any longer. For this reason, bikes like Cervelo's P3 really appeal to me, because they seem about as fast as you can get while still using standard, external, brake calipers, along with standard stems and aerobars.
So, I'm suspicious of superbikes; I approach them with a jaundiced eye; and they have to prove their ability to do all the basic bike functions. Against that backdrop, I was pleasantly, and delightfully, impressed by this bike.
I have two, and only two, complaints. First, as noted above, I'd prefer less forward sweep in the Bontrager pursuit bars. Second, this bike has its own quick release skewers designed to be a thematic, aerodynamic match to the frame. I found them finicky, and the nut has to be screwed a precise amount down for the lever to compress to the requisite tension. This makes for slow wheel changes, and you don't want to be futzing around with this after an in-race flat. I just went with Dura Ace skewers for this bike's training wheels and the HED skewers for the race wheels. I'll eat the extra 5 grams at 25mph.
Overall
The thing about Trek: it's a tough company, it's a big company, it's a rich company, but it's not an arrogant company. When they don't make a good bike, they don't try and say that they do. If it's a category about which they care, they keep working at it until they get it right. I think, with the Speed Concept, they basically got it right. This, after getting it very wrong with the Team Time Trial, and then only somewhat right with the Equinox TTX.
It would not surprise me to see running or model year changes in the rear brake caliper design, and maybe in the pursuit bar shape. Oh, and the quick release. But these are small potatoes. The rest of the bike is sufficiently well done that Trek can relax and give themselves a pat on the back.
Still, Trek does have one Speed Concept related job in front of it: a bomb-proof set of calculations that a retailer can use to know with significant precision what config matches up to a set of fit coordinates. I'll bet Trek has this sorted by the end of the year.



Start the discussion at forum.slowtwitch.com