
The Best, Least Expensive Upgrade for a Beginner Triathlete’s Bike
Over the summer I wrote an article about the need for athletes to more seriously consider using a road bike for their triathlon needs. And before we go any deeper on this topic, I know: this is not a beginner bike build. The idea, though, remains the same. Carrying on….
With all the new athletes coming into the sport (yes, this is actually happening — at the very least, according to our friends at USA Triathlon), we at Slowtwitch will be doing a lot of work in 2026 and beyond to make sure they get the information they need for what we hope is a long and successful journey as an endurance athlete.
So let us talk about the old “clip on” bar that once was a thriving thing in my early beginnings of the sport. One of the things I get asked a lot by new people coming into the sport is, “what bike should I buy for my first triathlon?” My answer is universally almost the same and it goes like this..
- What bike do you currently own, if any?
- Do you have someone you can borrow a bike from?
- Have you looked at the used market at all?
These three questions always allow me to understand some basics about where that athlete is. During my first four years in the sport, I worked in a triathlon shop. I learned really quickly to make sure our customers were happy the first time around. Because, ultimately, I was probably going to see them again and if they didn’t come back happy the first time, it wasn’t a good experience for both of us. And I feel that this is the approach all of us in the industry should be taking.
If a new athlete doesn’t have something good enough already (and, let’s be clear, the “good enough” barrier is a serviceable road bike), and it’s not possible for them to borrow one from a family member or friend, I usually tell them to start looking at a road bike. And now sometimes I will even have them look at a gravel bike if that is something they think they might want to do.
Most people just are not ready for a dedicated TT/tri bike when they first start out. First, it’s a really big investment; an “entry” level new bike these days is almost always going to be north of $4,000. Second, a TT bike and related position places a heftier physical demand on the body. Just the hip and neck strain alone is a hefty adjustment for new users, and often can wind up resulting in an overuse injury well before they’re able to toe their first starting line on board that new bike. But that is a totally different story for another day.
So, if you already have a road bike, let’s talk about what you need to move forward with getting more aerodynamic for your next or first triathlon. For that, you’ll need 2 things:
- A round, drop style handlebar; and
- A clip-on aerobar
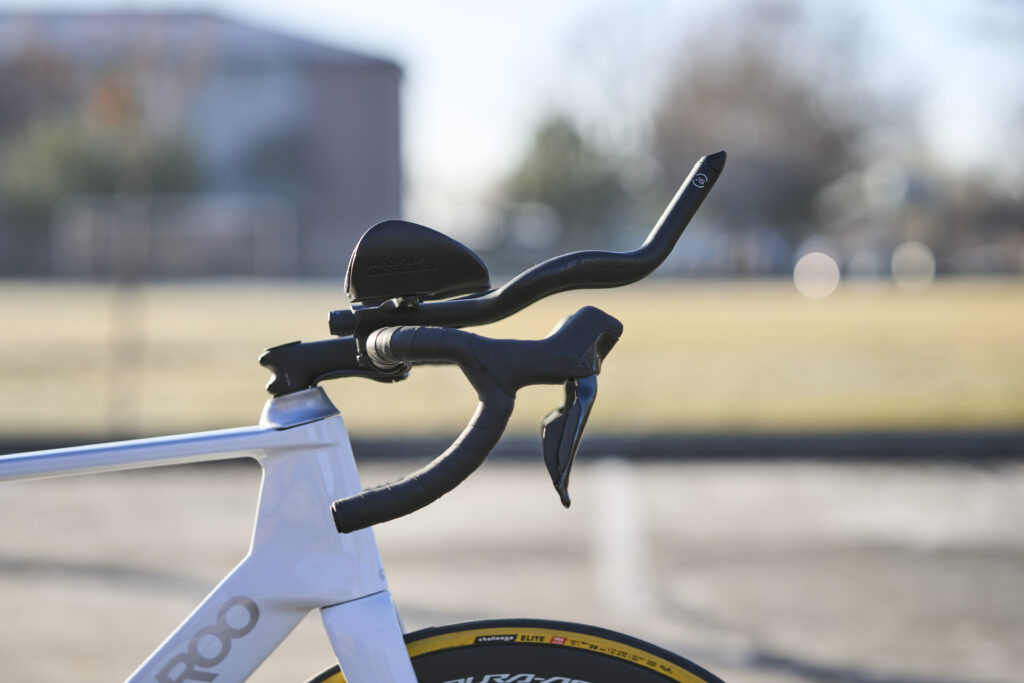
If you don’t have a handle bar that features a round top section you will probably need to look at this first. This is usually a pretty easy and relatively inexpensive thing to fix.
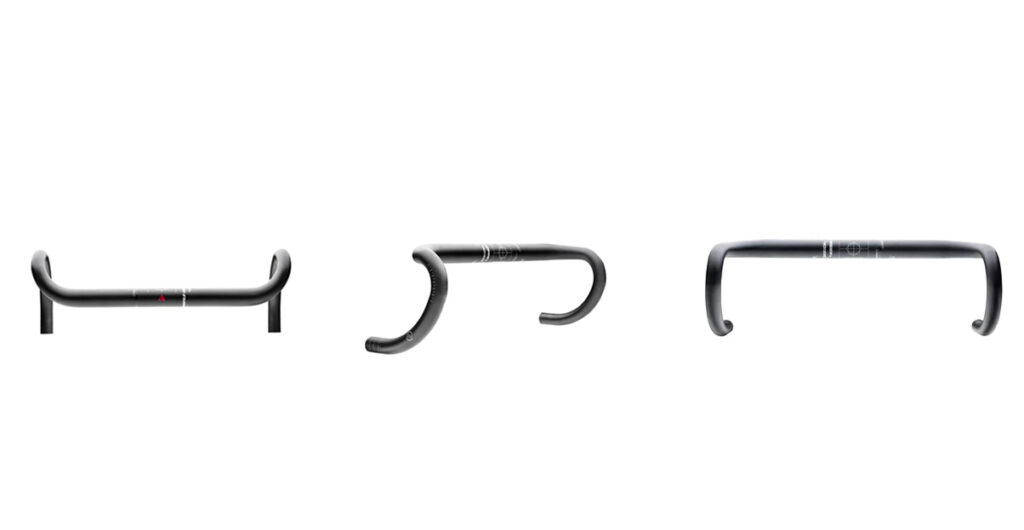
Here is but one example of the type of bar that you will either have or you will need to get. They usually come in two different diameters: 25.4mm or 31.8mm. A 31.8mm bar tends to work best for clip on aerobars as they almost universally fit the clamps available, although a 25.4 mm will work just fine with most shim kits.
As for the aero bar, that’s where we start to have all sorts of options.
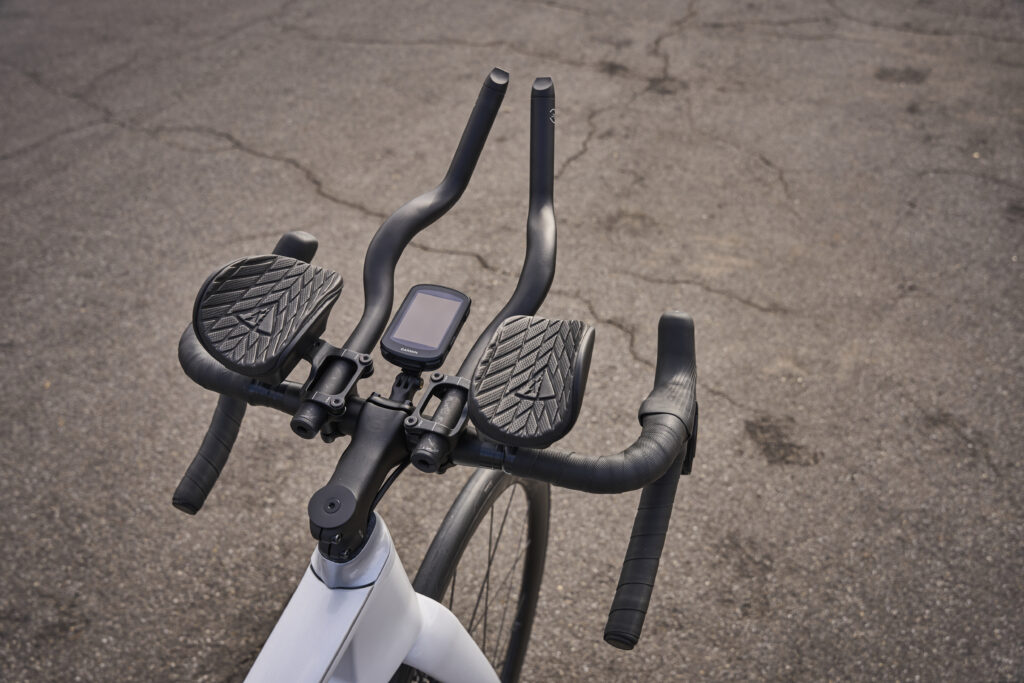
Aero Bar Brackets
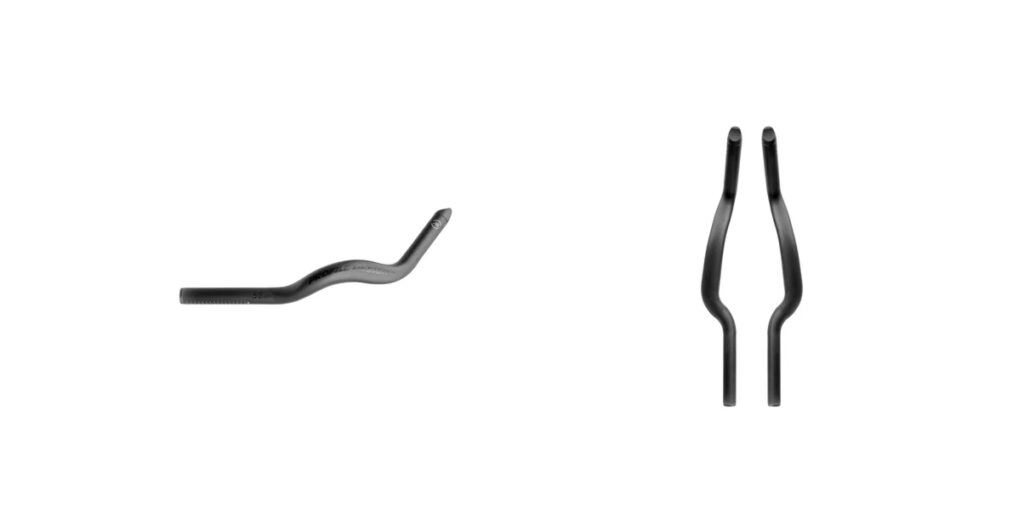
Let’s start with the brackets. The big thing you need to make of when purchasing is that you are choosing the right size diamater for your base bar. The other thing to pay attention to is whether you want the extensions to go above or below the base bar you have. Here’s a few examples of what you might be looking for:

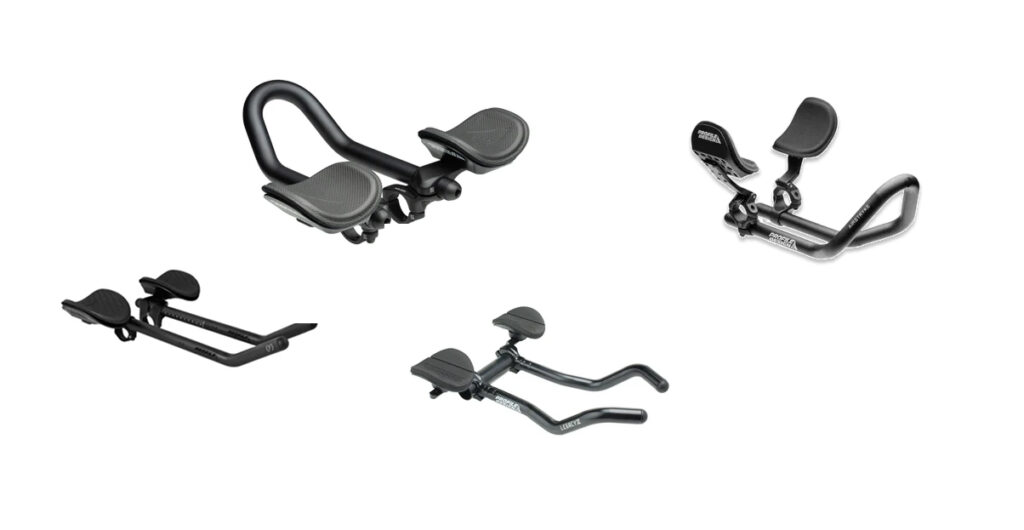
Bar Extensions
This choice can be overwhelming for a new athlete. Here are just some examples of the dozens of variations of extensions you could be using in your bar set-up.
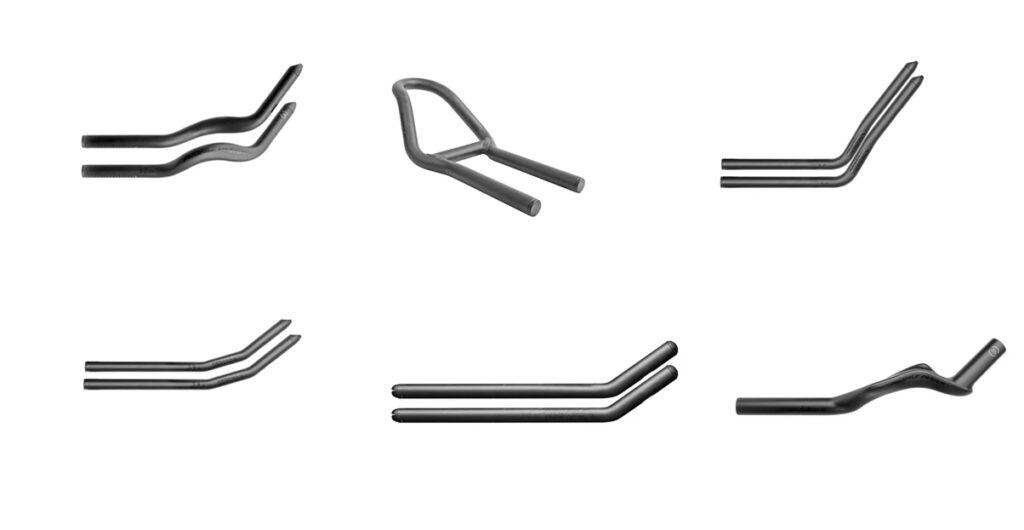
When thinking about extensions, I recommend you try to think about both your current needs and your future. Put your arms on your road bike bars like you think you would be riding in the TT position. Think about wrist placement and what feels natural. Are your hands straight? Curved? What feels the most natural to you? This will help guide you. Then think about what you might want to do next, assuming this works well and you want to upgrade again.
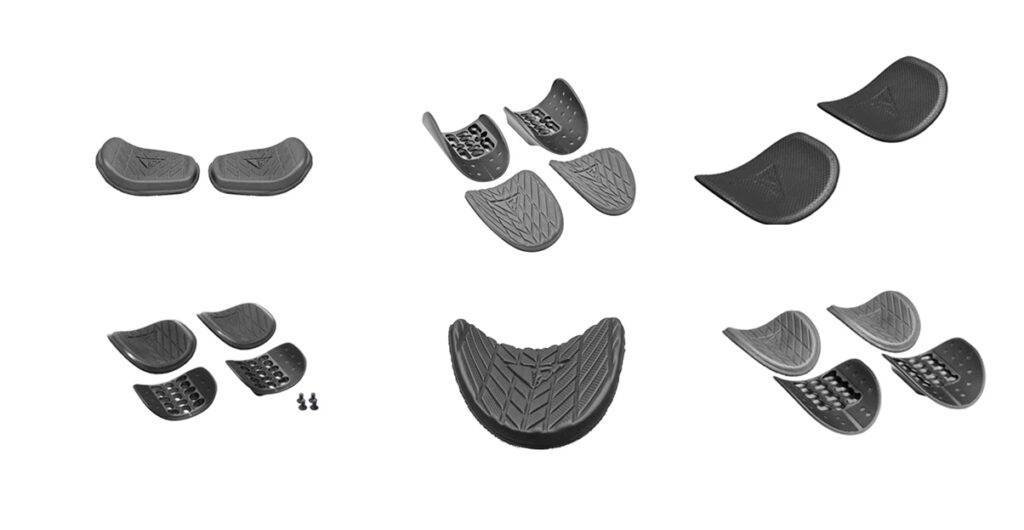
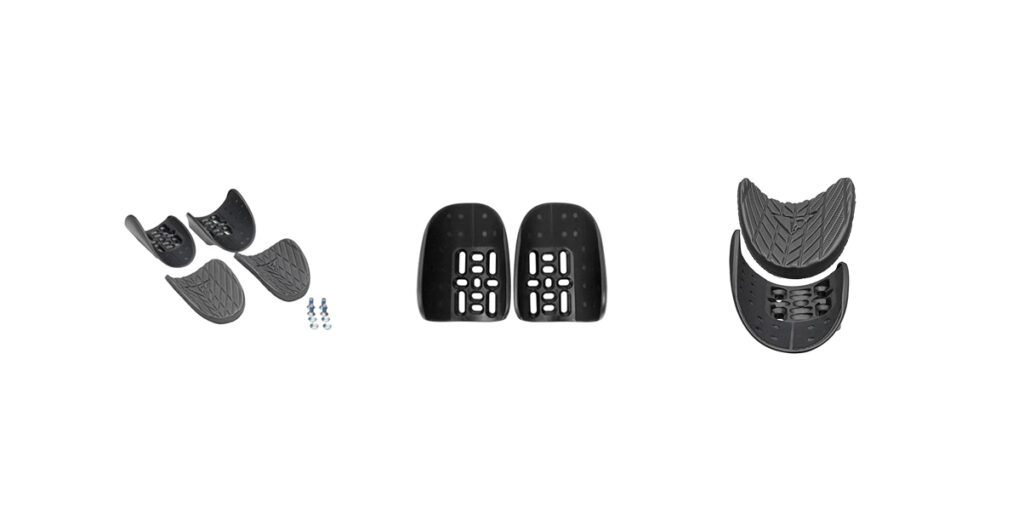
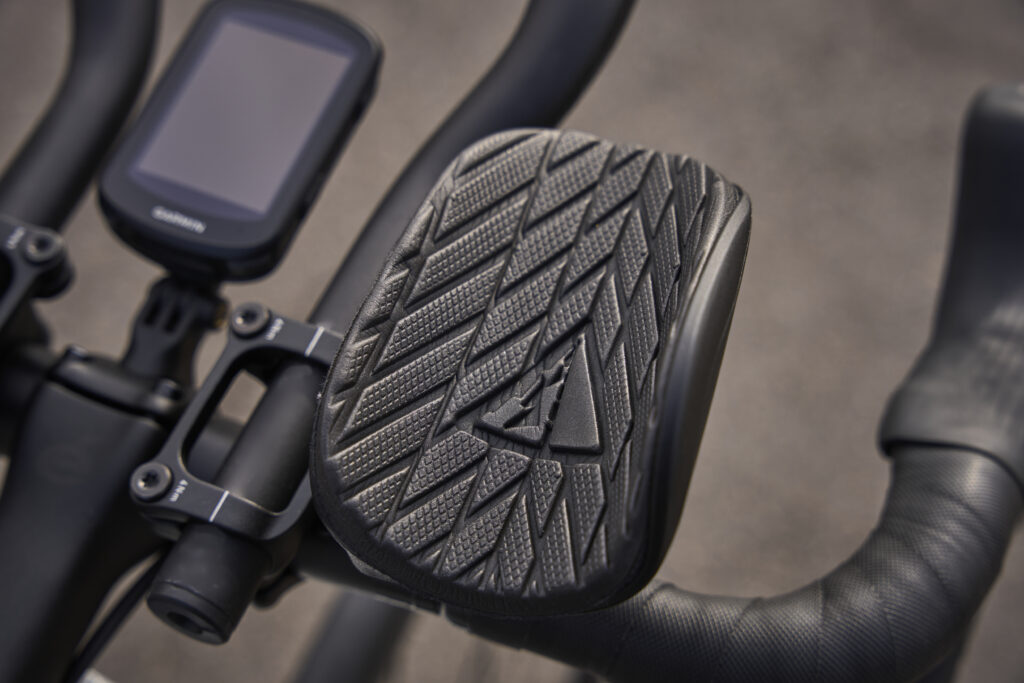
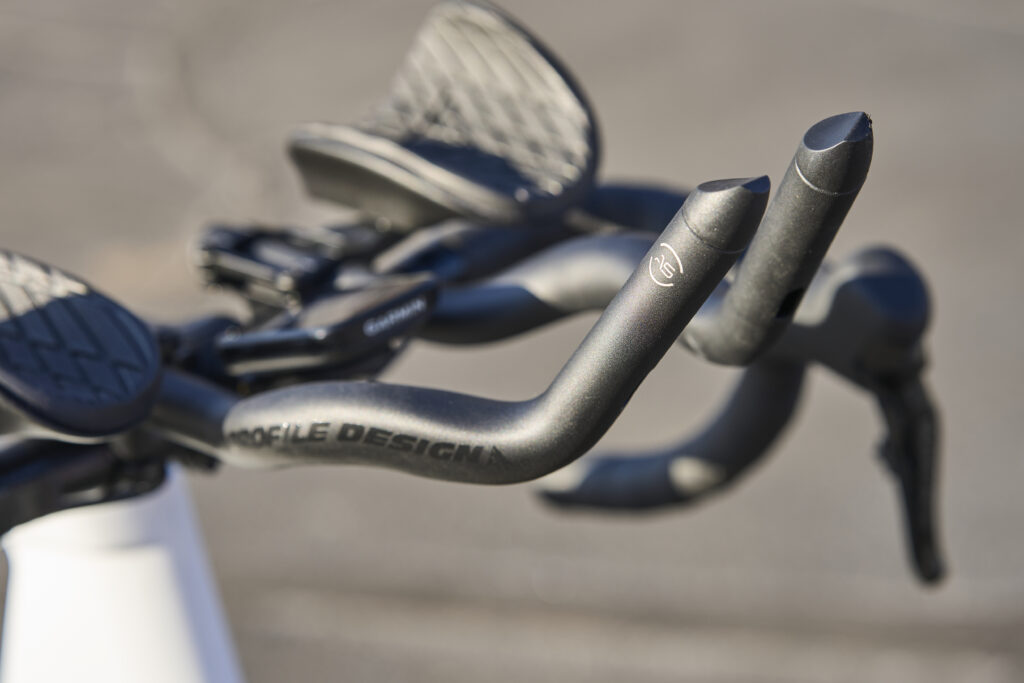
Aero Bar Arm Rests
Pads are something you will want to put some time and thought into. Adjustability is key here when you are first starting out. In my opinion when just starting out you want to go in the middle of the road when it comes to surface area: not too short, not too long.
Too Much?
If all of this just makes your head spin, you can always just buy a complete kit. Most of the time, this can be the most inexpensive way to approach this.
What Did I Do?
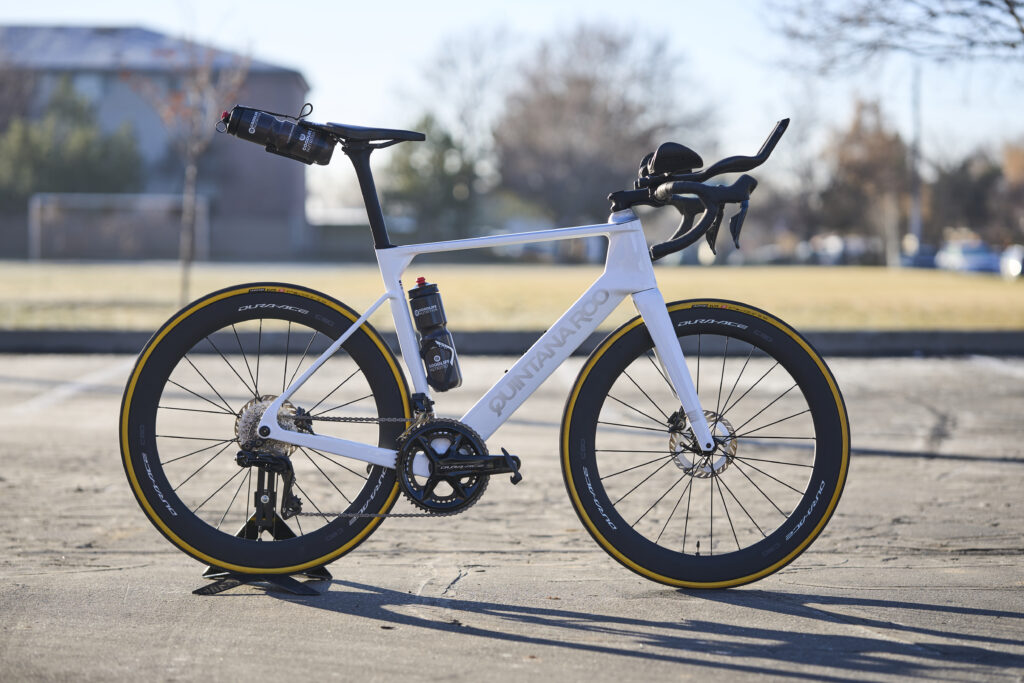
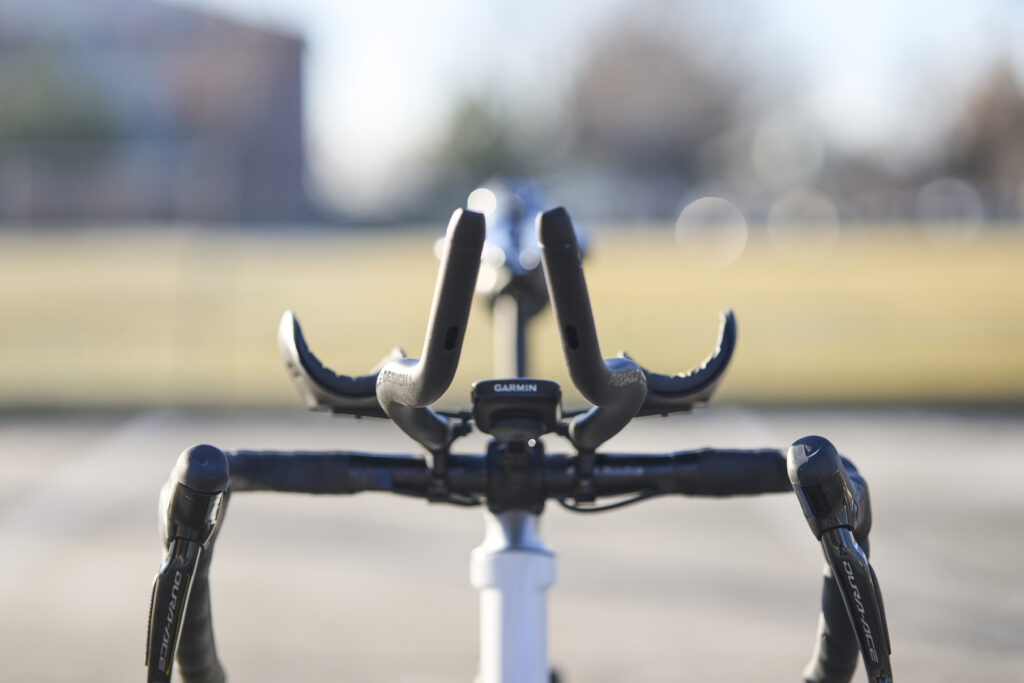
Road Drop Bar
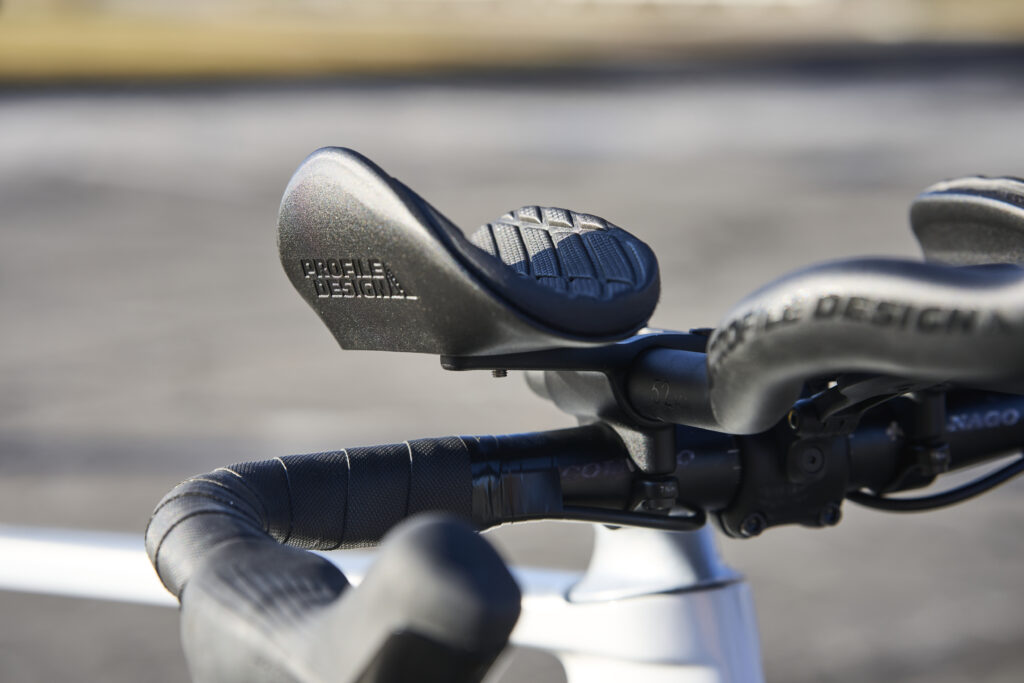
My current road bike had a aero drop bar. This needed to be swapped out in order for me to get on some clips ons. So we went to our local bike shop and found a really good priced aluminum 31.8mm bar for $60.
Mounting Brackets
For this I stole an old pair Zipp Vuka brackets off a Cervelo P series frame. I was getting ready to swap out the entire cockpit on that bike, so instead of buying someone news for this project, these did the trick just fine. One of the reasons they do is because most pad and extensions have come to a really good understanding on baseline standards when it comes to mounting holes and extension diameters although you will make to measure twice cut once like usual.
Pads
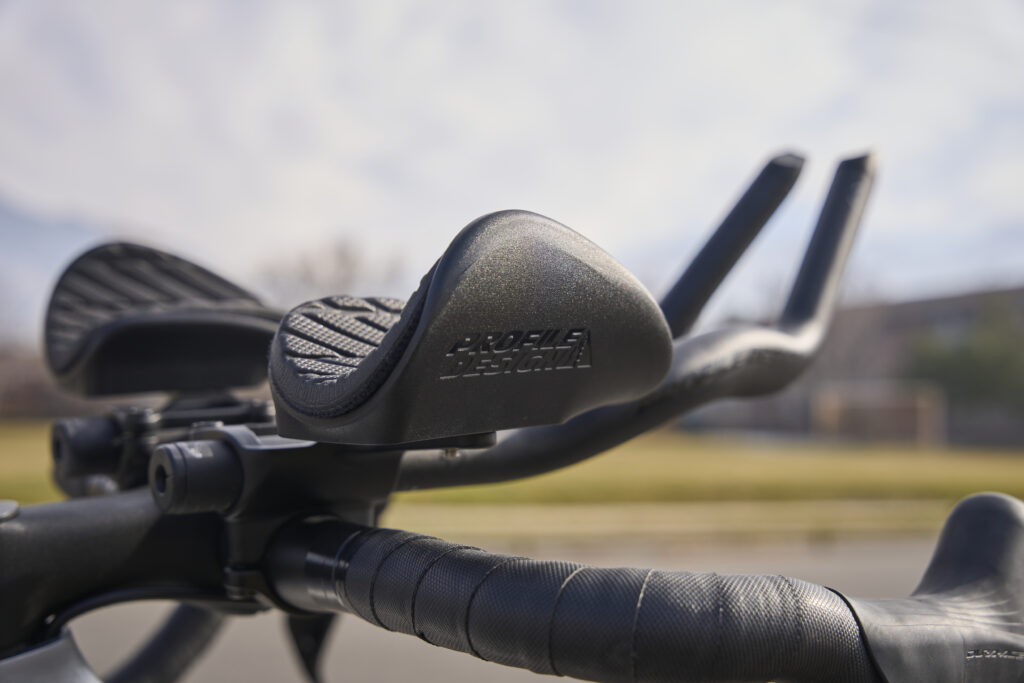
I went with the Profile Design Race-H Armrest Kit, which costs $114.
Because this is the first stage of my upgrade, I went with a more aggressive armrest pad. What I think I want to do with the bike is swap out the base bar to a flat, TT-style bar later down the line. This will be a way less expensive upgrade than getting into a complete TT bike when I feel like I am ready.
Extensions
I went with the Profile Design 52 ASA Aluminum Extensions for $120.
This decision was also made with some forward thinking. But ultimately it was based on comfort and price. This extension has an ergonomic design that works for me. I used to be a big S bend rider but I have since discovered that my comfort matters way more then my need for potential small drag savings. The other consideration was the bang for buck; at $120 dollars, if I ended up want to go with a different shape or carbon fiber extensions later I wouldn’t feel like it was a big waste of money now. I also need to be able to add shifters to this bar later down the road. But these extensions met my needs for both now and later.
Adding a set of clip-on aero bars is the probably the cheapest way to not only gain speed but to increase your future success in the sport of triathlon. We used to tell people all the time in stores that you’ll gain 1-2 mph of free speed just by getting into aero bars and I still think that is true today. It also allows for you to more easily transition yourself into a more aero position. And take your time with it! For someone new, let’s say you are doing a 90 minute ride. You want to maybe get down into the aero position on these new bars for 15-20 minutes total during that timed ride. Then, over the next few rides, slowly increase the amount of time you’re spending in the aero position. You’ll want to give your body plenty of time to get used to that different position. And, importantly, don’t do any sort of intense workouts at first. Keep it light until your body gets used to the position.
In the end, here’s what I spent to put together this current upgrade:
Road Bar $80
Base Clips $0
Arm Pads $114
Extensions $120
Total: $314
Tags:
Beginner TriathletebikeProfile DesignQuintana RooRelated Articles:


Continue the discussion at forum.slowtwitch.com
81 more replies

A road bike with a basic non aero seat tube is better also as you can reverse the orientation to get the saddle forward more. Can’t reverse an aero road bike saddle mount.
Also basic round bars are easier or cheaper to get extensions for than an aero drop bar.
Maybe invest in $50 also for a different stem to get stack and reach more dialed.
Thanks for the reply…. I used round bars for these….
Stem will depend on personal fit needs of course..
My first 70.3 I purchased the redshift sports switch aero system. It worked surprisingly well with very little faffing about.
I even went so far as to pay for a bike fit with it and he managed to get me extremely comfortable in both road and TT positions.
Not super cheap, but I think the ability to easily switch between the 2 positions was king.
Great article. I have just been involved in helping a son do just this after he was (eventually) infected with enthusiasm to race a 70.3.
And we agreed not to do a ‘lend’ and given he already had a road bike to keep any ‘upgrades’ value for money - I note the “beginner” in the article’s title and the caveat on that in the first paragraph.
The author says “this is the first stage of my upgrade” which has influenced the choices described and implies enduring intent which a “beginner triathlete” may or may not have.
We went for the " you can always just buy a complete kit" - this is “the most inexpensive way to approach this.”
His round section (31.8mm) bars meant we just needed clip ons and expense dictated alloy. The available steerer height meant ‘above bar’ extensions. Since this was a ‘try it once and see if I want to do another’ we went for some basic BBB AeroPro EB bars for £60.
ETA: After Swansea was kiboshed by a collar bone break with only 4 weeks to go, he completed a DIY one (pool, ride into Surrey and run in SW London park) before Christmas. And still wants to complete a ‘real’ one.
Versatility and comfort!
I additionally had a bent-forward seatpost
I used clip on aero bars for my first Ironman in 2019, it was a great solution at a point when I was not ready to commit to a TT bike.
However:
This article overcomplicates the issue for a beginner (assuming likely running non aero bars)
Step 1: buy some clip on aero bars
Step 2: spend 10 minutes fitting them
>$300 is not beginner friendly, clip on aero bars cost <$100
I wouldn’t recommend any beginner reads Slowtwitch articles (not referring to the forum) as 1) the content isn’t aimed at beginners 2) Slowtwitch is not a place (in my honest opinion) for unbiased objective consumer advice, the hookless debate showed that
Normally I would just let this one slide… But….You’re an idiot if you honestly feel this way.
And every time we write something for beginners some jackass like yourself makes some stupid comment like this…
Let me know when I can delete your account..
I really liked the paragraph where it explained there was to be an intentional focus on supporting new entrants to the sport. I do think that’s where some other sites have been more focussed in the past whilst ST has been better at serving the more ‘competitive’ athlete.
And so for a first move then it’s great to see. And no-one is going to nail a new direction first time. But just like a beginner to the sport, then there’s some slack to be cut. I admit, as a self confessed bike nerd then there were bits of the article that I thought did go a bit deep (for example I’d have started with the combined first, and then gone to the option for separate bars and pads- some may not know you need both until you’ve shown them). And for a sprint, even oly then heck, half the newbies I see and support are rocking up on MTBs not road bikes. And they have a great time.
Just think there’s a bit of slack both sides here for a new direction from the editorial team, and also for well intentioned, if perhaps not especially well communicated, feedback on that. As for any of those newbies following the article to the chat I’m thinking that it’s not the red carpet to a fun lounge they’ll see.
So I probably came in a bit hot / unduly negative, which I do apologise for.
I think it’s great to have more beginner friendly content. The combination of the cost of this setup and the cost of the bike made this series feel not so beginner friendly. But I also recognise 1) the bike factor is called out in the first paragraph 2) there is lots of other very helpful information within 3) the article specifically calls out that you can buy a complete system. So on balance, my criticism here was excessive.
The hookless topic is a bit more complex. I (& I expect many other users based on the comments) were a bit perplexed by the initial positioning by Slowtwitch. It’s hard to reconcile: 1) Accepting narrower operating margins / higher risk of an issue 2) Identifying no proven benefits 3) Presenting hookless as a competing technology where the focus should be on consumer education. That said, I respect the fact Slowtwitch conducted testing, which seems like a positive step forward, though I don’t have sufficient knowledge to know how representative of real world it has been to date.
I did my entire tri “career” up to and including ironman distance on a cervelo s2 road bike with clip ons. Admittedly I didn’t spend much time in aero as the position wasn’t great, but, I still had a great time training and racing, and it just didn’t seem like spending that much on such a specialized tool would have been worth it for me (I did most of my racing in my 20s when I had other financial priorities).
I’m sure a dedicated tri bike would have been much faster but I still beat plenty of people on my tri team who had way better set ups!
Fantastic article! Along with these types of useful articles what would be maybe useful to emphasise to new comers also is that riding a road bike is absolutely fine, even without clip ons.
I’ve ranted on about this many times but the time difference between doing an IM on a road bike compared to a TT bike is in most cases only about 15mins.
When the vast majority of participants are only looking for the achievement of finishing does it really matter if they finish in 13:30 or 13:45 etc?
The bike is the biggest perceived barrier to entry due to $$ and is also the most heavily misunderstood. Get in and just enjoy the race, then worry about that potential 15mins once you have the bug..
It would sure suck to finish in 12:14 on a road bike knowing you would have clipped 11:59 on a tri bike
That’s assuming 12 hours means anything to a newby. I can understand missing out on sub 10, but sub 12 meh… It’s just an arbitrary number. It’s like a 4 hour marathon, is it really worth losing sleep over?
That aside we are talking about new comers whos achievement is finishing-I doubt a single person would go ‘oh.. that’s a shame you were so close to 12 hours’. We all know the real responses are ‘that’s insane, I can’t believe you finished that race’.
Haha