Garmin Rally Pedal Review
Let me begin by stating that in general I don’t think a pedal-based power meter is the best option. First, there are too many reasonably-priced, crank-based power meters available. If asked for a recommendation for someone buying their first power meter, I would definitely point them toward a crank-based option. Once installed, the user only needs to know how to change the battery, making it very easy for people who don’t have the time or desire to do mechanical work on their own bike.
Second, the pedal is vulnerable to strikes on pavement and trail obstacles, like rocks and roots. Even the most deft criterium veteran will have a pedal scrape once or twice a season, feeling out the bike to (re)learn that point at which you can pedal your bike out of a turn. Off road on rocky and rooty trails, pedal strikes are inevitable when attempting to maintain speed over obstacles like rock gardens. And even if these instances of striking a pedal aren’t likely, the thought of an expensive piece of equipment taking those hits are in the back of my mind potentially changing the way I ride and race.
Those reservations aside, I do find the Garmin Rally pedals to be very convenient to use across my bikes and a handy power-measuring solution for two of my bikes in particular. Additionally, the process of swapping pedal bodies is reasonably easy. Lastly, Garmin’s Cycling Dynamics introduces new metrics I never before thought I needed. Below, I offer my first impressions of swapping between the Rally XC200 and the Rally RK200.
Rally XC200
I installed the Rally XC200 pedals on my 2019 Trek Crockett. This bike is my most versatile rig due in part to the sliding dropouts. During most of the year, I have this bike setup as a single speed with cyclocross tires for riding the snarl of ATV trails, creek beds, and abandoned rail road beds in Western New York, as well as for the occasional single speed cyclocross race. In the winter, I convert this bike to a 1×11 snow pig with full fenders and 40mm gravel tires for riding on roads with a mix of salt brine, slush, and ice.

To accommodate larger tire diameters, the chainstays are wide and asymmetrical, leaving very little clearance for the crankarm on the non-drive side. The clearance is so tight that there is no room for a non-drive side power meter crank arm, like a Stages or a 4iiii. Therefore, the Rally XC200 pedals are a convenient way to get power measuring on this bike.
My first ride with the pedals started cold and dry and ended with wet roads and kicking up road spray from the wintry mix of rain and snow. At about 3 hours and 43 minutes, I experienced some power drops on the right side. I contacted customer support about it, and the Garmin representative assured me that the pedals should have no problem in those cold wet conditions. The rep suggested adding a drop of mineral oil to the golden contact points for the battery. I never did this, but I also have not experienced another data drop to date. So, maybe we can chalk it up to a fluke, but I’ll continue to keep tabs on the right pedal spindle.
Conversion Process
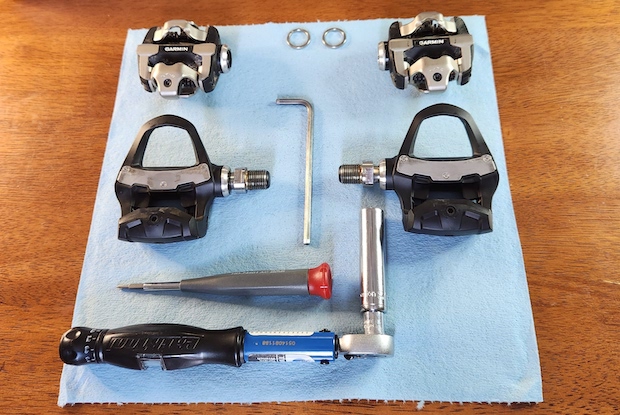
Swapping pedal bodies is very straightforward, but it’s worth taking time to read the manual or watch a video of someone doing it. I did both to make sure there wouldn’t be any surprises the first time I made the swap.
Having the correct tools makes the process go quickly: 15mm pedal wrench, 4mm hex key, torque wrench with a 12mm socket, and a small Phillips head screw driver. The full pedal pairs come with a set of pedal spacers (more on these later) and a set of yellow seals for the battery cover. The pedal body conversion kit comes with an extra pair of battery covers and an extra pair of the small screws that hold the battery bottom carriage. Collectively, these are handy parts to have on hand, in case the seals need replaced or you lose one of the small screws.
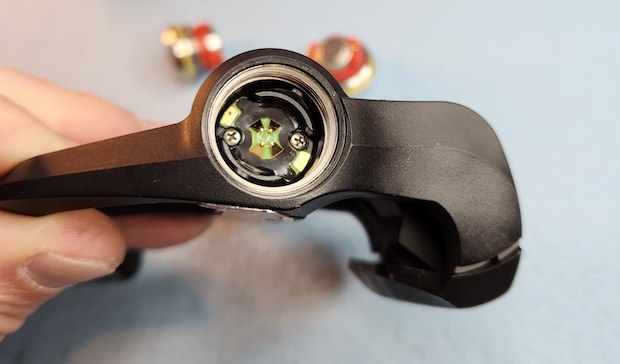
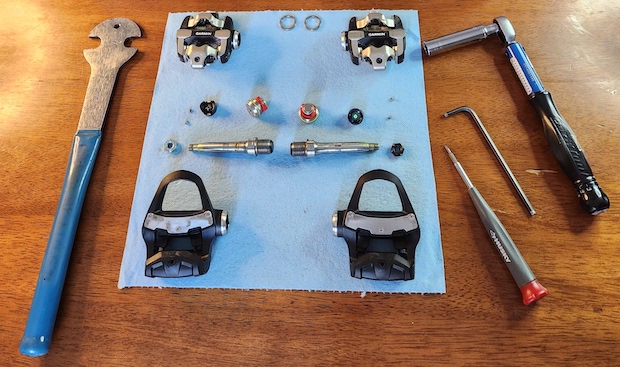
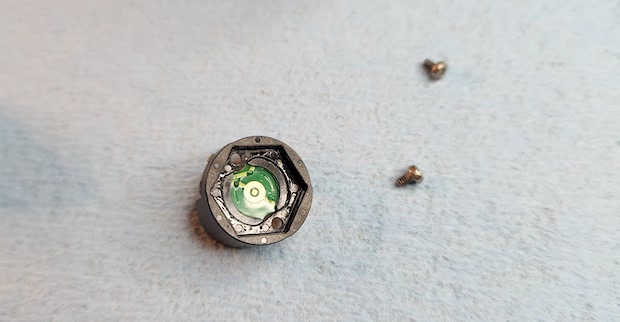
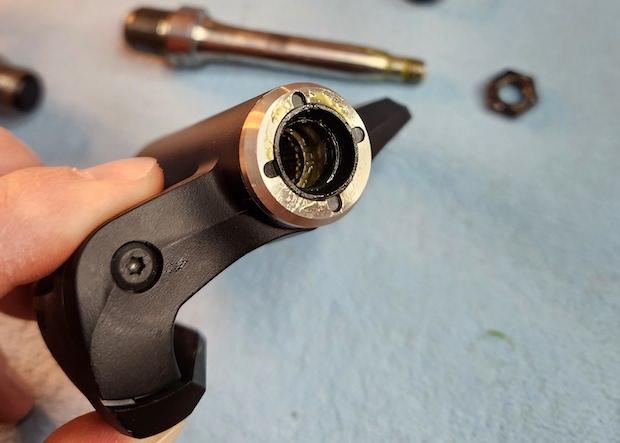
Removing the battery cover with the 4mm key is easy. Next, removing the two screws is easy, but they are so small you risk losing them if dropped. I recommend doing the conversion process on a surface that won’t allow the screws to bounce or roll away. The bottom battery carriage is shaped to fit on top of the nut below it, so it may feel like it is stuck.
You can fish it out by dislodging it from the nut being careful not to disturb the golden contact points for the battery. Once removed, the nut is easy to remove from the pedal spindle with the 12mm socket. The left nut is silver and has regular threading. The right nut is black and has reverse threading. So, keep in mind RIGHT = REVERSE when you get to this step.
Once the nut is removed, the pedal spindle pulls right out of the pedal body. The key here is to make sure you leave the two seals within the pedal body. If they come out with the spindle, you can pop them back into the pedal body.
After you complete this process for both pedals, reassembly with the other pedal bodies is just as easy. It is possible to put the wrong pedal body on the wrong spindle (I did this once), so I find it helpful to lay out the pedal bodies on the right and left side of my work area. When reassembling the pedals, the trickiest part is getting the nut started on the spindle with the nut inside the socket. After a few times, you’ll get the hang of doing this with some finesse. I take my torque specs seriously, so I do recommend using a torque wrench and setting the nut to 10 N-m. Also, be careful not to disturb the battery contact points when placing and screwing in the bottom battery carriage. Once that is done, securing the battery within the battery cover is no problem.
Rally RK200
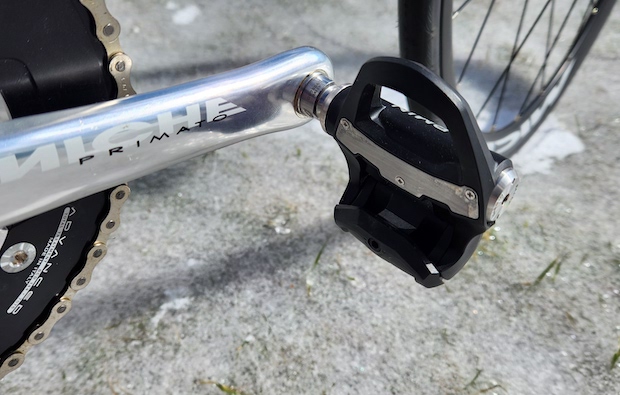
The Keo version of the Rally pedals solved another power meter dilemma for me: how to get power on my track bike. Most crank-based power meters for track bikes are drive side and expensive. A pedal-based power meter makes a lot of sense because they are easy to add to the bike, and they aren’t a track-specific piece of equipment like the crank-based power meters are with a 144 BCD. There is also almost no chance of striking a pedal even if the velodrome has 50-degree banking.
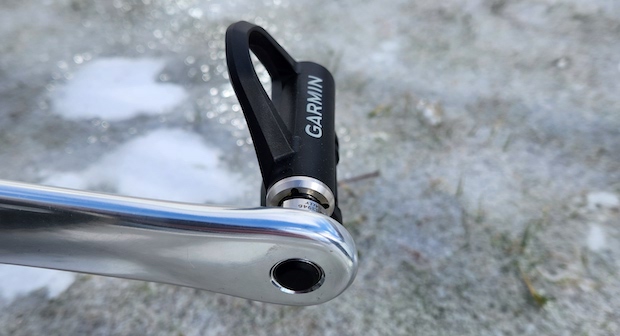
The Miche cranks I have on my track bike have thinner crank arm ends than my Shimano groups. When you buy a set of Rally pedals, they come with 2mm pedal spacers. All the electronics of the pedals are in the spindle, so you don’t want the spindle extending out on the inside of the crankarm potentially making contact with the chainstay or the chain. Garmin recommends 2mm clearance between the spindle end and the chain. The clearance is tight on my track bike, so the 2mm pedal spacers came in handy to make the spindle end flush with the crank arm.
I ran the Rally Keo pedals during several track sessions and they recorded without any data drops. It’s nice to have cadence, power, and other metrics measured so cleanly without adding a bunch of sensors. I do use a separate speed sensor on one of the wheels because GPS doesn’t work at the velodrome where I ride and the speed sensor is more accurate.
I also appreciate that when calibrating the pedals to your cycling computer, you are prompted to confirm crank length. My track bike has shorter cranks than I use on my other bikes, so it makes it easy to account for this difference when calibrating the pedals for my track bike.
The cleat tension on the Keo pedal bodies is very firm, which I appreciate. At the factory medium setting, I found the tension to be firmer than other Keo pedals. I appreciate this especially on the track, because you want to avoid any chance of clipping out while riding the track.
Stack Height and Q-Factor
When switching to any new pedal, it’s worth comparing the stack height and the q-factor. The stack height of the XC pedals bodies is 13.5mm, and the q-factor is 53mm (55mm with the pedal spacers). The stack height of the Keo and SPD-SL is 12.2mm, and the q-factor is also 53mm (55mm with the pedal spacers). You may want to raise or lower your saddle to compensate for the difference compared to your current pedals. For me, the difference wasn’t significant enough to change my saddle height on any of my bikes that have XTR or Look Keo pedals installed. I only use the pedal washers on my track bike, which has a narrow q-factor crankset, so going a bit wider wasn’t an issue.
Cycling Dynamics
Like the Garmin Vector pedals that came before, the Garmin Rally 200 pedals record some interesting data that may be useful for different types of riding and racing. You do need the dual-sensing pedals (both sides) to record the following Cycling Dynamics data; the single-sensing pedals will not provide you with this data. You can check the compatibility chart to see which Garmin devices will record and display Cycling Dynamics.
Winter Ride with XC200 Pedals
Track Workout with RK200 Pedals

Seated/Standing Position
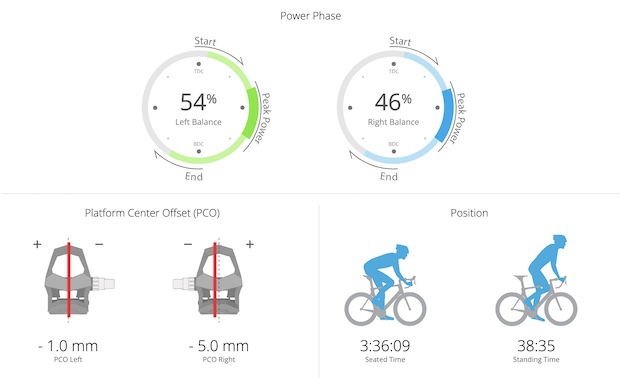
The Rally 200 pedals record the amount of time you are seated and standing during your ride. I find this statistic potentially useful. On the track bike in particular, getting comfortable standing and sprinting at high cadence on the banks is a goal. This statistic is a way to track how far into an effort you remain standing and at what cadence. I can also see this statistic useful for standing intervals on the road bike for training for accelerations on climbs. In the data above, the 38:35 of standing on the XC200 pedals is not accurate. That standing time was recorded when the right pedal was experiencing drops in data reporting (only for this one ride). However, the 1:18 of standing on the RK200 pedals is accurate and represents sprints during a structured track workout.
Power Phase (PP)
The Power Phase shows you where in the pedal stroke your peak power happens. I’m not sure how much this would vary across different cycling disciplines, but I’m interested to find out. Looking at the data from these two rides, there is not much difference between a long endurance ride on the XC200 pedals and a structured track workout on the RK200 pedals.
Platform Center Offset (PCO)
The PCO data shows you where on the pedal platform you are applying force. This is very useful for bike fitting and cleat placement. Looking at my data, my road shoes with Keo cleats seem to be placed evenly, but it looks like I could better adjust my SPD cleats on my thermal mountain bike shoes so they are even. But, it’s always good to consult a bike fitter before making cleat adjustments.
Right/Left Balance
The balance between the sides is also interesting data and arguably the most significant reason to use dual-sided power measuring. In my case, I have strength and flexibility imbalances that I work on regularly with my chiropractor and physical therapist. I wasn’t surprised to see that imbalance quantified (54% left /46% right) on the endurance ride on the XC200 pedals, but I found it interesting that on the fixed gear of the track bike the balance was perfectly even.
Impression So Far
Based on these first few rides and early impressions, I am eager to use the Rally pedal system more often across my bikes. Also, the more I learn about the pedals, I am becoming less worried about pedal strikes. There is nothing smart about the pedal bodies, since all of the data sensing and broadcasting is handled in the spindle. So, I am coming around to the fact that the pedal bodies can take a hit without compromising the integrity of the spindle. Long term reviews I’ve read also confirm this, as does Garmin. Now, I’m not going to set out to intentionally strike the pedals, but I think it will fade as a concern in the back of my mind. I’ll follow up with a long-term review in a few months after I’ve had a chance to get these pedals out on my full suspension mountain bike.


Start the discussion at forum.slowtwitch.com