1 of 13 photos
For many triathletes, tubeless tires are foreign, new, or at the very best – misunderstood. We’ve written on this topic before, as it is a very new technology, at least when it comes to road and triathlon bicycles. While we’ve largely covered the theory or Pros-and-Cons, we’ve yet to really show you a hands-on look at how they work. So, here it is… a photo gallery and step-by-step instructions.
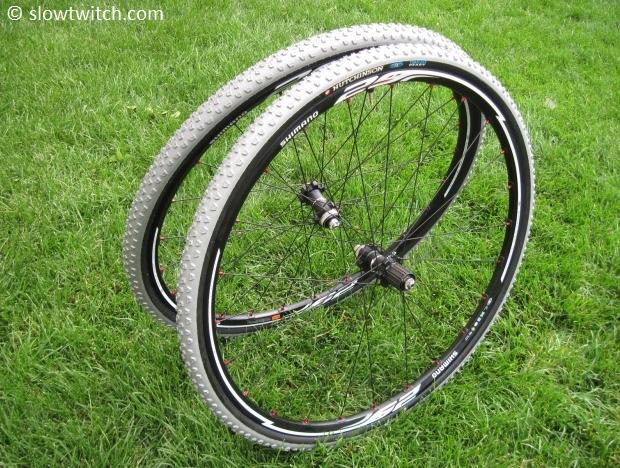
You’ll quickly notice that the tires and wheels used, however, aren’t necessarily triathlon-intended. Ten points for you. They aren’t even really intended for road, or mountain, or traditional cyclocross. No, this is a very unique package, so allow me to explain.
The wheels are Shimano WH-MT75, which are intended for 29er (700c) mountain bikes. These feature Shimano’s centerlock disc brake mounting system, and standard quick release axles in 100mm front width, and 135mm rear width. The rims have a 19mm internal width – so certainly wider than we’re used to on a road bike. The rims feature a smooth inner surface, and adhere to the mountain bike UST tubeless standard.
The tires are Hutchinson’s Bulldog CX tubeless. This tire is a very unique beast – and one of my favorites. It stands as one of the only tubeless-intended cyclocross tires. While our mountain bike friends have UST, there is no tubeless standard for road or cyclocross tires. However, this tire features a very “UST-like” bead – which is to say, it is very thick and square-shaped. Hutchinson simply calls it a “tubeless ready” cyclocross tire.

2 of 13 photos
What this means is the bead theoretically mates nicely with a UST or UST-like rim. I was after was a way to run tubeless with a minimum of hassle, and a maximum of safety. I didn’t want to fiddle with conversion rim strips, split-tube home-made conversions, or anything of that sort. If all goes well, these tires and wheels should mate up nicely.
And – for your road triathlon purposes – the set of steps I outline are exactly what you’d do on a road tubeless system. You’d just want to use a tubeless road wheel, such as the shallow-section Shimano Dura Ace aluminum wheels, and a pair of road tubeless tires. But the basic concept is identical.
What bike will this odd wheel and tire combination be used on? For that, you’ll have to wait… but I can give you a hint that includes a mix of cyclocross, a dash of disc brakes, and maybe even a set of aerobars.
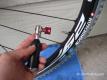
To get started, we need to know the required parts and tools. The top photo details the items that are generally required equipment: wheel (with tubeless valve), tire, pump, sealant, and either an air compressor or CO2 cartridge. Here is the optional equipment – a set of tire levers, a “super” tire lever, and some sort of bead lubricant.
And – for your road triathlon purposes – the set of steps I outline are exactly what you’d do on a road tubeless system. You’d just want to use a tubeless road wheel, such as the shallow-section Shimano Dura Ace aluminum wheels, and a pair of road tubeless tires. But the basic concept is identical.
What bike will this odd wheel and tire combination be used on? For that, you’ll have to wait… but I can give you a hint that includes a mix of cyclocross, a dash of disc brakes, and maybe even a set of aerobars.
To get started, we need to know the required parts and tools. The top photo details the items that are generally required equipment: wheel (with tubeless valve), tire, pump, sealant, and either an air compressor or CO2 cartridge. Here is the optional equipment – a set of tire levers, a “super” tire lever, and some sort of bead lubricant.

3 of 13 photos
For the bead lube, you can use soapy water, but I happen to have Schwalbe’s Easy Fit applicator. The idea with either is to provide a slippery layer between the tire bead and bead hooks, to help it quickly snap in to place upon inflation. Tubeless tires and rims are designed with an interference-fit – which is to say, the tire bead is slightly smaller than the bead seat diameter of the rim. When you inflate a tubeless tire, you often hear an audible “Pop Pop!” as the beads find their way home. Without a bead lubricant, sometimes that doesn’t happen – and your tire won’t hold air.
Start by inserting the tubeless valve. With many UST or tubeless-intended wheels, they include a specific-designed valve that you must use. These Shimano wheels included their own valve, and you can see why: it perfectly matches the contour of the rim.
Start by inserting the tubeless valve. With many UST or tubeless-intended wheels, they include a specific-designed valve that you must use. These Shimano wheels included their own valve, and you can see why: it perfectly matches the contour of the rim.

4 of 13 photos
Once the valve is through, install the nut and o-ring on the other side. Note that not all tubeless valves use an o-ring. Tighten down the nut nice and snug.
5 of 13 photos
Next, install the first bead of the tire around the rim (not pictured). Then, apply your soapy water or Easy Fit to both tire beads.

6 of 13 photos
Start to install the second bead.

7 of 13 photos
Be sure that the tire bead is not sitting right on top of the valve stem. It must go around to either side, as pictured here. This is an easy mistake that can result in no ability to inflate your tire.

8 of 13 photos
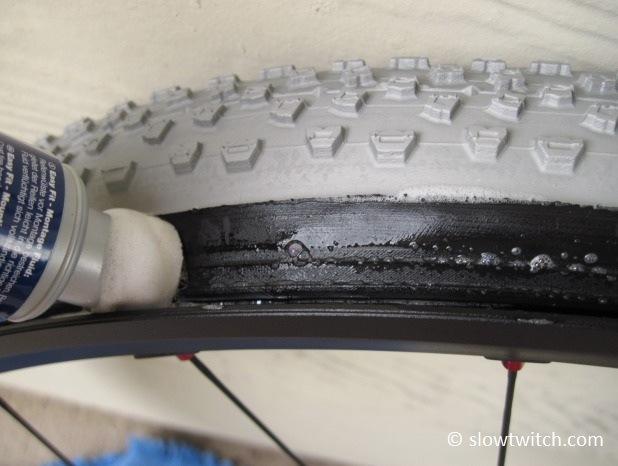
Leave about twelve inches of bead left open, and use this area to install the sealant. I’m using Hutchinson’s Protect’Air sealant. They recommend 30ml for a road tire, or 60ml for a mountain bike tire. I went with 60ml. Since I live in a very dry climate (Colorado), I’d rather start with a little bit extra, because all latex-based sealants evaporate over time.
9 of 13 photos
Next, arguably the most important step: Rotate the wheel 180 degrees, so the sealant flows to an area with both beads already seated. Why do that? If you try to install the second bead right where all the sealant is, you will make a huge mess. If you simply rotate the wheel and put the sealant somewhere else, you solve that problem, and make much less mess. Now install the second bead. Voila!
10 of 13 photos
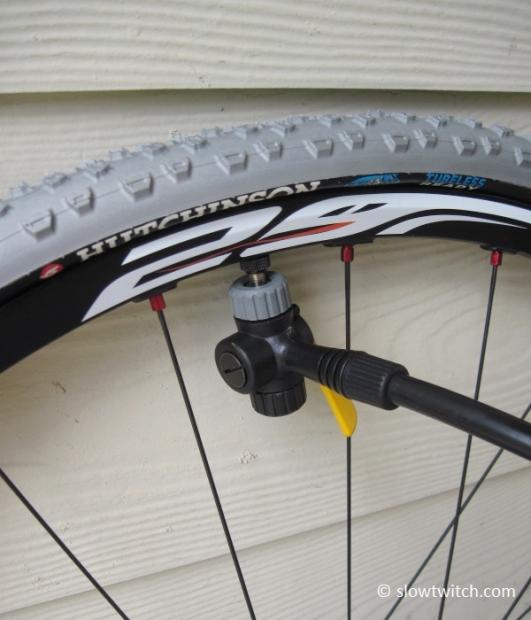
Now you’re ready to pump.

11 of 13 photos
And here’s where it gets tricky. Unfortunately for me, this particular combination of tire and rim would not inflate with a floor pump. You see, all tires and rims are subject to a range of tolerance. If you use inner tubes, it’s no big deal – even with a loose fitting combination, the nature of the system makes inflation easy (the tube fills up, starts to give the tire some shape, and the beads eventually find their home). With tubeless, you don’t have this luxury. Everything needs to be much more perfect out-of-the-package.
I should note, however, that if you’re going to err on one side, I’d rather the fit be a little bit too loose. In this case, I was able to install both tire beads without any tools at all – not even a single tire lever. No blistered thumbs means a happy mechanic. So what’s a guy to do? If you have an air compressor, that’s the best option. I don’t have one, so I had to sacrifice a CO2 cartridge for each wheel.
I should note, however, that if you’re going to err on one side, I’d rather the fit be a little bit too loose. In this case, I was able to install both tire beads without any tools at all – not even a single tire lever. No blistered thumbs means a happy mechanic. So what’s a guy to do? If you have an air compressor, that’s the best option. I don’t have one, so I had to sacrifice a CO2 cartridge for each wheel.

12 of 13 photos
While certainly not the most economical thing, you must also consider that the chance of getting a flat tire (and using a CO2 cartridge later) is dramatically reduced when compared to a standard inner tube system. As I inflated these tires, there was the trademark “Pop Pop!” sound as the beads snap in to place. Everything sealed up instantly, with no mess. The 16 gram cartridges gave me about 55 psi per tire – more than enough. I will likely use between 40 and 45 psi for my mix of asphalt and dirt paths.
13 of 13 photos
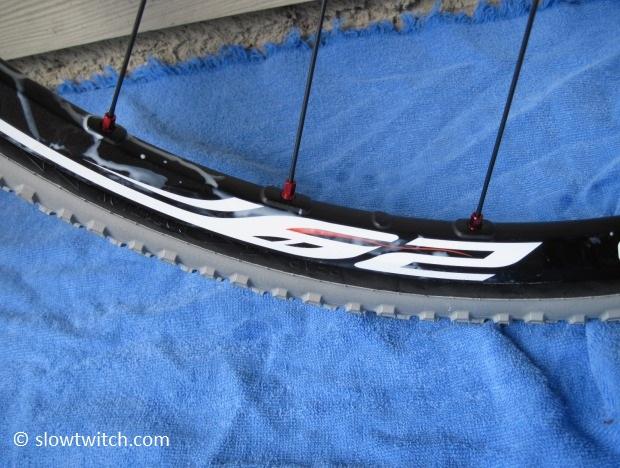
Here it is – the completed wheel set. Overall, the installation went beautifully, and exactly as I’d hoped. The tire casing measured out at 34.3mm wide, for an advertised 700x34mm. This is about right, since I’m using a slightly wider-than-intended rim which spreads the tire casing. I should note that if you want to replicate this setup, use a true UST-style rim, such as this Shimano wheel, or one of the Mavic 29er wheels. For tires, the only tubeless cyclocross tires that I'm aware of are the Hutchinson Bulldog and Piranha, and the Specialized Captain 2Bliss. You also have the option of using a Stan's NoTubes rim with a non-tubeless-intended tire, but your results may vary (or require experimenting with different amounts of rim tape).
For Road Tubeless, follow the same procedure outlined here. I look forward to riding these wheels flat-free for the rest of the year. In the coming weeks, we'll have a more detailed report on the complete bike for which these wheels are intended.
Editor's Note: For clarity's sake, Hutchinson is discontinuing this tire (the Bulldog CX Tubeless), along with the lighter-treaded Piranha CX Tubeless. Unfortunately, the UCI changed the maximum tire spec for cyclocross from 35mm to 33mm, making this tire illegal, at least at the professional level. Given that, along with the market's slow response to disc brakes and tubeless for cyclocross, Hutchinson now offers 32mm widths in two tube-intended clincher models (the Piranha 2 and Toro). Our use of this tire was simply for educational purposes, although we secretly hope that they will bring back their excellent tubeless CX tires in the future.